iCloud Mail provides advanced spam filtering and automatic synchronisation across Apple devices. Connecting your custom domain to iCloud Mail gives you professional email addresses while keeping your inbox separate from your hosting package.
You will configure iCloud Mail on your device, add your custom domain through iCloud+ settings and update DNS records to route email through Apple’s servers. Once complete, your custom domain email works across all your Apple devices with no additional setup required.
Before you begin
- You need an active iCloud+ subscription. Custom domain support is not available on free iCloud accounts.
- You need an Apple ID to access iCloud services.
- Your domain must be registered and you need access to modify DNS records.
Enable iCloud Mail on your device
iCloud Mail must be active on at least one device before you can add a custom domain. This creates your iCloud email account and prepares it to receive mail from your domain.
iOS or iPadOS
- Open Settings.
Tap the grey cogwheel icon on your home screen. - Access your Apple ID settings.
Tap your name at the top of the Settings screen. - Select iCloud.
Scroll down and tap iCloud from the list of services. - Enable Mail.
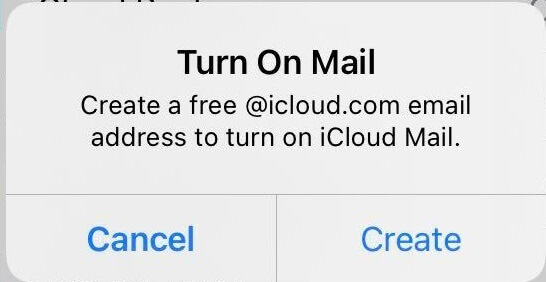
Toggle the Mail switch to the on position. If prompted, tap Create to set up your iCloud email address. This activates iCloud Mail on your device.
macOS
- Open System Preferences.
Click the Apple menu in the top-left corner and select System Preferences. - Access your Apple ID settings.
Click your Apple ID name at the top of the System Preferences window. - Select iCloud.
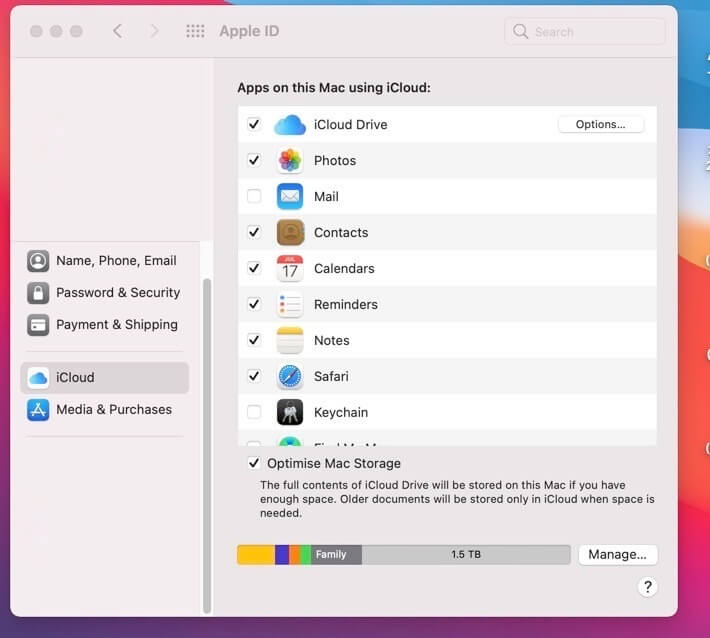
Click iCloud in the left sidebar. - Enable Mail.
Tick the checkbox next to Mail. This activates iCloud Mail on your Mac.
Windows
- Download iCloud for Windows.
Visit the Microsoft Store and download the iCloud application. - Restart your computer.
Once installation completes, restart Windows to finish the setup process. - Open iCloud.
Launch the iCloud application from your Start menu. - Sign in with your Apple ID.
Enter your Apple ID credentials when prompted. - Enable Mail.
Tick the Mail checkbox and click Apply. This activates iCloud Mail on your Windows computer.
Add your custom domain to iCloud
You configure custom domains through the iCloud web interface. This process generates the DNS records you need to route email through Apple’s servers.
- Log in to iCloud.
Visit iCloud.com and sign in with your Apple ID. You may need to approve the login on another Apple device. - Open Account Settings.
Click Account Settings from the main iCloud page. - Access custom domain settings.
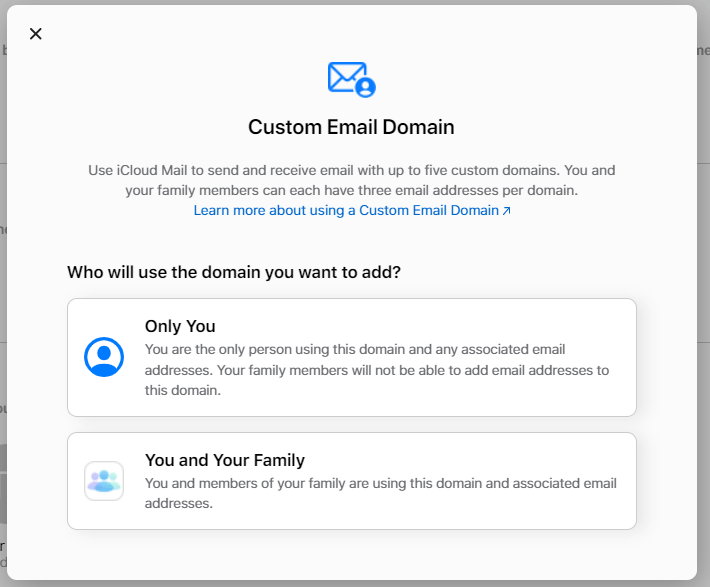
Scroll down to the Custom Email Domain section and click Manage. You can configure your domain for personal use or share it with family members.
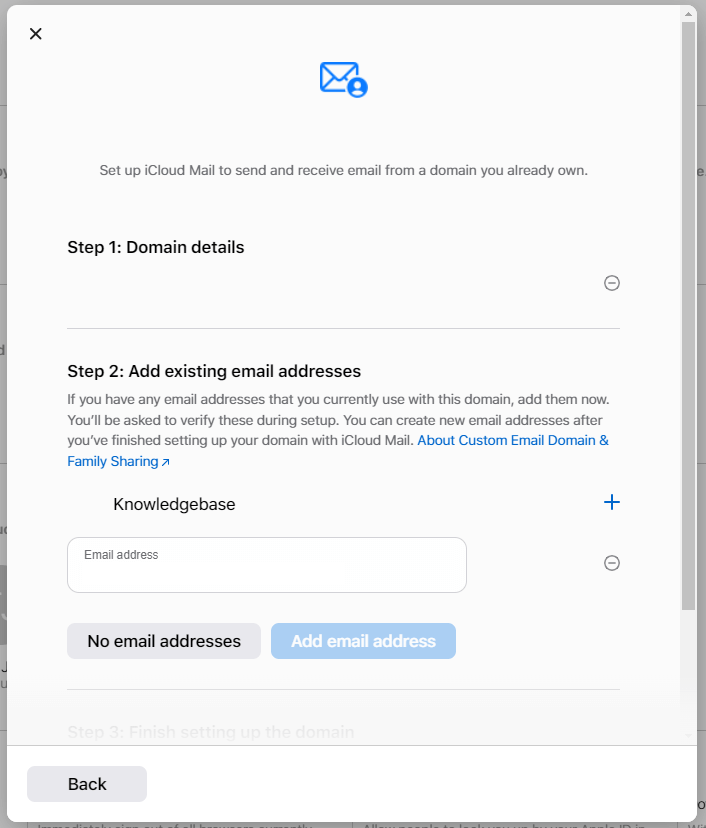
- Enter your domain name.
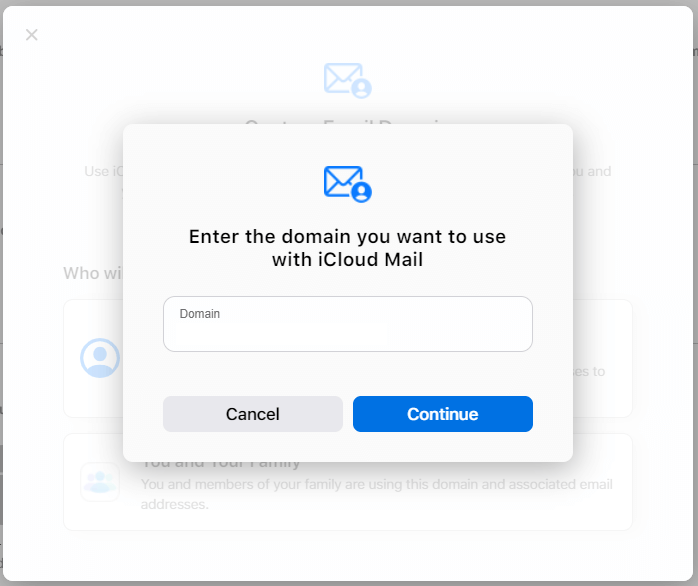
Type your domain name in the field provided. Do not include www or any subdomain prefix.
- Add existing email addresses (optional).
If you already have email addresses on your domain, add them now. Otherwise, click Continue to proceed.
- Review DNS requirements.
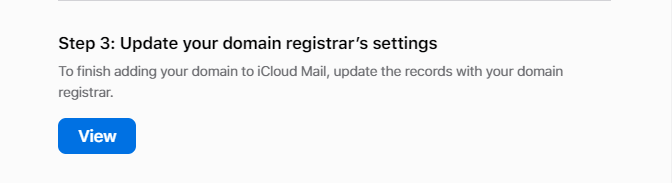
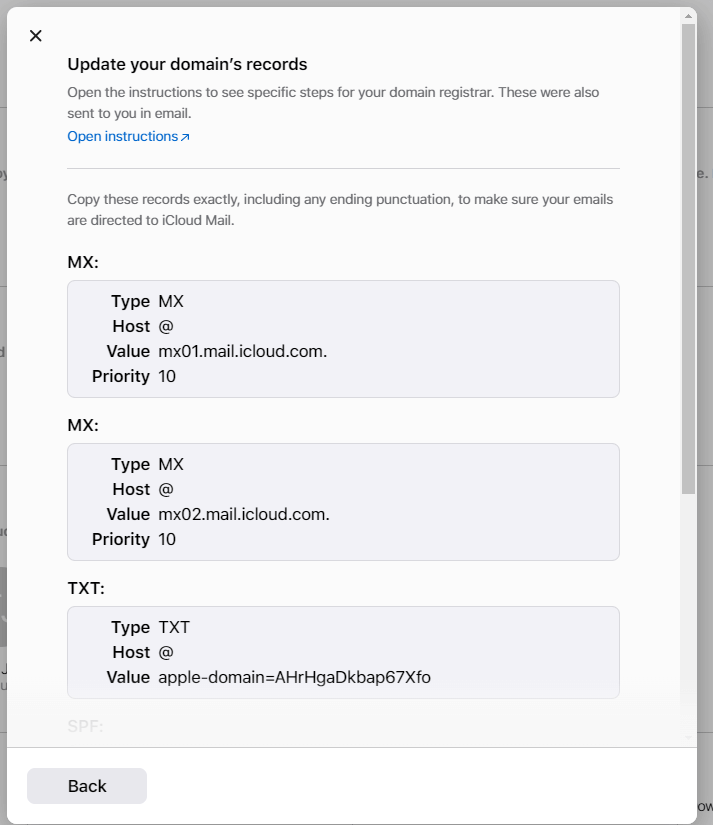
iCloud displays the DNS records you need to add to your domain. Keep this page open while you configure your DNS settings.
Configure DNS records
DNS records tell email servers where to deliver mail for your domain. You need to add five records that point your domain to Apple’s mail servers and verify domain ownership.
The exact values for some records are unique to your domain and provided by iCloud during setup. Copy these values from the iCloud interface and use them in the following steps.
Add MX records
MX records direct incoming email to Apple’s mail servers. You need to add two MX records with equal priority.
- Log in to cPanel.
Access your hosting control panel atyourdomain.co.uk/cpanelreplacing yourdomain.co.uk with your actual domain. - Open Zone Editor.
Scroll to the Domains section and click Zone Editor. - Select your domain.
Find your domain in the list and click Manage. - Add the first MX record.
Click Add Record and select MX from the type dropdown. Enter your domain name in the Name field,mx01.mail.icloud.comin the Mail Server field and10in the Priority field. Click Add Record to save. - Add the second MX record.
Repeat the previous step usingmx02.mail.icloud.comas the mail server. Keep the priority at10. This provides redundancy if one mail server is unavailable.
Add verification TXT record
The verification TXT record proves you own the domain. iCloud provides a unique value during setup that you must copy exactly.
- Add a TXT record.
In Zone Editor, click Add Record and select TXT from the type dropdown. - Enter the verification value.
Copy the verification string from the iCloud setup page and paste it into the TXT Data field. Enter your domain name in the Name field. Click Add Record to save.
Add SPF record
The SPF record authorises Apple’s servers to send email on behalf of your domain. This prevents other mail servers from rejecting your messages as spam.
- Add a TXT record for SPF.
Click Add Record and select TXT from the type dropdown. - Enter the SPF value.
Enter your domain name in the Name field andv=spf1 include:icloud.com ~allin the TXT Data field. Click Add Record to save.
Add DKIM record
The DKIM record adds a digital signature to outgoing email. Receiving servers verify this signature to confirm messages genuinely came from your domain.
- Add a CNAME record.
Click Add Record and select CNAME from the type dropdown. - Enter the DKIM values.
Entersig1._domainkeyin the Name field. Copy the DKIM target from the iCloud setup page and paste it into the CNAME field. This typically follows the formatsig1.dkim.yourdomain.co.uk.at.icloudmailadmin.com. Click Add Record to save.
Complete setup in iCloud
DNS changes take time to propagate across the internet. Once propagation completes, iCloud can verify your records and activate email delivery.
- Wait for DNS propagation.
DNS changes typically propagate within 24 hours but can take up to 48 hours. You can check propagation status using online DNS lookup tools. - Verify DNS records.
Return to the iCloud custom domain setup page and click Finish Setup. iCloud checks your DNS records and confirms they are configured correctly. - Create email addresses.
Once verification completes, you can create email addresses using your custom domain. These appear in the Mail app on all your Apple devices automatically.
Troubleshooting
DNS verification fails
iCloud cannot verify your DNS records if they contain errors or have not propagated yet.
- Check each record matches the values provided by iCloud exactly, including trailing dots where shown.
- Wait 24-48 hours after adding records before attempting verification.
- Use a DNS lookup tool to confirm your records are visible globally.
- Remove any existing MX records for your domain before adding the iCloud MX records.
Email not arriving
Missing or incorrect DNS records prevent email delivery to your custom domain.
- Verify MX records point to
mx01.mail.icloud.comandmx02.mail.icloud.comwith priority 10. - Check the SPF record includes
include:icloud.comin the value. - Confirm the DKIM CNAME record points to the correct iCloud target.
- Test email delivery by sending a message from another email account to your custom domain address.
Custom domain option not available
Custom domain support requires an active iCloud+ subscription.
- Verify your iCloud+ subscription is active in Settings > Apple ID > iCloud > Manage Storage.
- Free iCloud accounts cannot use custom domains. Upgrade to iCloud+ through your device settings.
- Family sharing members can use custom domains if the family organiser has iCloud+.
Further reading on email authentication
Email authentication protocols protect your domain from spoofing and improve deliverability. SPF, DKIM and DMARC work together to verify that messages claiming to come from your domain are legitimate. Understanding these protocols helps you troubleshoot delivery issues and maintain your sender reputation.
SPF (Sender Policy Framework) lists which mail servers can send email for your domain. When you add include:icloud.com to your SPF record, you authorise Apple’s servers to send on your behalf. Receiving servers check this record before accepting messages. The SPF specification defines how servers should interpret these records.
DKIM (DomainKeys Identified Mail) adds a cryptographic signature to message headers. Apple’s mail servers sign outgoing messages using a private key, and receiving servers verify the signature using the public key published in your DKIM DNS record. This proves the message was not altered in transit. The DKIM standard explains the technical implementation.
DMARC (Domain-based Message Authentication, Reporting and Conformance) builds on SPF and DKIM by telling receiving servers what to do when authentication fails. You can configure DMARC to quarantine or reject suspicious messages. DMARC also provides reports showing who is sending email using your domain.
Wrapping up
Your custom domain now delivers email through iCloud Mail. You enabled iCloud Mail on your devices, added your domain through iCloud+ settings and configured DNS records to route email through Apple’s servers. Your email addresses work across all Apple devices with automatic synchronisation.
Test email delivery by sending messages to your new addresses from external accounts. Check that replies work correctly and attachments send without issues. Our domain registration service includes DNS management tools for configuring email and other services.
Plans and tools mentioned in this guide
Did this guide solve your problem?
Still stuck?
Our UK support team answers tickets and live chat every day. Send us the guide you were following and where it stopped working.
Keep learning
Find a guide
Related guides

Hosting that keeps up
cPanel hosting with the tools these guides use, backed by UK support.
Get cPanel Hosting
Keep your site secure
Protect your visitors with SSL certificates – from budget DV to premium EV certificates.
Get SSL Certificate