Mailing lists allow you to send the same message to multiple recipients at once. You can use them for internal communications, customer updates or marketing campaigns without manually addressing each email.
You will create a mailing list through cPanel’s mailing list tool, configure access controls and manage subscribers. Once set up, you can send messages to the entire list with a single email address.
Before you begin
- You need access to your cPanel control panel.
- Only send emails to recipients who have given consent. Sending unsolicited mail violates data protection laws and may result in account restrictions.
- If you experience deliverability issues, review our guide on email blocked for spam.
Create a mailing list
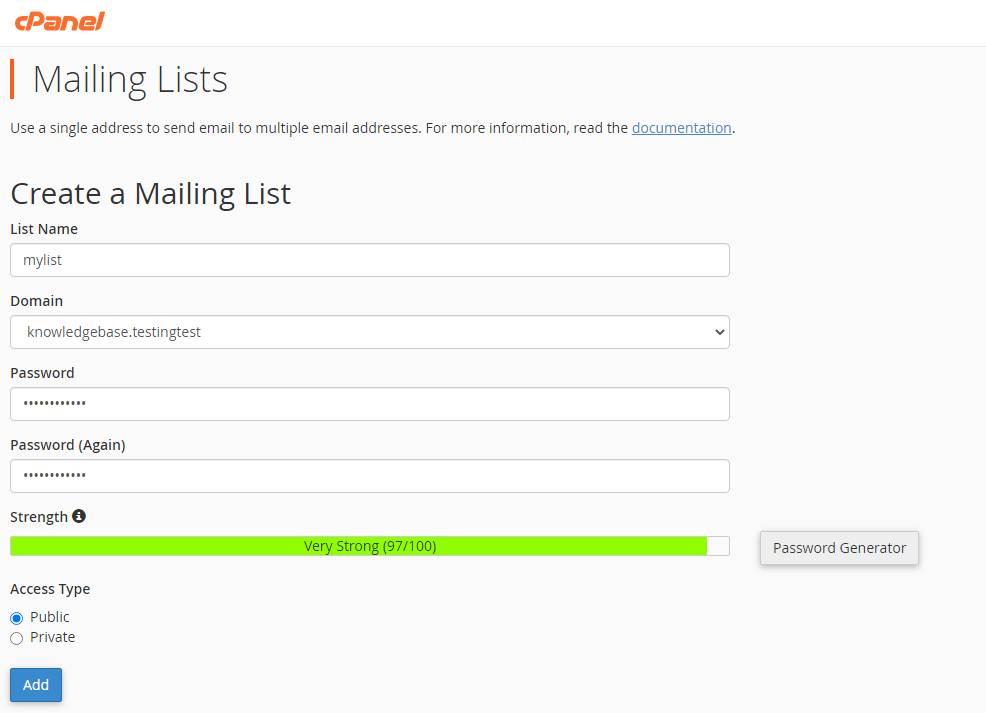
You will configure your mailing list name, domain and access settings. These determine who can subscribe and whether the list archives are visible to the public.
- Log in to cPanel.
Access your control panel atyourdomain.co.uk/cpanel, replacing yourdomain.co.uk with your actual domain name. - Open the Mailing Lists tool.
Scroll to the Email section and click Mailing Lists. This opens the mailing list management interface.

- Configure the list details.
Enter a List Name (such as newsletter or updates), select the Domain from the dropdown menu, create a Password for list administration and confirm it in the second password field. We recommend using the password generator to create a strong password. - Set the access type.
Choose Public if you want anyone to subscribe and view the archives, or Private if you need to approve subscribers and keep archives restricted. Private lists work better for internal communications or exclusive content.
- Create the list.
Click Add Mailing List. A green success message confirms the list was created. You can now send emails to the list address or add subscribers.
Manage your mailing list
After creating your list, you can modify settings, add or remove subscribers and control administrative access. The management interface provides four main options.
- Delete removes the list permanently, including all archives and subscriber addresses.
- Change Password updates the administrative password for accessing list settings.
- Manage opens the subscriber interface where you can add or remove email addresses.
- Delegation controls which users have administrative permissions for the list.

Click Manage to add subscribers manually or configure subscription settings. You can also view message archives and adjust list behaviour from this interface.
Wrapping up
Your mailing list is now active and ready to use. You configured the list name, domain and access controls, then reviewed the management options for adding subscribers and adjusting settings.
Remember to only send emails to recipients who have given consent. Review our guide on avoiding spam blocks if you experience deliverability issues.

Ready to get started?
Launch your website with our reliable cPanel hosting with unlimited bandwidth and expert support.
Get cPanel Hosting