Tracking the sender’s IP address helps you verify whether an email is legitimate or a phishing attempt. Gmail stores this information in email headers, which you can view through the web interface.
You will extract the IP address from Gmail’s email headers and use third-party lookup tools to identify the sender’s location and network provider. This information reveals whether the email originated from an expected source.
Before you begin
- You need access to your Gmail account.
- The email must be in your Inbox, Spam or Junk folder.
- Large email providers often encrypt traffic, which can limit IP tracking accuracy.
Extract the IP address from email headers
Gmail stores sender IP addresses in email headers. You need to view the full email source to access this information.
- Log in to Gmail.
Open your browser and navigate togmail.com. Sign in with your credentials. - Open the email you want to investigate.
Click on the email in your inbox to view its contents. The email opens in the main reading pane.
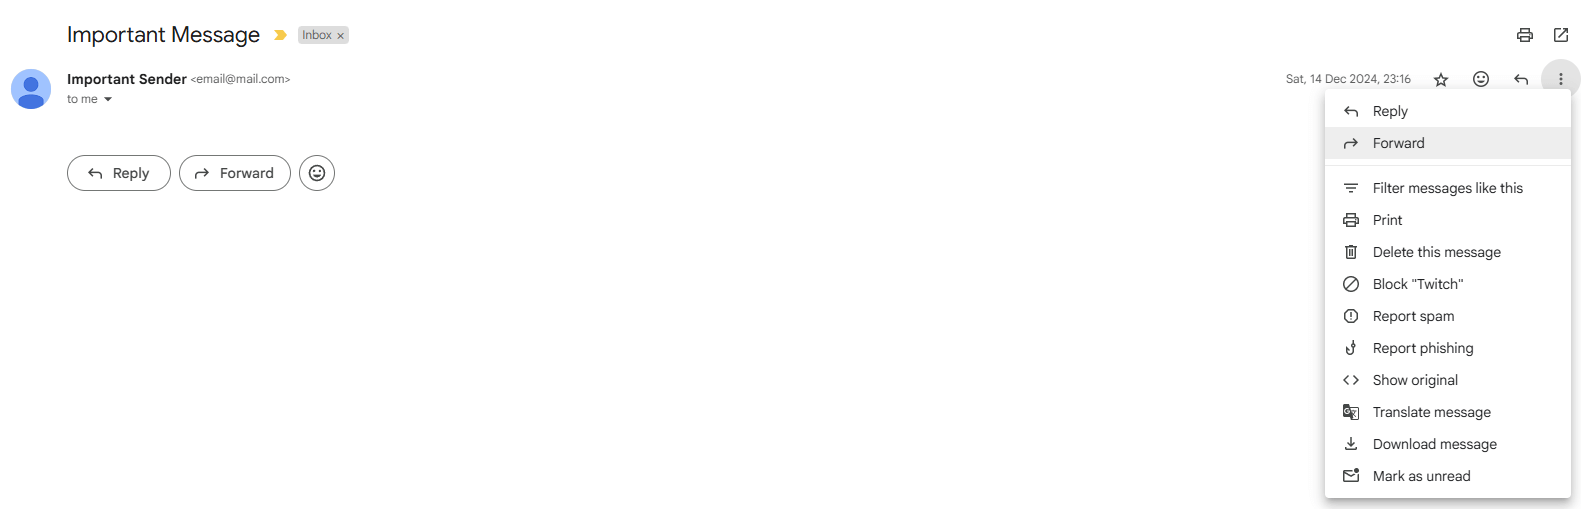
- Access the email options menu.
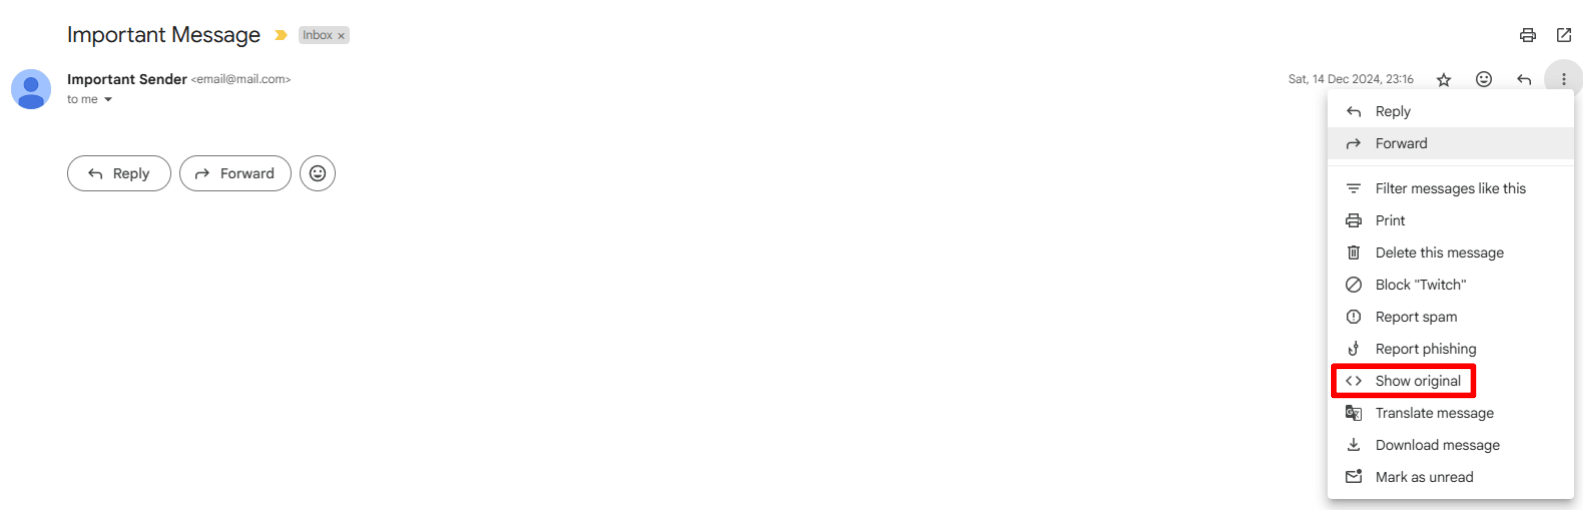
Look for three vertical dots in the top right corner of the email. Click these dots to reveal additional options. - Select Show Original.
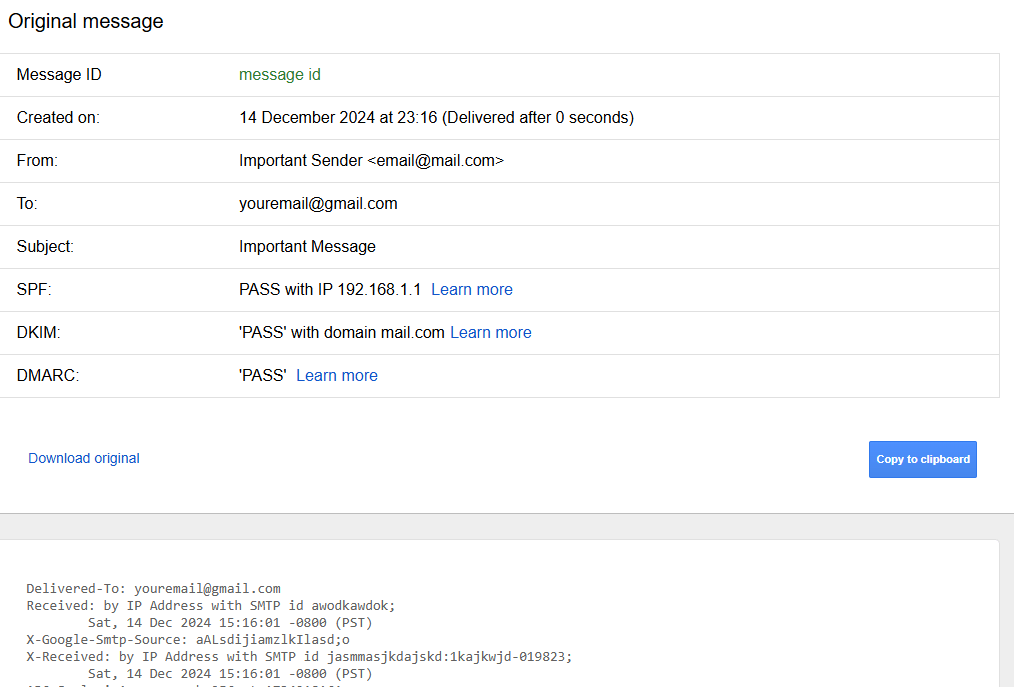
Click Show Original from the dropdown menu. This opens a new tab displaying the complete email source, including all header information and authentication checks for SPF, DKIM and DMARC.
- Locate the sender IP address.
Search the headers for lines beginning withReceived:orX-Originating-IP:. The IP address appears after these labels, typically in the format123.456.78.90for IPv4 or a longer alphanumeric string for IPv6.
You now have the sender’s IP address. The next step is to look up this IP to identify its location and network provider.
Look up the IP address
Third-party IP lookup tools provide geographical location, network provider and hosting information. This data helps you determine whether the email originated from an expected source.
- Choose an IP lookup service.
Open a new browser tab and navigate to an IP lookup tool. We recommend using multiple services to cross-reference results. Common options include ipinfo.io, whatismyipaddress.com and infobyip.com. - Enter the IP address.
Copy the IP address from the email headers and paste it into the lookup tool’s search field. Click the search or lookup button. - Review the results.
The tool displays information including city, region, country, internet service provider and hosting company. Check whether this location matches your expectations for the sender.
For example, an IP registered to Amazon Web Services in Oregon indicates the email was sent through AWS infrastructure. If you expect the sender to use AWS, this confirms authenticity. If not, the email may be suspicious.
Wrapping up
You can now track sender IP addresses in Gmail and verify email authenticity. You extracted the IP from email headers and used lookup tools to identify the sender’s location and network provider. This information helps you spot phishing attempts and verify legitimate emails.
We recommend setting up DMARC records to add email authentication at the server level. For general email troubleshooting, check our guides on email size limits and using the ping command to test mail server connectivity.

Ready to get started?
Launch your website with our reliable cPanel hosting with unlimited bandwidth and expert support.
Get cPanel Hosting