WHMCS is a client management, billing and support platform designed for web hosting providers. You can deploy it on your hosting account using Softaculous, which automates the installation process and configures the database for you.
This guide shows you how to install WHMCS through cPanel’s Softaculous app installer. You will configure your license key, set up admin credentials and access your new WHMCS installation.
Before you begin
- You need an active WHMCS license. You can purchase a WHMCS license from us.
- You need access to your cPanel control panel.
- We recommend installing WHMCS in a subdirectory or subdomain rather than your main domain root.
Access Softaculous in cPanel
Softaculous is cPanel’s built-in application installer. You will use it to deploy WHMCS without manually uploading files or creating databases.
- Log in to cPanel.
Access your control panel atyourdomain.co.uk:2083using your cPanel credentials. - Open Softaculous Apps Installer.
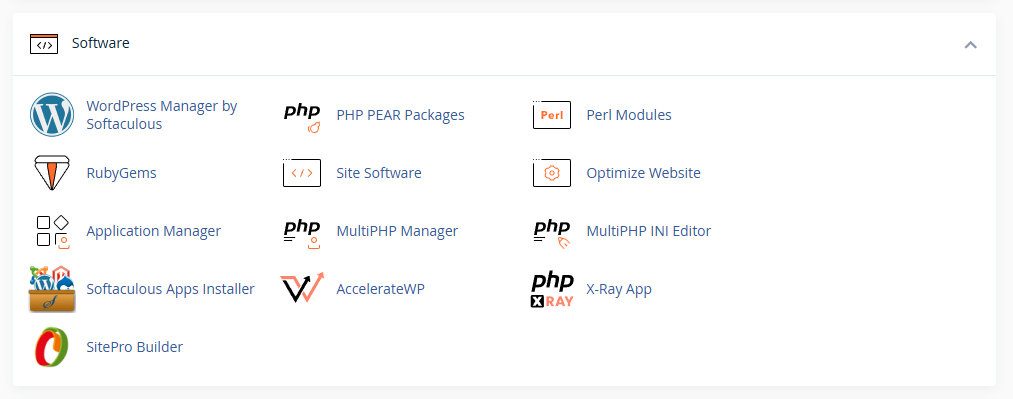
Scroll to the Software section and click Softaculous Apps Installer. This opens the application library.
Locate and configure WHMCS
You will now find WHMCS in the Softaculous library and configure your installation settings. The quick install option uses sensible defaults while allowing you to specify your license key and admin credentials.
- Find WHMCS.
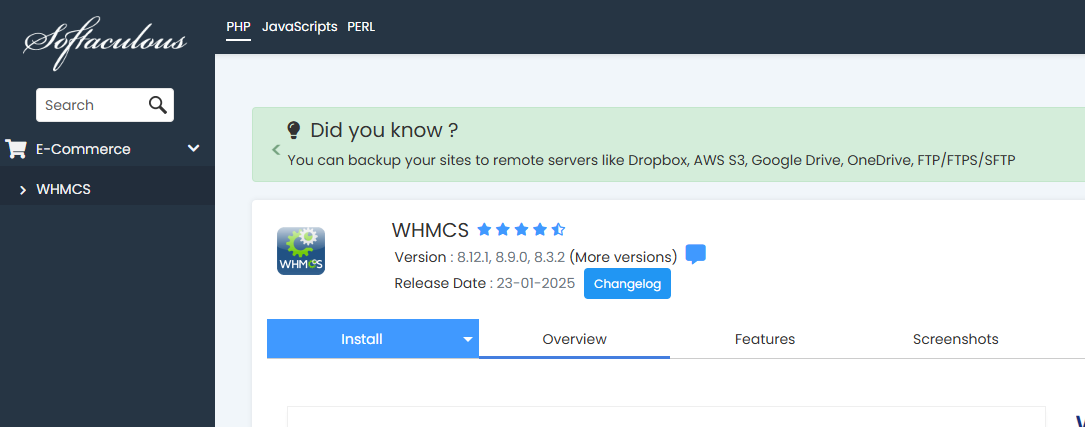
TypeWHMCSinto the search bar or scroll to the E-commerce category. Click the WHMCS icon to open its overview page. - Start the installation.
Click Install to expand the installation options. Select Quick Install to use the default configuration.
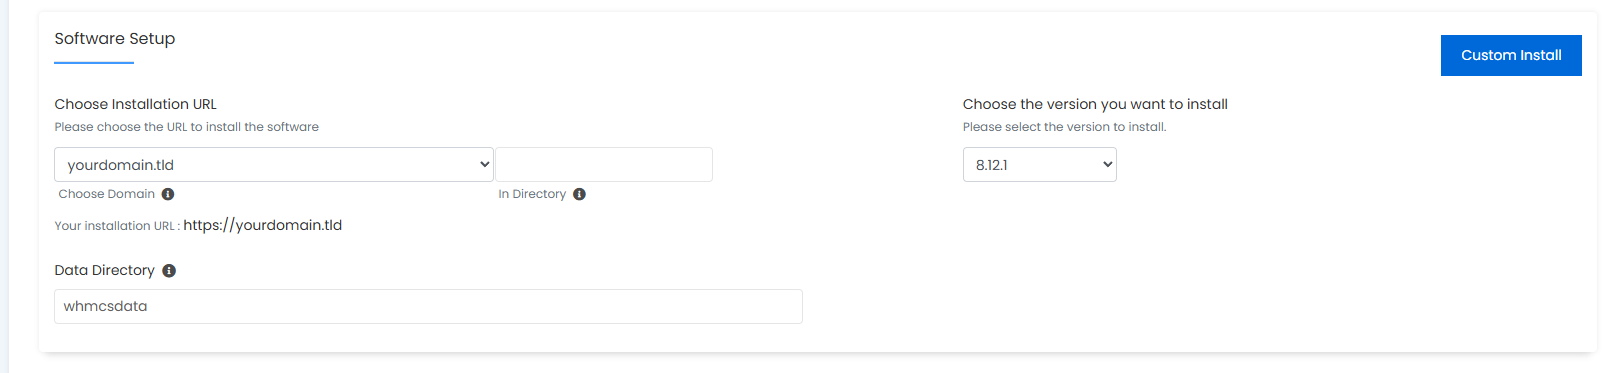
- Review installation settings.
The installer displays the WHMCS version, installation URL and directory path. The default settings install WHMCS in your public_html root. To install in a subdirectory, enter a folder name in the In Directory field.
- Enter your license key.
Scroll to the Site Settings section and paste your WHMCS license key into the License Key field. WHMCS requires a valid license to function. - Create admin credentials.
Set your admin username, password and email address. These credentials provide access to the WHMCS admin area. Use a strong password that combines letters, numbers and symbols.
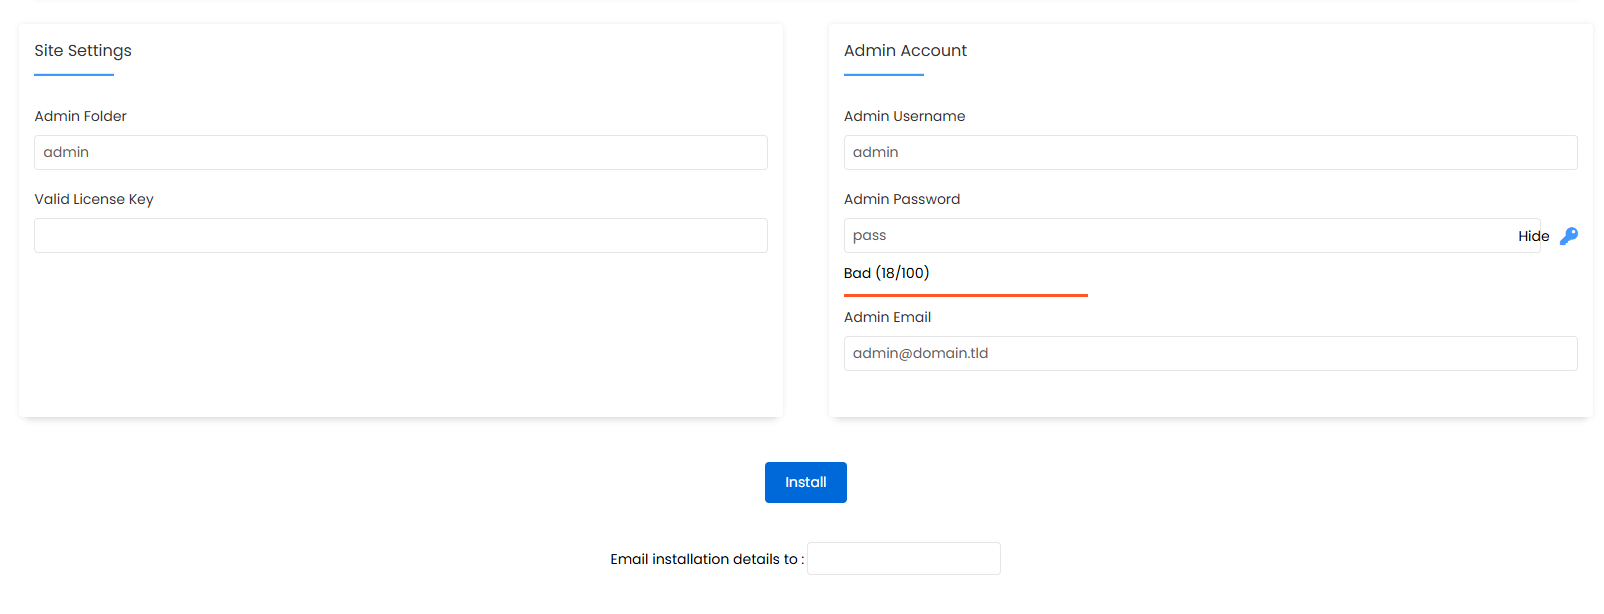
- Complete the installation.
Click Install at the bottom of the page. Softaculous creates the database, uploads files and configures WHMCS. The process takes 2-3 minutes. You can optionally enter an email address to receive installation details. - Access your WHMCS installation.
When the installation completes, Softaculous displays your WHMCS URL and admin login link. Visityourdomain.co.uk/admin(or your chosen subdirectory) to log in with your admin credentials.
Wrapping up
You have installed WHMCS on your hosting account using Softaculous. Your installation is configured with your license key and admin credentials, ready for you to set up products, payment gateways and client areas.
We recommend reviewing WHMCS’s initial setup wizard to configure your company details, currency settings and email templates. You can also explore our reseller hosting plans if you are building a hosting business with WHMCS.

Need multiple accounts?
Create isolated individual accounts for your clients and manage them all from one dashboard.
Get Reseller Hosting
Need more control?
Upgrade to VPS hosting for scalable resources and root access to your server.
Get VPS Hosting