Password-based SSH authentication leaves your VPS vulnerable to brute force attacks. SSH keys provide cryptographic authentication that eliminates this risk while simplifying your login workflow.
You will generate an SSH key pair, add the public key to your server and disable password authentication. Once complete, you connect to your VPS using your private key instead of a password.
Before you begin
- You need root access to your VPS with the credentials from your welcome email.
- Windows users require PuTTY and PuTTYgen installed.
- We recommend keeping your current SSH session open while testing key-based authentication in a second window.
Generate your SSH key pair
SSH keys work in pairs. The private key stays on your local machine while the public key goes on your server. You need to generate this pair before configuring server access.
Linux and macOS users can generate keys using the built-in ssh-keygen command. Windows users should use PuTTYgen, which provides a graphical interface for key generation and management.
Generate keys on Linux or macOS
- Open a terminal window.
Access your terminal application through your system’s application menu. - Run the key generation command.
Execute the following command to create a 4096-bit RSA key pair:
ssh-keygen -t rsa -b 4096- Specify the file location.
Press Enter to accept the default location (~/.ssh/id_rsa) or provide a custom path. The default location works for most users. - Set a passphrase.
Enter a strong passphrase when prompted. This adds an extra security layer by encrypting your private key. You can leave this blank, but we recommend using a passphrase. - Locate your public key.
Your public key is saved as~/.ssh/id_rsa.pub. You will copy this to your server in the next section.
Generate keys on Windows with PuTTYgen
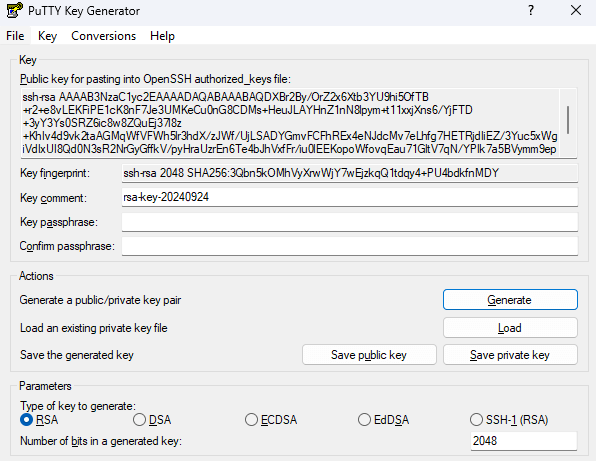
- Launch PuTTYgen.
Open PuTTYgen from your Start menu or applications folder. - Configure key parameters.
Select RSA as the key type and set the number of bits to 4096. This provides strong encryption suitable for server authentication. - Generate the key pair.
Click Generate and move your mouse randomly within the window. This creates entropy for key generation. - Add a key passphrase.
Enter a passphrase in the Key passphrase field and confirm it. This encrypts your private key on disk. - Save your private key.
Click Save private key and choose a secure location on your computer. Remember this location as you will need the file to connect to your server. - Copy your public key.
The public key appears in the text box at the top of the window. You will paste this into your server configuration in the next section.
Add your public key to the server
Your server needs your public key stored in a specific location to authenticate your connection attempts. You will create the necessary directory structure and add your key to the authorized keys file.
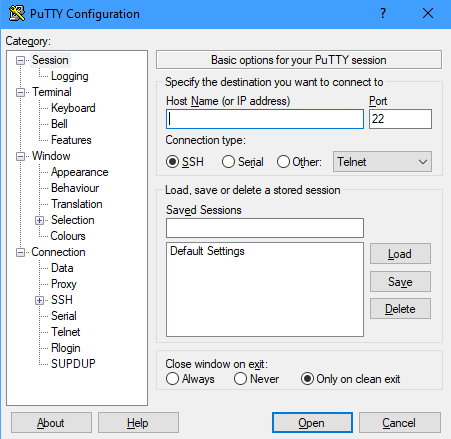
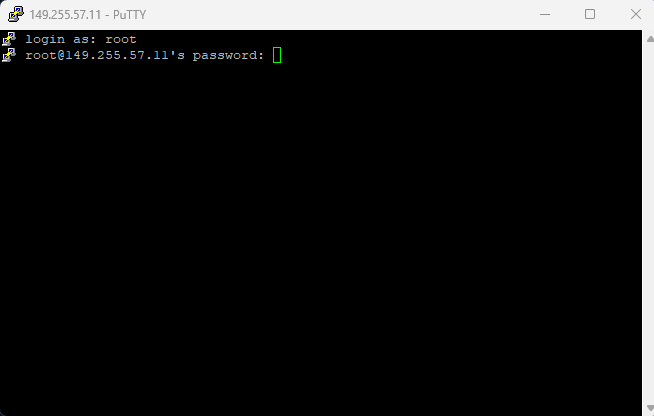
- Connect to your VPS.
Use PuTTY or your terminal to connect via SSH. Enter your server’s IP address or hostname, then log in as root using the password from your welcome email.

- Create the SSH directory.
Run the following command to create the directory that stores SSH configuration:
mkdir -p ~/.ssh- Set directory permissions.
Restrict access to the SSH directory to prevent unauthorised access:
chmod 700 ~/.sshThis permission setting allows only the directory owner to read, write and execute files within it.
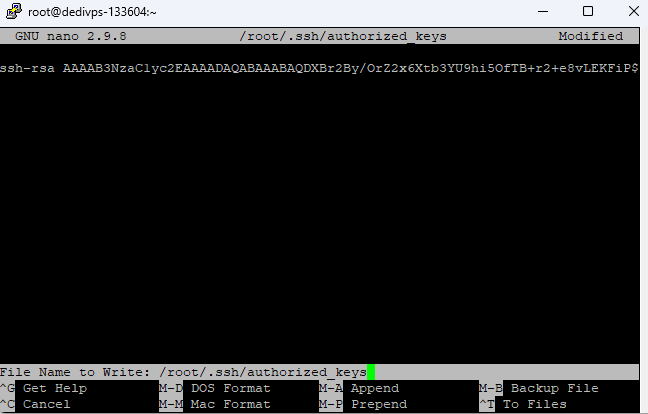
- Open the authorized keys file.
Create and open the file that stores your public key:
nano ~/.ssh/authorized_keys- Paste your public key.
Right-click in the nano editor to paste your public key. The entire key must appear on a single line with no line breaks. - Save the file.
PressCtrl+X, thenYto confirm, thenEnterto save the file and exit nano.
- Set file permissions.
Restrict access to the authorized keys file:
chmod 600 ~/.ssh/authorized_keysYour server now accepts connections authenticated with your private key. Test this before disabling password authentication to confirm your key works correctly.
Test your SSH key authentication
You need to verify that key-based authentication works before disabling password access. This prevents you from being locked out of your server if something goes wrong.
Test on Linux or macOS
- Open a new terminal window.
Keep your existing SSH session open in case you need to troubleshoot. - Connect using your key.
Run the following command, replacingyour-server-ipwith your actual server address:
ssh root@your-server-ip- Enter your passphrase.
If you set a passphrase during key generation, enter it when prompted. You should connect without being asked for your server password.
Test on Windows with PuTTY
- Load your private key in Pageant.
Right-click the Pageant icon in your system tray and select Add Key. Navigate to your saved private key file and open it. - Open PuTTY.
Launch a new PuTTY session without closing your existing connection. - Connect to your server.
Enter your server details and click Open. When prompted for a username, enterroot. You should connect without being asked for a password.
If you connect successfully, your SSH key authentication is working correctly. You can now disable password authentication to secure your server.
Disable password authentication
Password authentication allows attackers to attempt brute force attacks against your server. Disabling it forces all connections to use SSH keys, which are practically impossible to crack through brute force.
- Open the SSH daemon configuration.
Run the following command to edit the SSH server settings:
nano /etc/ssh/sshd_config- Find the password authentication setting.
PressCtrl+Wto open the search function in nano. TypePasswordAuthenticationand pressEnter.
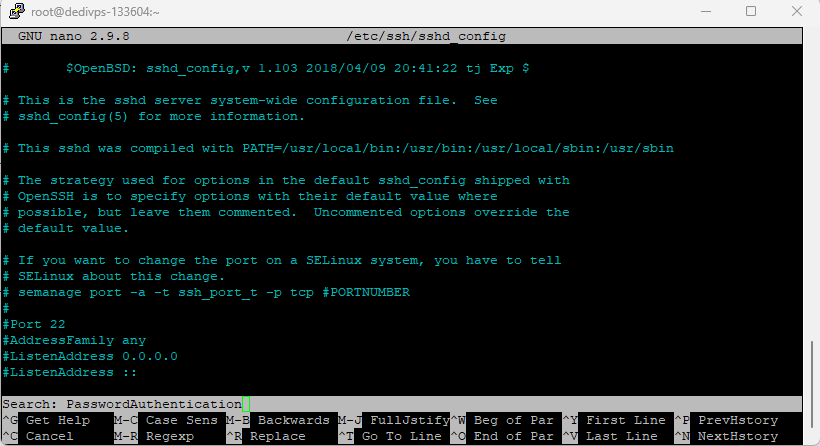
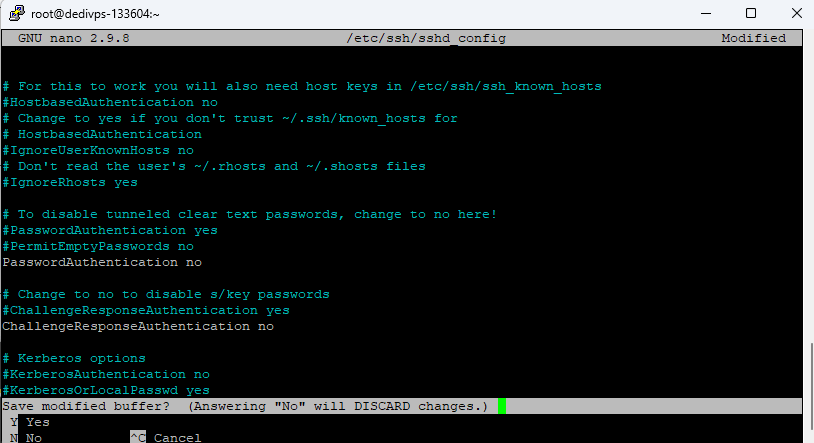
- Change the setting to no.
Use the arrow keys to navigate to the line that readsPasswordAuthentication yes. Changeyestono. If the line starts with a hash symbol (#), remove it to uncomment the setting. - Save your changes.
PressCtrl+X, thenY, thenEnterto save the file and exit.
- Restart the SSH service.
Apply your configuration changes by restarting the SSH daemon:
service sshd restart- Verify the change.
Open a new SSH connection in a separate window. You should connect using your key without being prompted for a password. If you cannot connect, your existing session remains open for troubleshooting.
Your server now rejects all password-based authentication attempts. Only users with the correct private key can connect.
Troubleshooting
Most SSH key issues stem from incorrect file permissions, malformed keys or configuration errors. These problems are usually quick to fix once identified.
Permission denied (publickey) error
This error appears when your server rejects your key. The most common causes are incorrect file permissions or a missing public key.
- Verify that
~/.sshhas permissions set to 700:chmod 700 ~/.ssh - Confirm that
~/.ssh/authorized_keyshas permissions set to 600:chmod 600 ~/.ssh/authorized_keys - Check that your public key appears as a single unbroken line in the authorized_keys file
- Ensure you are connecting as the correct user (root in this guide)
Connection still prompts for password
If your connection asks for a password after adding your key, the server is not recognising your key authentication.
- Confirm that Pageant is running with your key loaded (Windows users)
- Verify that you are using the correct private key file
- Check that your public key in
~/.ssh/authorized_keysmatches your private key - Review the SSH daemon logs for authentication errors:
tail -f /var/log/auth.log
Locked out after disabling passwords
If you disabled password authentication before confirming that key authentication works, you need alternative access to restore password login.
- Access your server through your hosting control panel’s console feature
- Edit
/etc/ssh/sshd_configand changePasswordAuthenticationback toyes - Restart the SSH service:
service sshd restart - Fix your key configuration before disabling passwords again
Further reading on SSH security
SSH keys form the foundation of secure server access, but additional hardening measures can further protect your VPS. Understanding these concepts helps you make informed decisions about your server security posture.
Key-based authentication eliminates the risk of password guessing attacks, but your private key becomes a single point of failure. Protecting this key with a strong passphrase adds a second authentication factor. Even if someone gains access to your key file, they cannot use it without the passphrase. The SSH Academy provides detailed guidance on key generation best practices and passphrase selection.
Regular security audits help identify potential vulnerabilities before they become problems. Review your authorized_keys file periodically to remove old or unused keys. Check your SSH logs for unusual connection attempts or patterns. Our VPS security guide covers these maintenance tasks in detail.
Wrapping up
Your VPS now accepts only SSH key authentication, eliminating the risk of password-based attacks. You generated a key pair, added your public key to the server and disabled password authentication. Your private key provides secure access without transmitting passwords over the network.
Store your private key securely and never share it with anyone. Consider creating separate keys for different devices or team members. Our VPS hosting and Dedicated Cloud plans provide full root access for implementing these security configurations.

Need more power?
Get scalable resources with our VPS hosting with root access and optional software.
Get VPS Hosting
Starting something new?
Perfect for websites and small businesses unlimited bandwidth with cPanel hosting.
Get cPanel Hosting