Additional FTP accounts let you grant file access to developers or team members without sharing your main login credentials. You can restrict each account to specific folders and set storage quotas to prevent any single user from consuming your entire allocation.
You will create new FTP accounts through your cPanel or Plesk control panel, configure directory access and set optional usage limits. Each account receives unique credentials that work with any FTP client.
Before you begin
- You need access to your cPanel or Plesk control panel.
- Your main FTP credentials are included in your welcome email.
Why create additional FTP accounts
Your hosting plan includes a primary FTP account with unrestricted access to all files, emails and website data. Additional accounts solve three common access control problems.
First, you can grant developers access to specific project folders without exposing your entire file system. A developer working on your WordPress theme only needs access to /public_html/wp-content/themes, not your email configuration or database backups.
Second, storage quotas prevent any single account from filling your hosting space. You might allocate 500 MB to a contractor uploading marketing assets whilst reserving the bulk of your storage for critical site files.
Third, separate credentials improve security. When a project ends, you delete that FTP account rather than changing your master password and updating it across multiple services.
Create an FTP account in cPanel
You will navigate to the FTP management area, configure account details and set access restrictions. The new account becomes active immediately after creation.
- Log in to cPanel.
Access your control panel atyourdomain.co.uk:2083using your primary hosting credentials. - Open FTP Accounts.
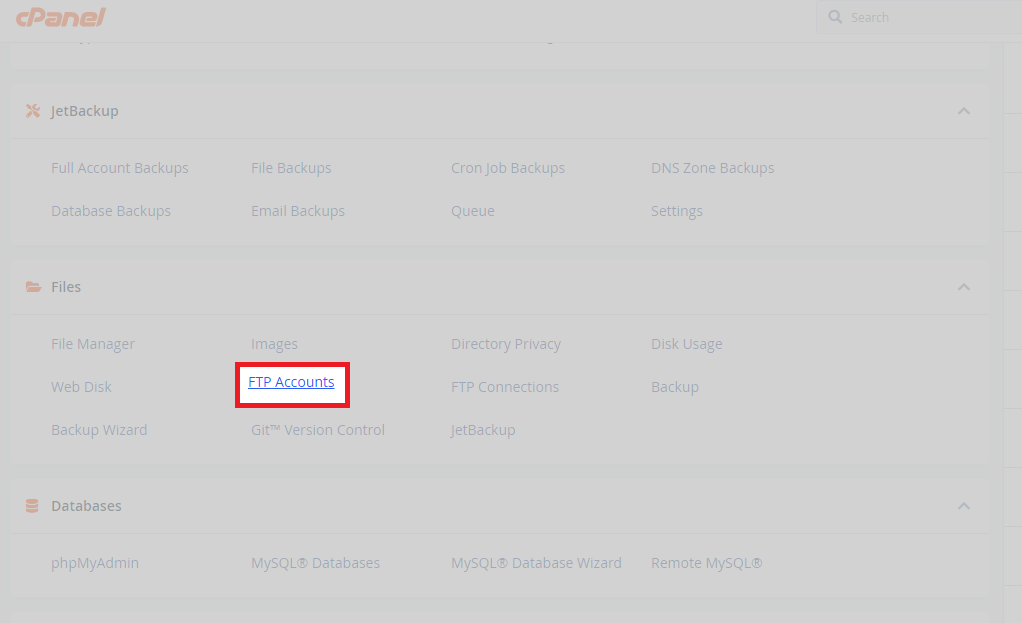
Scroll to the Files section and click FTP Accounts. This displays your existing accounts and the creation form.
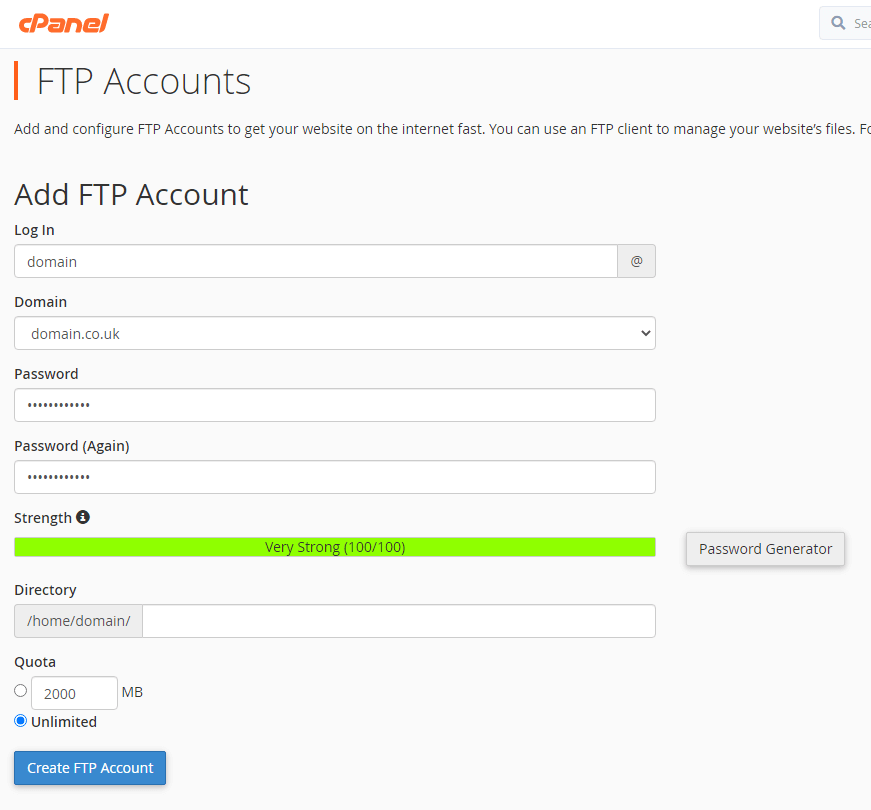
- Enter account details.
Type a username in the Log In field. Click Generate next to the Password field to create a secure password, or enter your own. The system automatically creates a full username by appending your domain. - Set the directory path.
Leave the Directory field at its default value to grant access to your entire home directory, or enter a specific path likepublic_html/wp-content/uploadsto restrict access to that folder only. - Configure the storage quota.
Enter a number in megabytes in the Quota field to limit how much storage this account can use, or select Unlimited. A quota prevents the account from consuming space needed by other services. - Create the account.
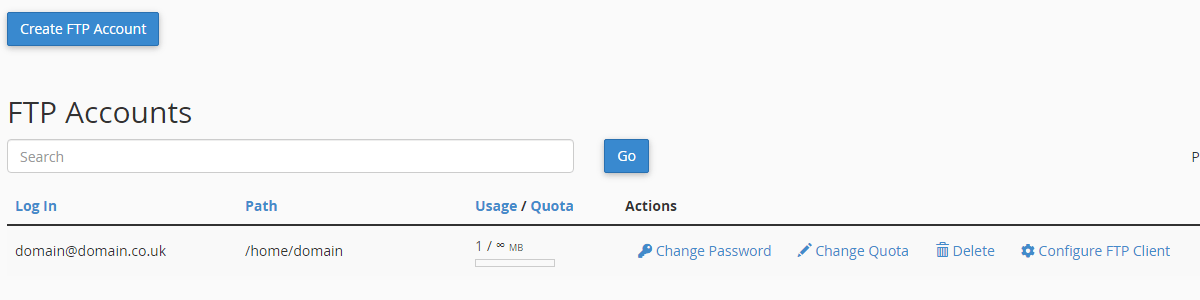
Click Create FTP Account. The new account appears in the accounts list below the creation form.
The account is now active. You can modify its quota, change its password or delete it entirely from the accounts list. Each account displays its current storage usage and remaining quota allocation.
Create an FTP account in Plesk
You will access the FTP management interface for your domain, configure account settings and confirm creation. Plesk creates the account and displays a success message.
- Log in to Plesk.
Access your control panel atyourdomain.co.uk:8443using your hosting credentials. - Select your domain.
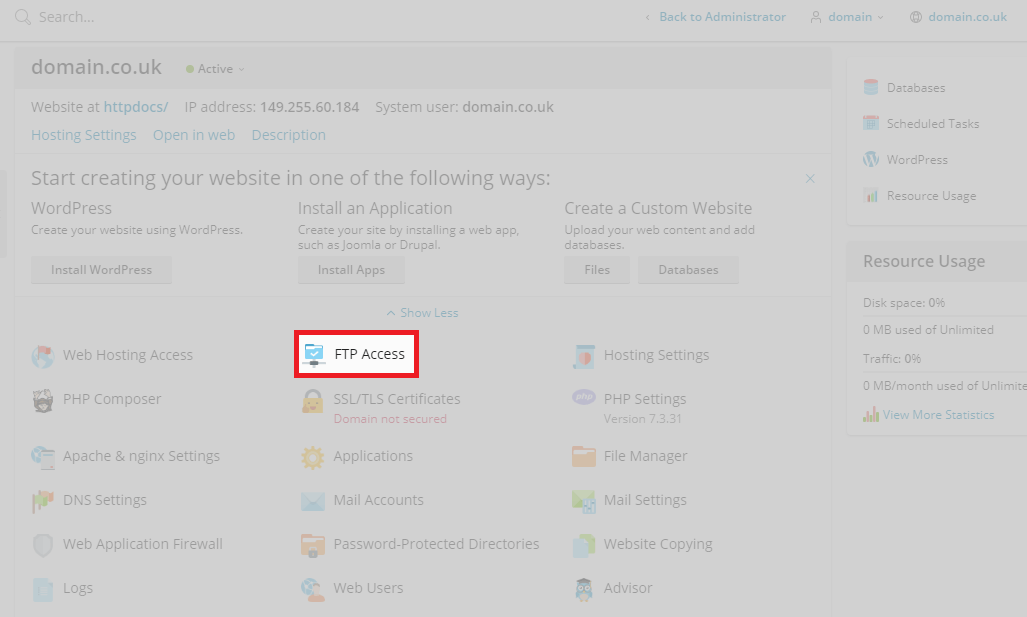
Click the domain name you want to create an FTP account for. This opens the domain management interface. - Open FTP Access.
Click FTP Access in the left sidebar. This displays your existing FTP accounts and management options.
- Start creating an account.
Click Add FTP Account at the top of the page. This opens the account configuration form.

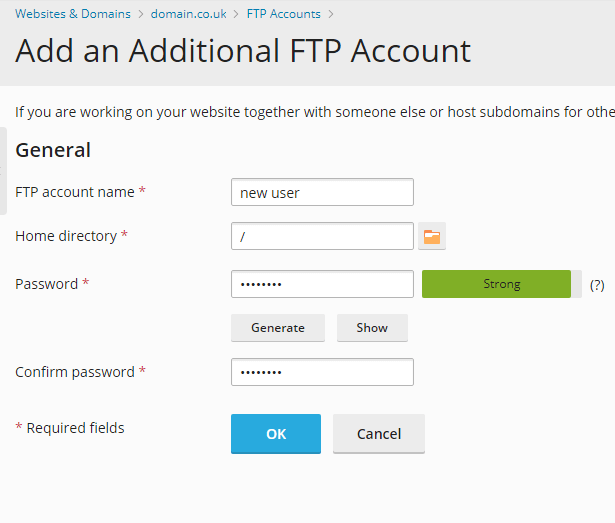
- Configure account settings.
Enter a username in the FTP account name field. Type or generate a password in the New password field. Enter a directory path in the Home directory field to restrict access, or leave it at the default to grant full access. - Save the account.
Click OK at the bottom of the form. Plesk creates the account and returns you to the FTP Access page.
A confirmation message appears at the top of the page. The new account is now active and appears in your FTP accounts list.

Wrapping up
You created additional FTP accounts with restricted directory access and optional storage quotas. Each account has unique credentials that work with any FTP client including FileZilla, Cyberduck or WinSCP.
Review your account list periodically and delete unused accounts to maintain security. Our guide on using the cPanel File Manager covers an alternative method for managing files directly through your browser. All shared hosting plans include unlimited FTP accounts.

Ready to get started?
Launch your website with our reliable cPanel hosting with unlimited bandwidth and expert support.
Get cPanel Hosting