Custom nameservers let you brand your reseller hosting service with your own domain name. Instead of clients pointing their domains to generic nameservers, they use nameservers under your domain. This makes your service look more professional and keeps your branding consistent across all client accounts.
You will create DNS records for your custom nameservers, request glue records from your registrar and configure the nameservers with your hosting provider. Once complete, your clients can use nameservers that match your brand.
Before you begin
- You need a registered domain name to use for your custom nameservers.
- You must have access to your domain’s DNS management area in cPanel or Plesk.
- Custom nameservers require advanced DNS configuration. If you need assistance, contact our support team.
Create DNS records for your nameservers
You need to create A records that point your custom nameserver hostnames to our server IP addresses. These records tell the DNS system where to find your nameservers when clients configure their domains.
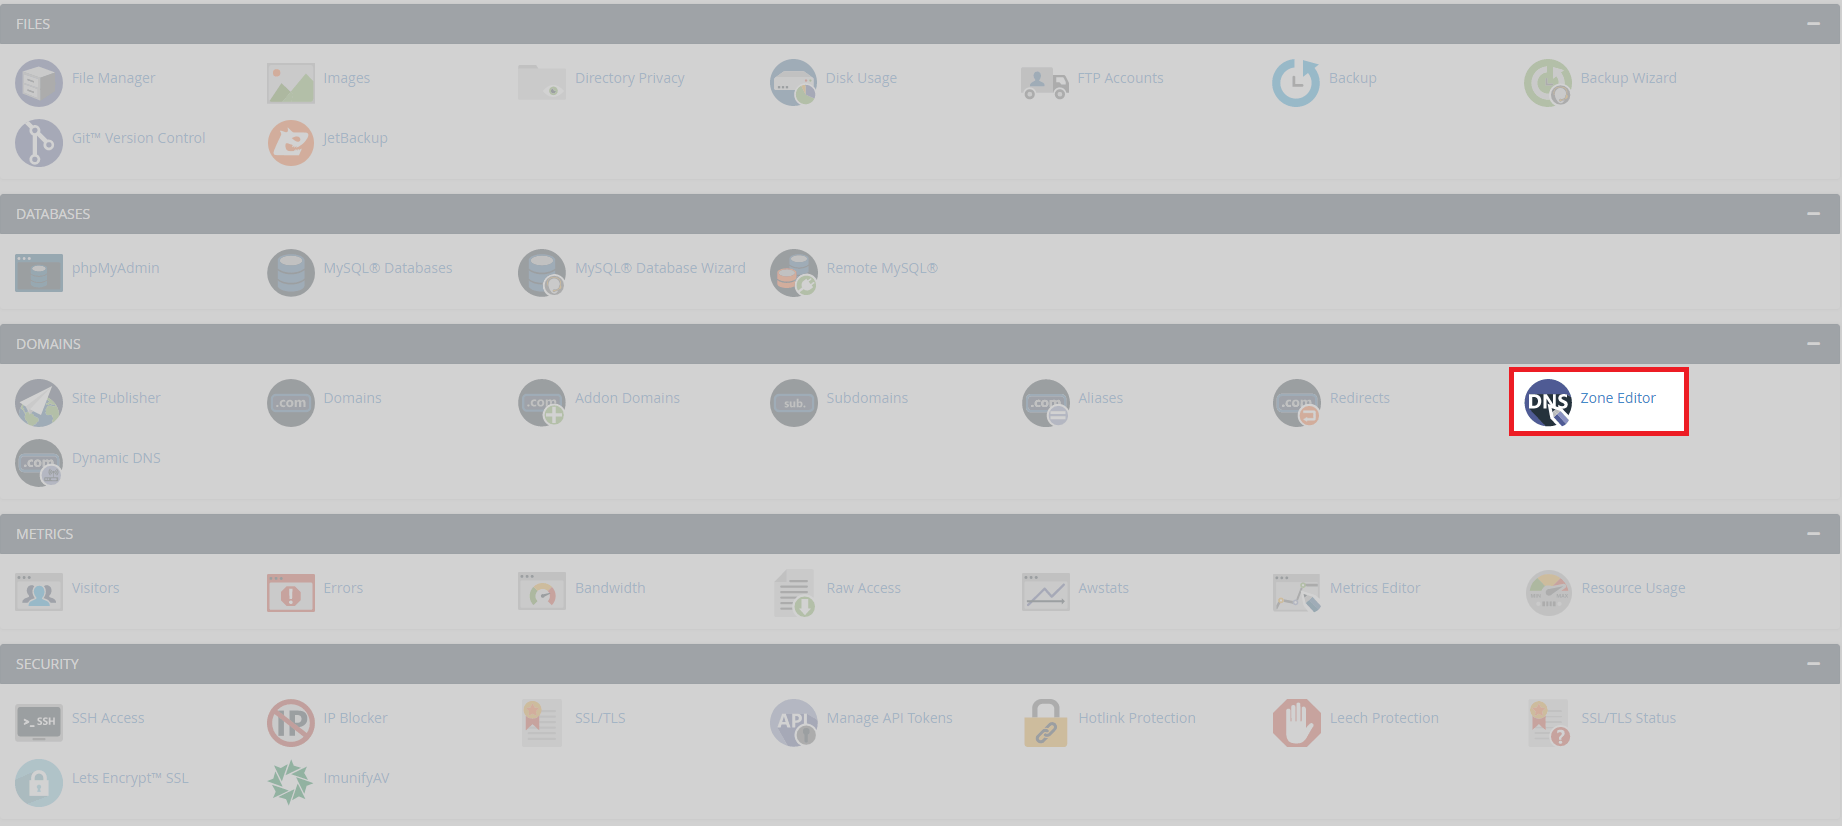
- Access your DNS management area.
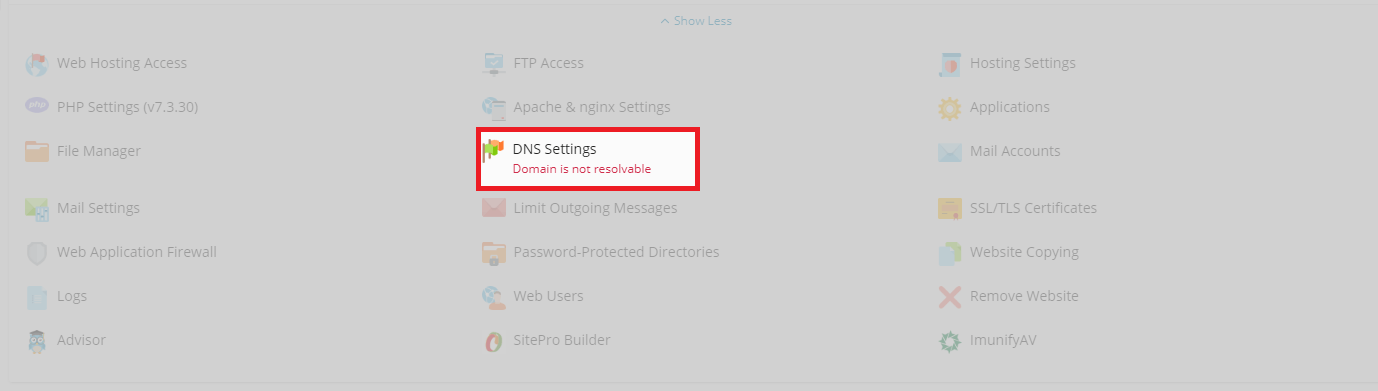
Log in to your control panel and locate the DNS or zone editor for the domain you want to use. In cPanel, this is Zone Editor. In Plesk, navigate to DNS Settings for your domain. - Create the first A record.
Add a new A record with the hostnamens1.yourdomain.co.uk(replacing yourdomain.co.uk with your actual domain). Point this record to the IP address149.255.60.1. - Create the second A record.
Add another A record with the hostnamens2.yourdomain.co.ukand point it to185.53.57.60. These two records establish the locations of your custom nameservers.
Your DNS records are now configured. The next step registers these nameservers with your domain registrar so they can be used globally.
Register glue records with your registrar
Glue records connect your custom nameserver hostnames to their IP addresses at the registry level. Without glue records, the DNS system cannot resolve your nameservers because it creates a circular dependency.
- Contact your domain registrar.
Reach out to the company where you registered your domain. If your domain is registered with Unlimited Web Hosting, contact our team. - Request glue record creation.
Ask them to create glue records forns1.yourdomain.co.ukpointing to149.255.60.1andns2.yourdomain.co.ukpointing to185.53.57.60. Provide both the hostnames and IP addresses. - Confirm the glue records are active.
Your registrar will notify you once the glue records are registered. This process typically completes within a few hours but may take up to 24 hours depending on the registrar.
Once your registrar confirms the glue records are active, your custom nameservers are ready to use. You can now update client domains to point to your branded nameservers.
Wrapping up
Your custom nameservers are now configured and ready for use. You created DNS A records pointing to our server IP addresses and registered glue records with your domain registrar. Clients can now use nameservers under your domain name instead of generic hosting provider nameservers.
Allow 24-48 hours for DNS changes to propagate fully across the internet. Test your nameservers by updating a test domain to use them and confirming it resolves correctly. Our reseller hosting plans include support for custom nameservers and white-label branding.

Ready to get started?
Launch your website with our reliable cPanel hosting with unlimited bandwidth and expert support.
Get cPanel Hosting