Cloudflare provides DNS management with built-in security features and a content delivery network that speeds up your site. Setting up Cloudflare requires adding your domain to their platform, configuring DNS records and updating your nameservers.
You will connect your domain to Cloudflare’s network and configure DNS records to route traffic through their infrastructure. This gives you access to features like DDoS protection and free CDN caching.
Before you begin
- You need access to your domain registrar account to update nameservers.
- We recommend exporting your current DNS zone file before making changes.
- Create a free Cloudflare account at dash.cloudflare.com/sign-up if you do not have one.
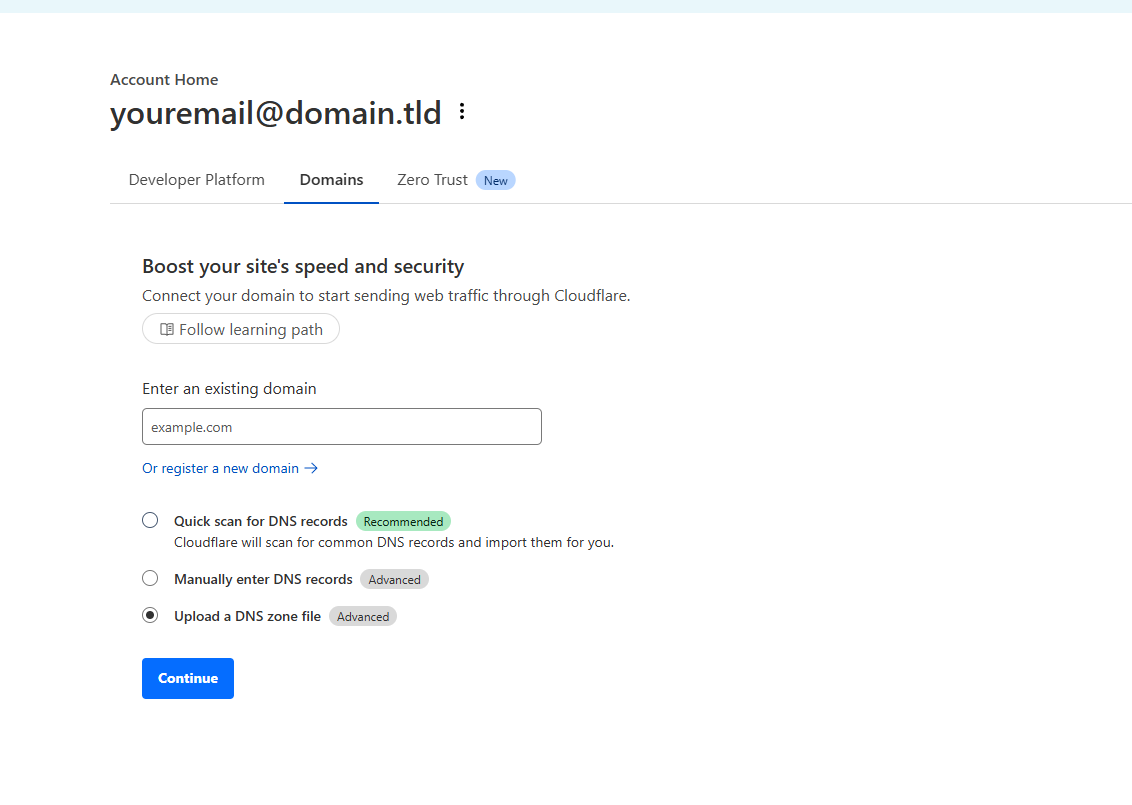
Add your domain to Cloudflare
You need to register your domain with Cloudflare before you can manage its DNS records. Cloudflare will scan your existing DNS configuration and import the records automatically.
- Log in to your Cloudflare account.
Access the dashboard at dash.cloudflare.com/login using your Cloudflare credentials. - Enter your domain name.
Type your domain into the Enter your site field and click Add site. Cloudflare will begin scanning your current DNS records. - Select a plan.
Choose the Free plan or any paid plan that matches your requirements. Click Continue to proceed with the selected plan.

Import DNS records
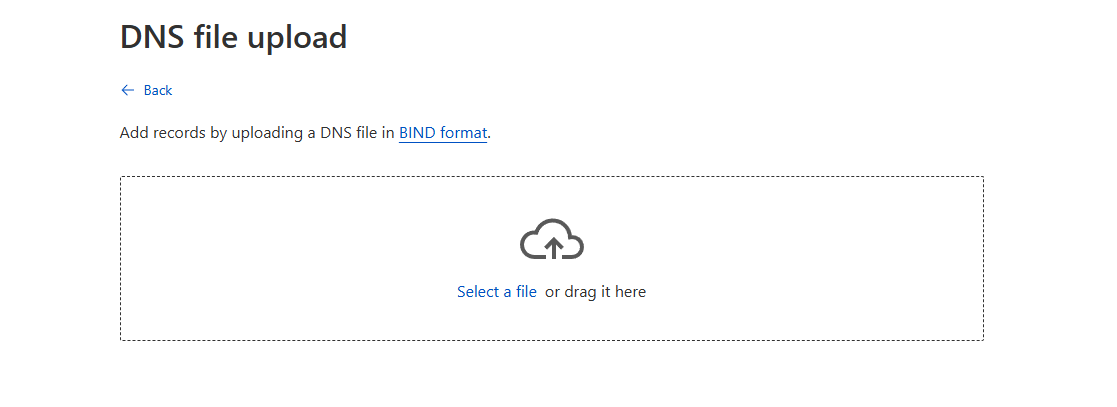
Cloudflare automatically scans and imports most DNS records during setup. You can also upload a DNS zone file if you exported one from your previous DNS provider.
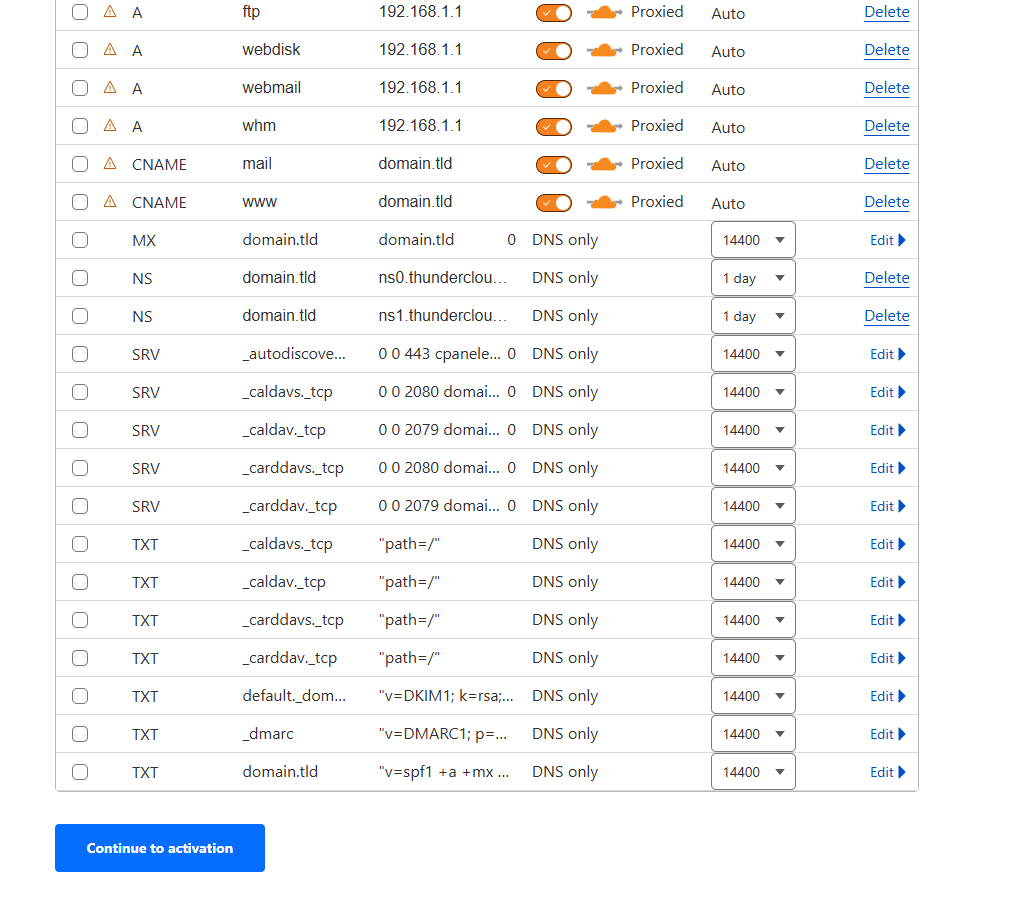
- Review the imported records.
Cloudflare displays all DNS records it found during the scan. Check that your A records, MX records and other entries appear correctly. - Upload a zone file (optional).
If you have a DNS zone file, drag and drop it into the upload box. This imports all records from the file at once instead of adding them manually. - Continue to activation.
Click Continue to Activation once you have verified or imported your DNS records. This moves you to the nameserver configuration step.
Update your nameservers
Changing your domain’s nameservers to Cloudflare’s servers activates their DNS management and routes traffic through their network. You make this change at your domain registrar.
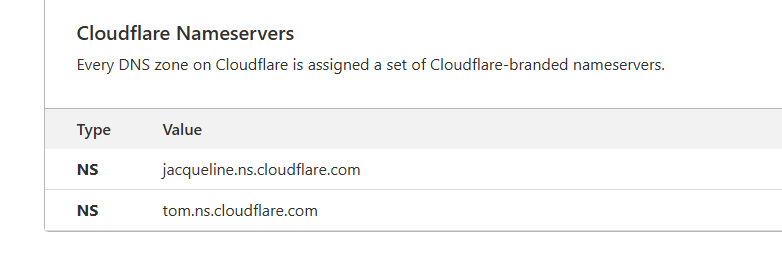
- Copy the Cloudflare nameservers.
Cloudflare displays two nameserver addresses on the activation page. These typically look likename1.ns.cloudflare.comandname2.ns.cloudflare.com. Copy both addresses. - Log in to your domain registrar.
Access your domain registrar’s control panel where you purchased or manage your domain name. - Replace the existing nameservers.
Find the nameserver settings for your domain and replace the current nameservers with the two Cloudflare nameservers you copied. Save the changes. - Verify the nameserver update.
Return to Cloudflare and click Done, check nameservers. Cloudflare will verify that your nameservers point to their network.
Nameserver changes take between a few minutes and 48 hours to propagate globally. You can check DNS propagation status using online tools to monitor when the changes complete.
Wrapping up
Your domain now uses Cloudflare for DNS management. You added your site to Cloudflare, imported DNS records and updated your nameservers to route traffic through their network. Your site benefits from Cloudflare’s security features and content delivery network.
Monitor your site over the next 24 hours to confirm DNS changes have propagated. Check that your website loads correctly and email delivery continues without interruption. Our web hosting plans work seamlessly with Cloudflare’s DNS services.
If you run into any trouble, get in touch and our team will be happy to help.

Ready to get started?
Launch your website with our reliable cPanel hosting with unlimited bandwidth and expert support.
Get cPanel Hosting