PIP (Pip Installs Packages) manages Python package installation and updates on your system. Without it, you need to download and install Python libraries manually, which becomes impractical as your projects grow.
You will check your Python installation, install PIP using either ensurepip or cURL and verify the installation works correctly. Once complete, you can install any Python package from the command line.
Before you begin
- Python must be installed on your Windows system.
- You need access to the Windows Command Prompt.
Check your Python installation
PIP requires Python to be installed before it can work. You need to confirm Python is present and check which version you have.
- Open Command Prompt.
Press Windows + R, typecmdand press Enter. - Check the Python version.
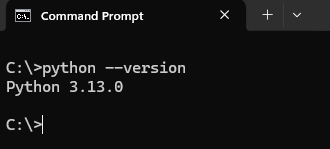
Type the following command and press Enter:
python --versionIf Python is installed, you will see the version number displayed (for example, Python 3.13.1). If you see an error message, you need to install Python before continuing.
Install PIP with ensurepip
The ensurepip module comes bundled with Python 3.4 and later. This method installs PIP directly from your Python installation without downloading external files.
- Run the ensurepip command.
In Command Prompt, type the following command and press Enter:
py -m ensurepip --upgradeThis command installs PIP and upgrades it to the latest version if an older version exists. The installation completes in a few seconds.
Install PIP with cURL (alternative method)
If ensurepip fails or is unavailable, you can download and run the PIP installation script manually using cURL. This method works on any Windows system with internet access.
- Download the PIP installation script.
In Command Prompt, type the following command and press Enter:
curl https://bootstrap.pypa.io/get-pip.py -o get-pip.pyThis downloads the installation script and saves it as get-pip.py in your current directory.
- Run the installation script.
Type the following command and press Enter:
py get-pip.pyPython executes the script and installs PIP on your system.
Verify the PIP installation
After installing PIP, you need to confirm it works correctly and check which version was installed.
- Check the PIP version.
In Command Prompt, type the following command and press Enter:
pip --versionIf PIP is installed correctly, you will see the version number and the Python version it is associated with. You can now install Python packages using commands like pip install package-name.
Wrapping up
You have installed PIP on your Windows system and verified it works correctly. You can now install, update and remove Python packages from the command line, which speeds up development and makes dependency management straightforward.
If you need to install packages for a specific project, consider using Python virtual environments this helps keep dependencies isolated and secure. Our VPS hosting gives you full control over your Python environment.
If you run into any trouble, get in touch and our team will be happy to help.

Ready to get started?
Launch your website with our reliable cPanel hosting with unlimited bandwidth and expert support.
Get cPanel Hosting