Nginx reverse proxy cache stores temporary copies of your website’s content. When visitors access your site, Nginx serves the cached version directly instead of processing each request through your primary web server. This reduces server load and speeds up page delivery.
You will enable, disable and clear the Nginx cache through your hosting control panel. The process differs slightly between cPanel and Plesk.
Manage Nginx cache in cPanel
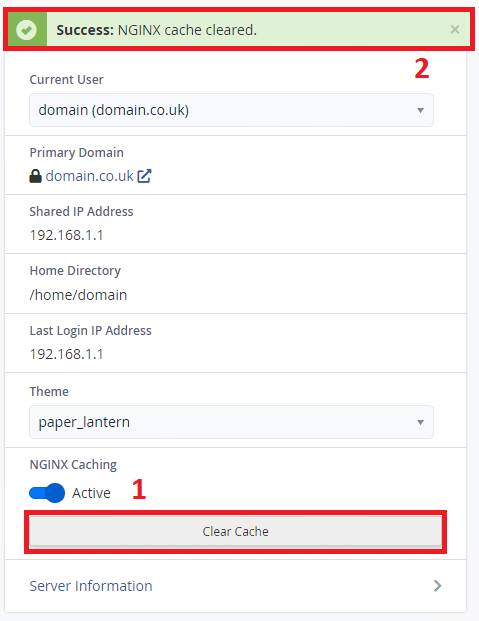
cPanel displays Nginx cache controls on the main overview screen. You can toggle caching on or off and clear stored content when needed.
Enable Nginx cache
- Open the general information panel.
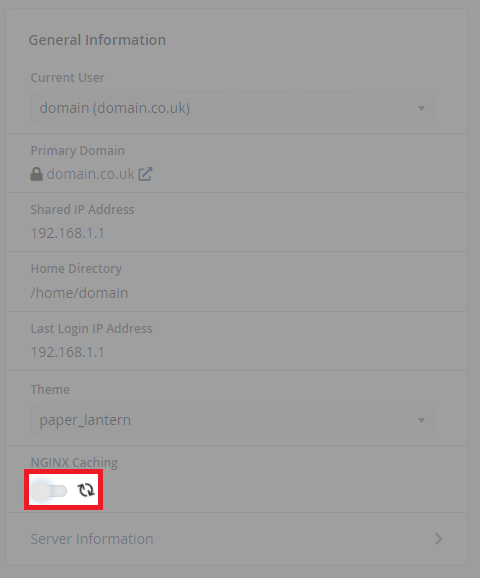
Log in to cPanel and locate the General Information panel on the main overview screen. - Click the Nginx cache toggle.
Find the radio button next to Nginx Cache and click it. A spinning icon appears while the change processes.
- Confirm activation.
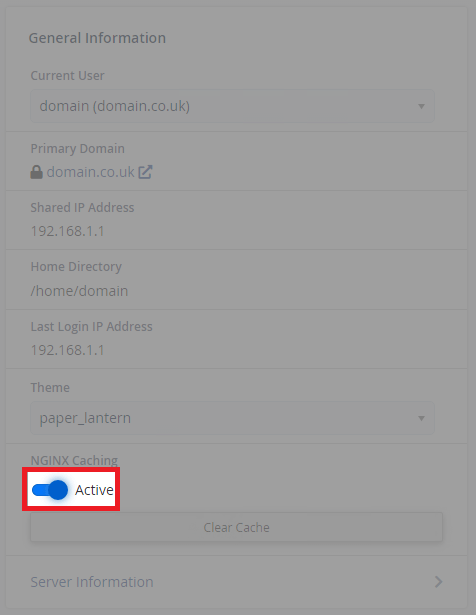
The button turns blue and displays Active when caching is enabled. A Clear Cache button also appears.
Disable Nginx cache
- Click the active toggle.
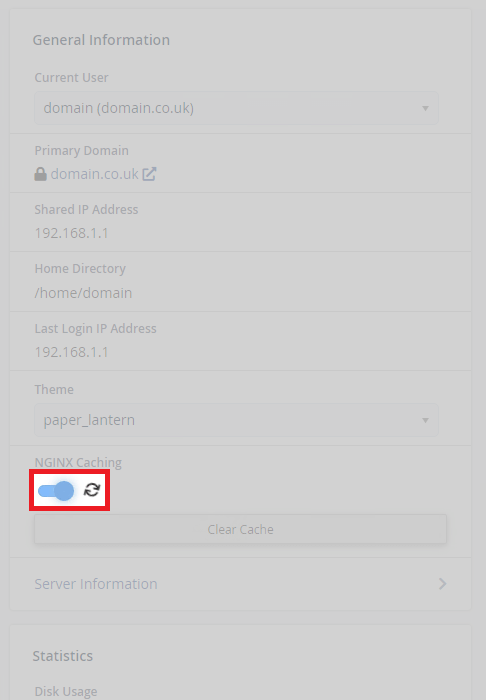
In the General Information panel, click the blue Active button. The loading icon appears while the change processes.
- Confirm deactivation.
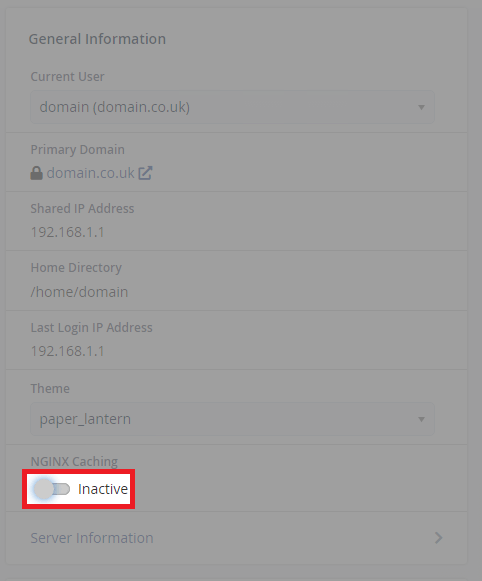
The button turns clear and displays Inactive when caching is disabled. The Clear Cache button disappears.
Clear Nginx cache
- Click Clear Cache.
In the General Information panel, click the Clear Cache button. A green banner appears at the top of the screen confirming the cache was cleared.
Manage Nginx cache in Plesk
Plesk stores Nginx cache settings within your subscription’s hosting configuration. You access these through the Apache and Nginx settings page.
Enable or disable Nginx cache
- Open Apache and Nginx settings.
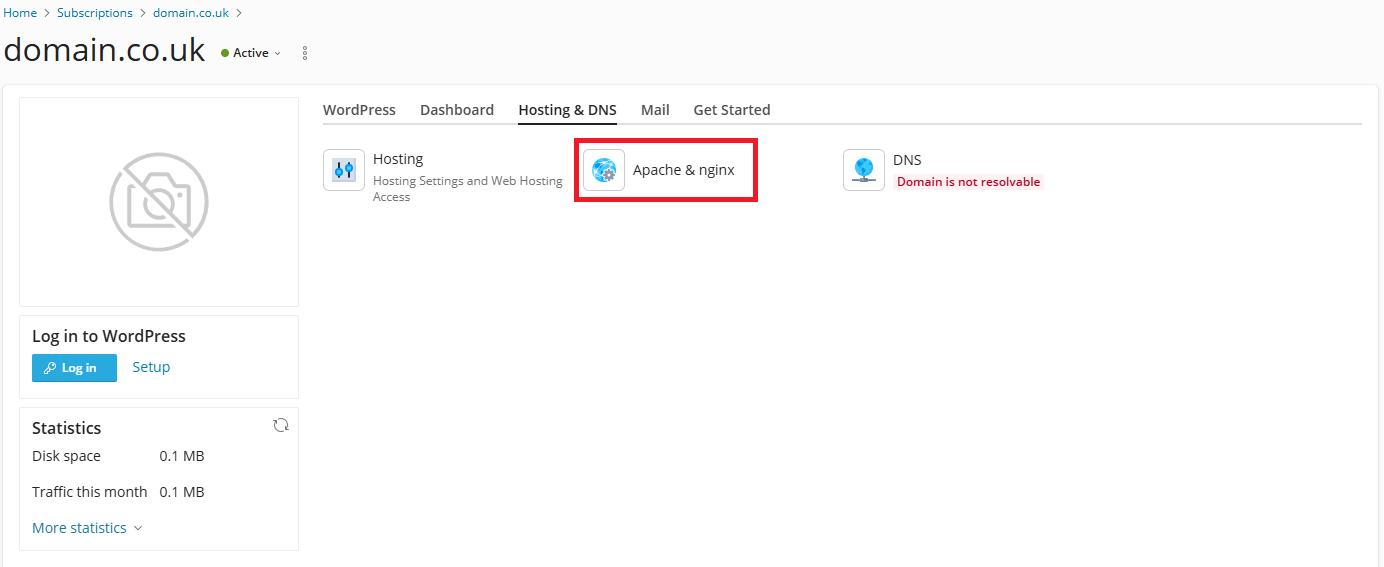
Log in to Plesk, select your subscription and click Hosting & DNS. Then click Apache & nginx Settings.
- Locate the caching checkbox.
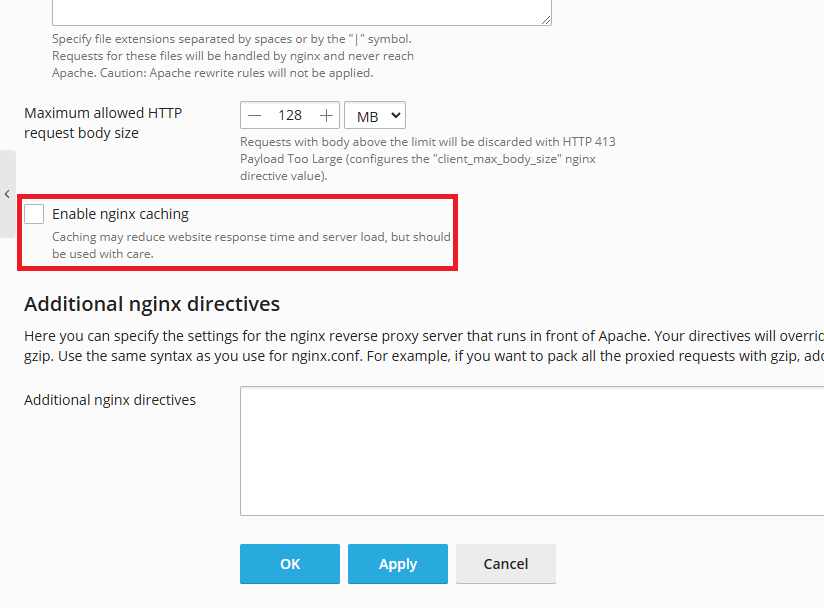
Scroll down to find Enable nginx caching. An unticked checkbox means caching is currently disabled.
- Toggle caching and apply changes.
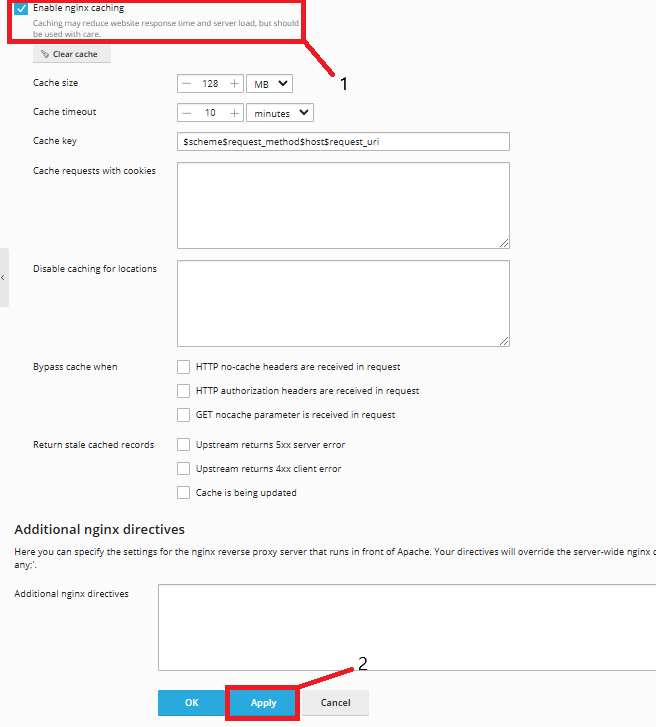
Tick the Enable nginx caching checkbox to enable caching, or untick it to disable. Click Apply at the bottom of the page to save your changes.
Clear Nginx cache
- Click Clear cache.
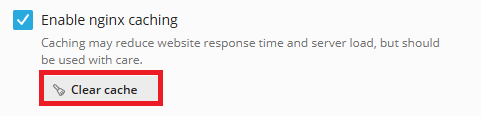
On the Apache & nginx Settings page, locate the Clear cache button below the Enable nginx caching checkbox. Click it to remove all stored cache files.
Wrapping up
You can now control Nginx cache through your hosting control panel. Enabling cache improves site performance by serving stored content to visitors. Clearing cache forces Nginx to fetch fresh content from your web server, which is useful after making site updates.
Monitor your site’s performance after enabling cache. If you notice outdated content appearing, clear the cache to force a refresh.
If you run into any trouble, get in touch and our team will be happy to help.
Did this guide solve your problem?
Still stuck?
Our UK support team answers tickets and live chat every day. Send us the guide you were following and where it stopped working.
Keep learning
Find a guide
Related guides

Hosting that keeps up
cPanel hosting with the tools these guides use, backed by UK support.
Get cPanel Hosting
Keep your site secure
Protect your visitors with SSL certificates – from budget DV to premium EV certificates.
Get SSL Certificate