WordPress does not have a real task scheduler. Instead, it fires its scheduled tasks on every page request by running wp-cron.php whenever a visitor loads a page. On a site with significant traffic this means the same scheduled task may run hundreds of times per hour, consuming CPU and memory that should be serving your visitors.
You will disable WordPress’s built-in cron and replace it with a server-side cron job in cPanel that fires on a schedule you define. This reduces unnecessary resource usage and makes scheduled tasks more reliable on busy and low-traffic sites.
Before you begin
- You need access to your WordPress site’s
wp-config.phpfile, which you can edit in cPanel File Manager. - You need access to Cron Jobs in your cPanel account.
- We recommend creating a WordPress backup before editing
wp-config.php.
Disable WP-Cron in wp-config.php
Disabling WP-Cron requires adding a single constant to your WordPress configuration file. This prevents WordPress from triggering wp-cron.php on page requests.
- Open File Manager.
In cPanel, open File Manager and navigate to the root directory of your WordPress installation (usuallypublic_htmlor a subdirectory within it). - Edit wp-config.php.
Right-clickwp-config.phpand choose Edit. If prompted to confirm, click Edit. - Add the disable constant.
Find the line that readsdefine('WP_DEBUG', false);(ortrueon development sites – either is fine). Add the following line immediately after it:
define('DISABLE_WP_CRON', true);The section should now look like this:
define('WP_DEBUG', false);
define('DISABLE_WP_CRON', true);

/* That's all, stop editing! Happy publishing. */- Save the file.
Click Save Changes in File Manager. WP-Cron is now disabled – no scheduled tasks will run until you set up the cPanel cron in the next step.
Add a cron job in cPanel
Now that WordPress will no longer fire its own scheduled tasks, you need a server-side cron job to trigger wp-cron.php at regular intervals.
- Open Cron Jobs.
In cPanel, locate the Advanced section and click Cron Jobs. - Set the schedule.
Choose how often to run the cron. For most sites, once every 15 minutes is the right balance between responsiveness and resource use. Use the Common Settings dropdown to select Once Per 15 Minutes. - Enter the command.
In the Command field, enter the following, replacingyourdomain.co.ukwith your actual domain:
/usr/bin/wget -O /dev/null https://yourdomain.co.uk/wp-cron.php?doing_wp_cron- Add the cron job.
Click Add New Cron Job to save it. The cron job appears in the list at the bottom of the page.
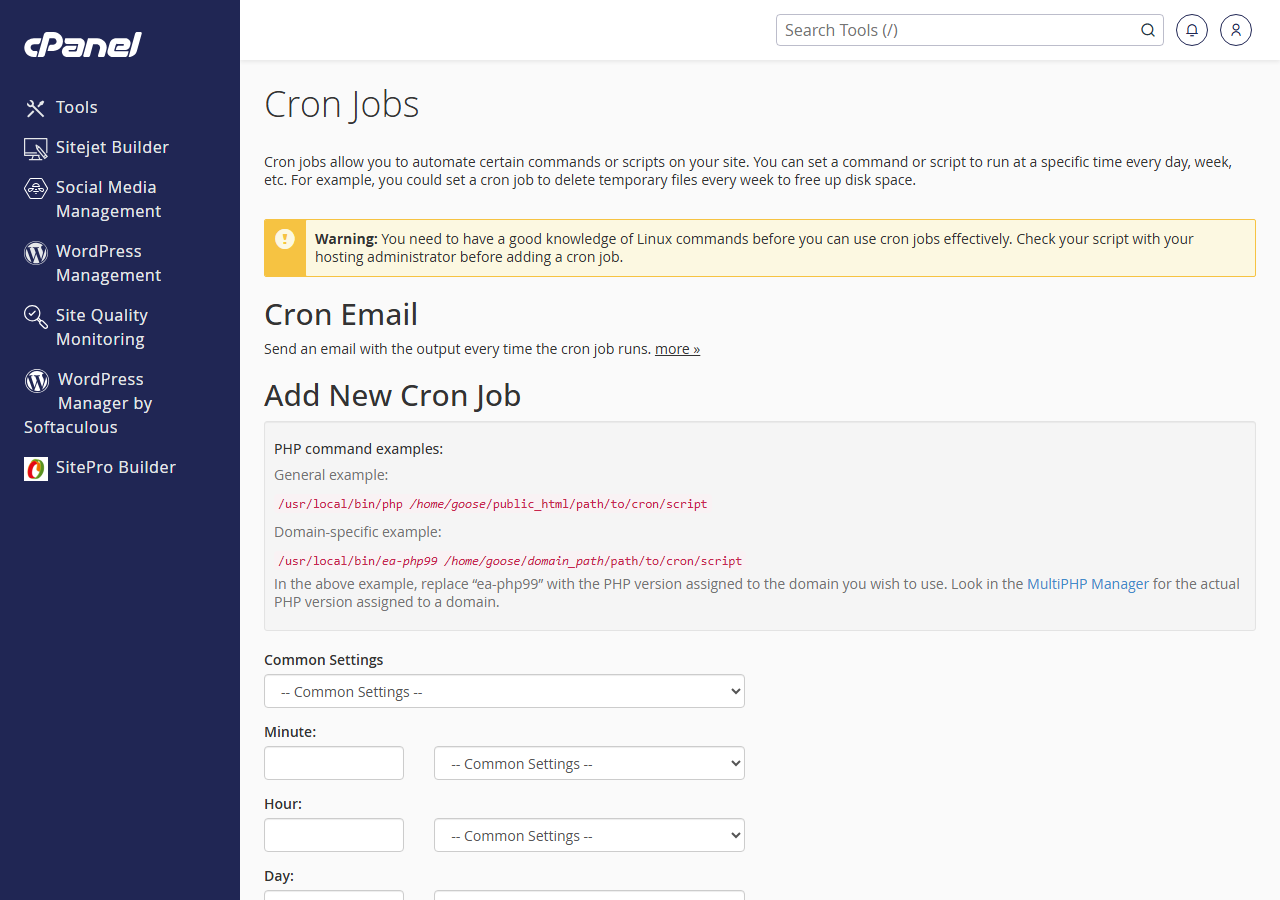
WordPress scheduled tasks now run at the interval you set, regardless of whether anyone is visiting your site.
Choose the right frequency
The frequency you choose depends on what your site uses scheduled tasks for:
- Once daily – sufficient for informational sites that do not publish time-sensitive content.
- Every 15 minutes – suitable for most WordPress sites, including those that schedule posts and use spam filtering plugins.
- Every minute – reserved for e-commerce sites or platforms with real-time stock, payment or sync requirements. Do not run more frequently than needed, as it generates unnecessary server load.
Wrapping up
You disabled WP-Cron’s per-request behaviour by adding DISABLE_WP_CRON to wp-config.php, and replaced it with a real cPanel cron job on a fixed schedule. Scheduled tasks now run reliably without adding overhead to every page request your site receives.
Monitor your site over the next few days to confirm scheduled tasks – such as post publishing, plugin updates and email notifications – continue to work as expected. If anything appears delayed, reduce the cron interval in cPanel. See our guide on fixing WordPress errors if changes to wp-config.php cause unexpected behaviour.
Our WordPress hosting plans include full cPanel access and cron job support for all scheduled task requirements.

