A complete WordPress backup protects your site against data loss from server failures, hacking attempts or update errors. Manual backups give you full control over what gets saved and where it goes.
You will create a local backup by downloading your WordPress files via FTP and exporting your database through phpMyAdmin. This method works on any hosting platform and stores everything you need to restore your site if something goes wrong.
Before you begin
- You need FTP credentials for your hosting account. These are in your welcome email or available through your control panel.
- We recommend using FileZilla or another FTP client. Our File Manager guide covers alternative methods.
- Create a dedicated folder on your computer to store backup files. Storing backups locally complies with our general terms.
What makes up a WordPress backup
A complete WordPress backup contains three components that work together to run your site. Understanding what each part does helps you verify your backup is complete.
The installation directory holds WordPress core files, your theme, plugins and all uploaded media. The database stores posts, pages, comments, user accounts and site settings. The configuration file (wp-config.php) connects WordPress to your database and contains credentials WordPress needs to function.
Missing any of these three components means you cannot restore a working site. Your backup process must capture all three to be useful.
Download WordPress files via FTP
FTP access lets you download every file from your WordPress installation. This includes core files, themes, plugins and uploads that make up your site’s front end.
- Locate your FTP credentials.
Check your welcome email for FTP hostname, username and password. If you cannot find these details, contact support or generate new credentials through your control panel. - Connect to your server.
Open your FTP client and enter your hostname, username and password. Set the port to 21 for standard FTP or 22 for SFTP. Click Connect to establish the connection. - Navigate to your WordPress directory.
Once connected, locate your WordPress installation folder. On cPanel accounts this is typicallypublic_html. On multi-site setups, verify you are in the correct domain folder before proceeding. - Select all WordPress files.
Highlight all files and folders in your WordPress directory. Use Ctrl+A on Windows or Cmd+A on Mac to select everything at once.
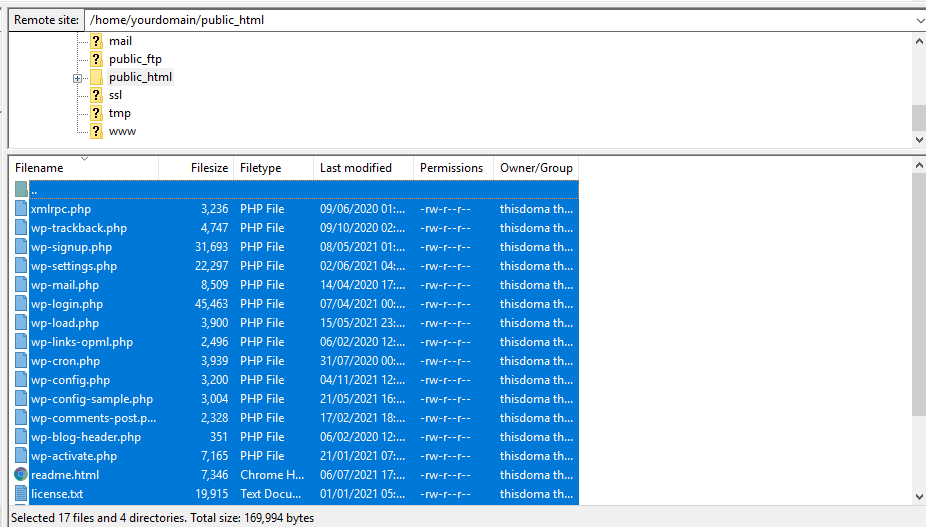
- Download files to your backup folder.
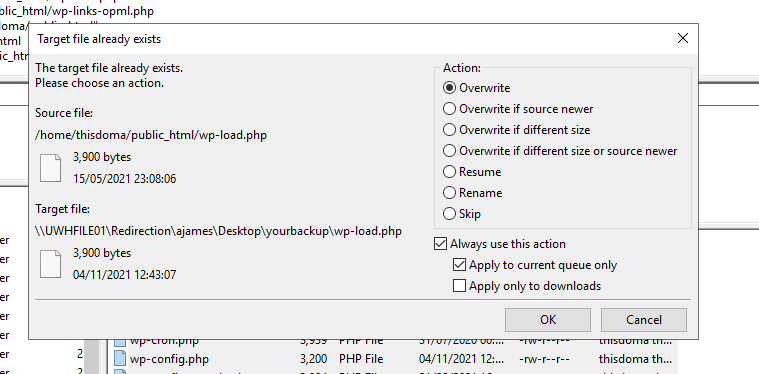
Drag the selected files from the remote server panel to your local backup folder. Large sites may take several minutes to transfer depending on your connection speed. - Handle overwrite warnings.
If a duplicate file warning appears, select Overwrite under Action. Tick Always use this action and Apply to current queue only, then click OK. This ensures all files transfer correctly without interruption.
- Verify the download completed.
Check your backup folder contains all WordPress files. The folder size should match what your FTP client reported for the remote directory.
Your WordPress files are now backed up locally. Next you need to export the database to complete the backup.
Locate your database credentials
Before exporting your database, you need to identify which database WordPress uses. The configuration file contains this information.
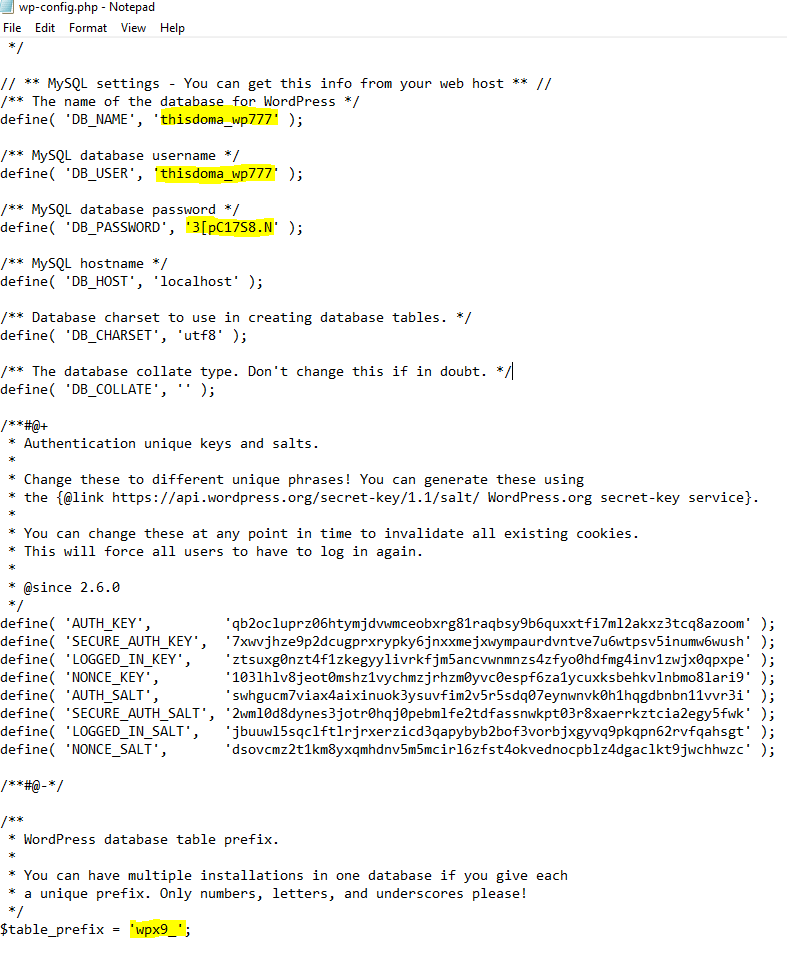
- Open wp-config.php.
Navigate to your backup folder and openwp-config.phpin a text editor. This file sits in the root of your WordPress installation. - Find the database name.
Look for the line starting withdefine('DB_NAME'. The value in quotes is your database name. Write this down as you will need it to export the correct database. - Note the table prefix.
Scroll down to find$table_prefix. This value (usuallywp_) identifies your WordPress tables within the database. Knowing this helps you verify the export contains the right data.
Keep this file open while you export the database. You will reference it to confirm you are exporting the correct database.
Access phpMyAdmin
phpMyAdmin provides a web interface for managing MySQL databases. The access method differs between cPanel and Plesk control panels.
cPanel
- Log in to cPanel.
Access your cPanel control panel using the URL and credentials provided in your welcome email. - Open phpMyAdmin.
Scroll to the Databases section and click phpMyAdmin. This opens phpMyAdmin in a new browser tab.

Plesk
- Log in to Plesk.
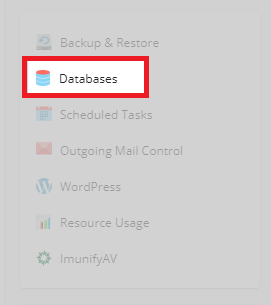
Access your Plesk control panel using your login credentials. - Navigate to Databases.
From your domain overview, find the features sidebar on the right and click Databases. This displays all databases associated with your domain.
- Identify your WordPress database.
Compare the database names listed against theDB_NAMEvalue in yourwp-config.phpfile. Click the phpMyAdmin icon next to the matching database name.

phpMyAdmin opens in a new tab. You are now ready to export your database.
Export your WordPress database
Exporting creates a file containing all your WordPress content, settings and user data. This file works alongside your WordPress files to create a complete backup.
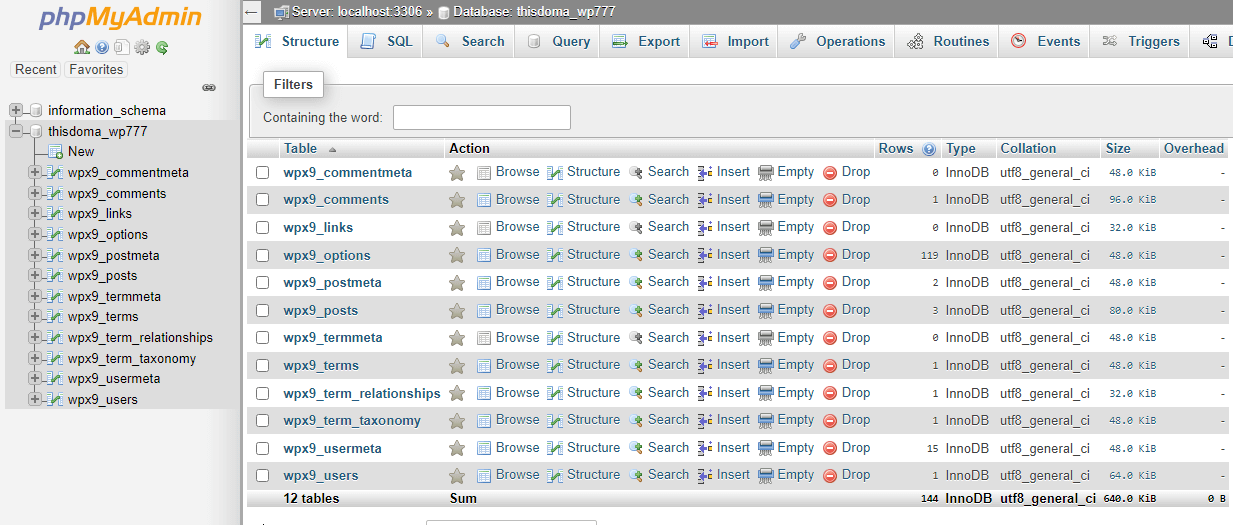
- Select your database.
In the phpMyAdmin sidebar, click on your WordPress database name. The database name should match the value from yourwp-config.phpfile.
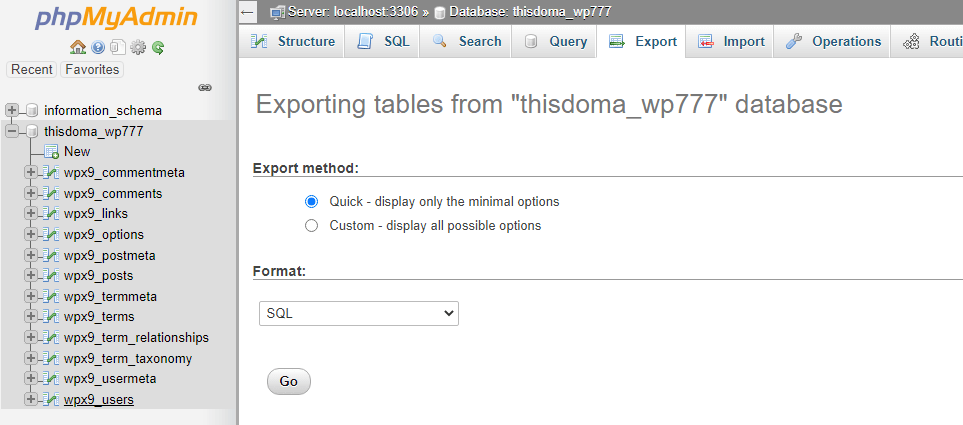
- Open the Export tool.
Click Export in the top navigation bar. This displays export options for your database. - Start the export.
Leave all settings at their defaults and click Go. The quick export method includes all tables and data your WordPress site needs.
- Save the database file.
Your browser prompts you to save a file with a.sqlextension. Save this file to your backup folder alongside your WordPress files. - Verify the export.
Check the file size is reasonable for your site. A small blog might be a few megabytes while a large site with many posts could be hundreds of megabytes. An unusually small file suggests the export failed.
Your backup folder now contains everything needed to restore your WordPress site. Store this folder somewhere safe, preferably on an external drive or cloud storage service.
Further reading on WordPress backups
Manual backups give you complete control but require regular attention to stay current. Automated backup solutions remove this burden by running on a schedule without intervention.
Note – Archival is disallowed on the shared hosting platform.
WordPress backup plugins like UpdraftPlus and BackupBuddy handle both files and database exports automatically. These tools can send backups to remote storage services such as Dropbox, Google Drive or Amazon S3. The UpdraftPlus documentation covers setup and scheduling options in detail.
For sites running business operations, consider implementing a 3-2-1 backup strategy. This means keeping three copies of your data on two different media types with one copy stored off-site. The 3-2-1 backup strategy guide from Backblaze explains how this approach protects against multiple failure scenarios.
Test your backups regularly by restoring them to a staging environment. A backup you cannot restore is worthless when disaster strikes. Our WordPress installation guide covers the restoration process.
Wrapping up
You now have a complete local backup of your WordPress site. You downloaded all WordPress files via FTP, identified your database credentials in wp-config.php and exported your database through phpMyAdmin. This backup protects your site content, configuration and uploaded media.
Schedule regular backups to keep your backup current with site changes. We recommend backing up before major updates, plugin installations or theme changes. Store backup files on external media or cloud storage to protect against server failures. Our WordPress hosting plans include automated backup options that handle this process for you.
If you run into any trouble, get in touch and our team will be happy to help.

Running a WordPress site?
Get fast, secure and reliable WordPress Hosting with optimised for performance with AccelerateWP.
Get WordPress Hosting
Need multiple accounts?
Create fully isolated individual accounts for your clients and manage them all from one dashboard.
Get Reseller Hosting