Web contact forms, such as Contact Form 7, are essential for communication between website owners and visitors. However, without proper protection these forms become targets for bots and spam attacks. The same applies to login pages which, without CAPTCHA protection, remain vulnerable to brute force attacks.
Integrating reCAPTCHA helps distinguish between legitimate users and automated bots, preventing abuse whilst maintaining functionality. For comprehensive protection, you should also consider WordPress security plugins alongside reCAPTCHA.
Setting up a reCAPTCHA account in Google
Before you can enable reCAPTCHA on your sites you first need to set up an account in Google. This will allow you to link from your site to Google via verification keys.
If you haven’t already done so, you’ll need to install WordPress before following this guide.
1. First using the following link open the Google reCAPTCHA page in your browser of choice (for this example we will be using Chrome).
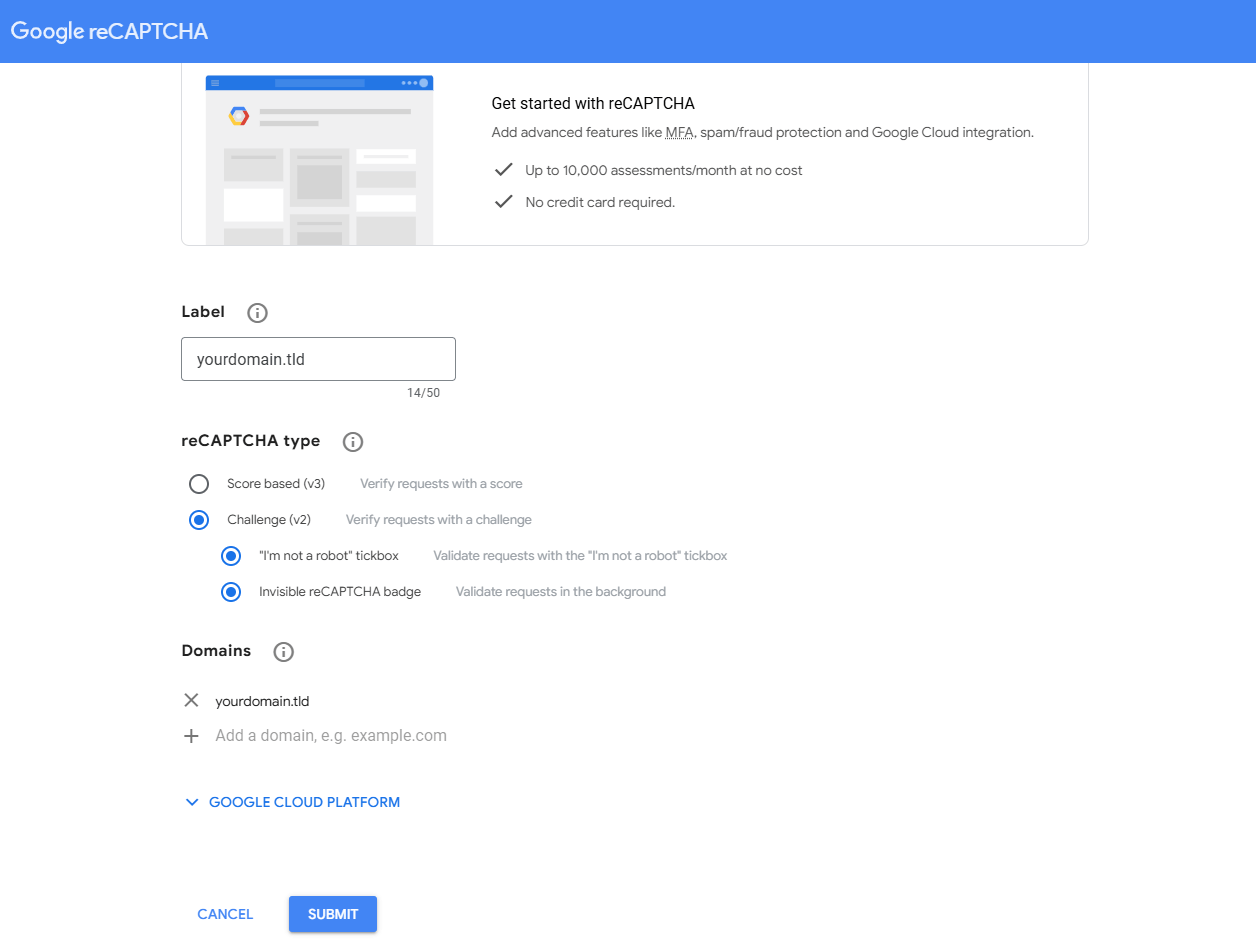
2. From here you start configuring your CAPTCHA in this guide we are going to use type 2 Challenge (v2) with both the tick box and invisible badge. Enter the domains you want to use, enter multiple here if you are planning setup on future sites. Click “Submit” when you are happy with the configuration.
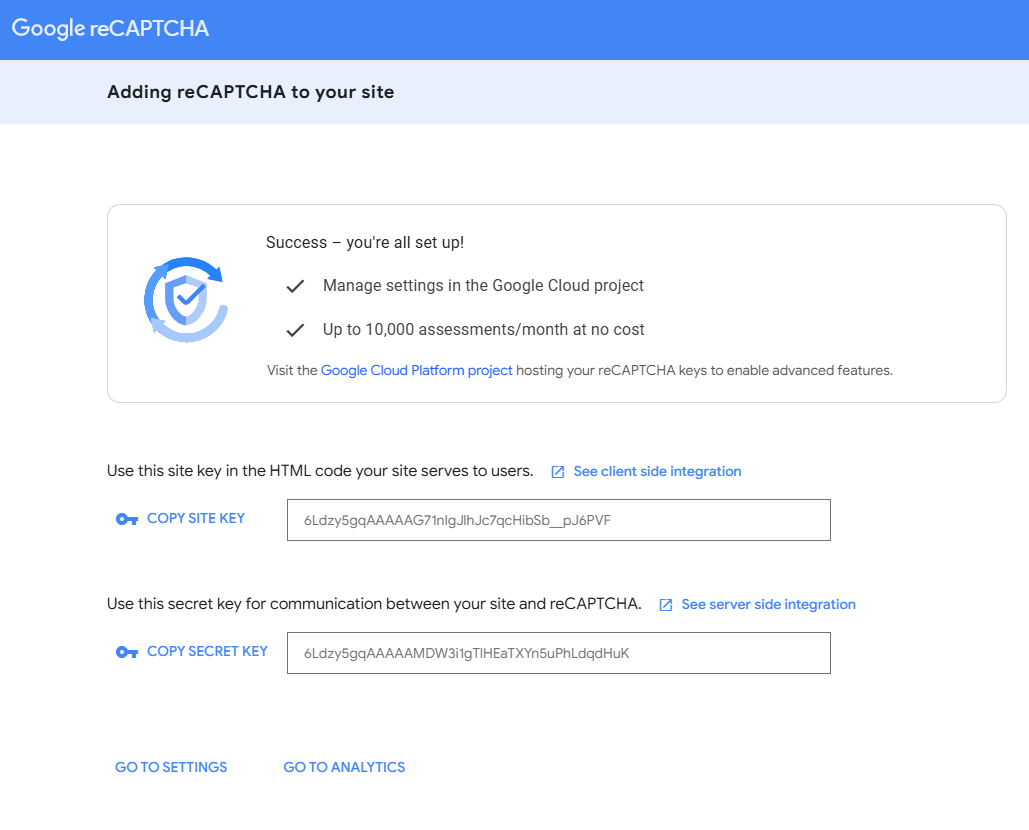
3. Finally, you will be prompted with a site (HTML) and secret key which are used together during the set up process.
Adding reCAPTCHA to Contact Form 7
If you are using the Contact Form 7 plugin adding reCAPTCHA is straightforward and can be done via the plugins integration menu.
- From the wp-admin area, click on Contact then Integration.
- The integration box should be visible, click Setup Integration and then add in the site and secret keys you have from your Google setup.
- With that completed, click Save to enable it across all the contact forms on your site.
Adding reCAPTCHA to WordPress login page.
Securing your login page with reCAPTCHA prevents automated brute force attacks. If you’ve lost access to your admin area, you can reset your WordPress admin password before proceeding.
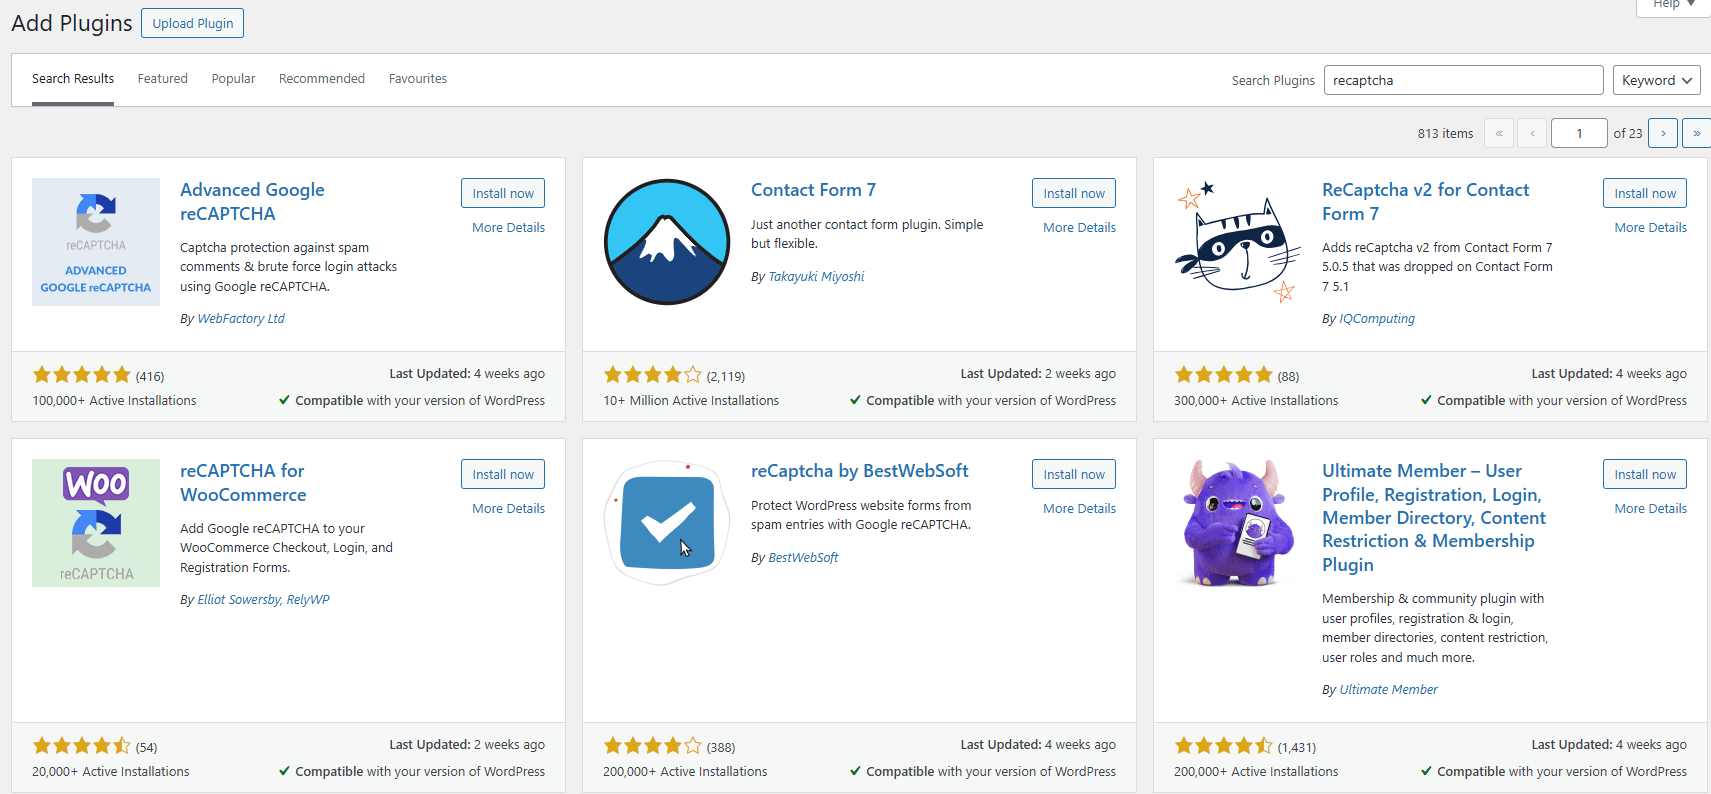
1. Start by logging into the WordPress admin area and heading to the plugins section, from here using the search bar labelled “Search Plugins” search “Advanced Google reCAPTCHA” (This is optional, you can choose another plugin if you prefer). Click “Install Now” & “Activate” to enable this plugin on your WordPress site.
2. Afterwards from the WP Admin area click on “Settings” revealing Advanced Google reCAPTCHA, click this to begin setup.
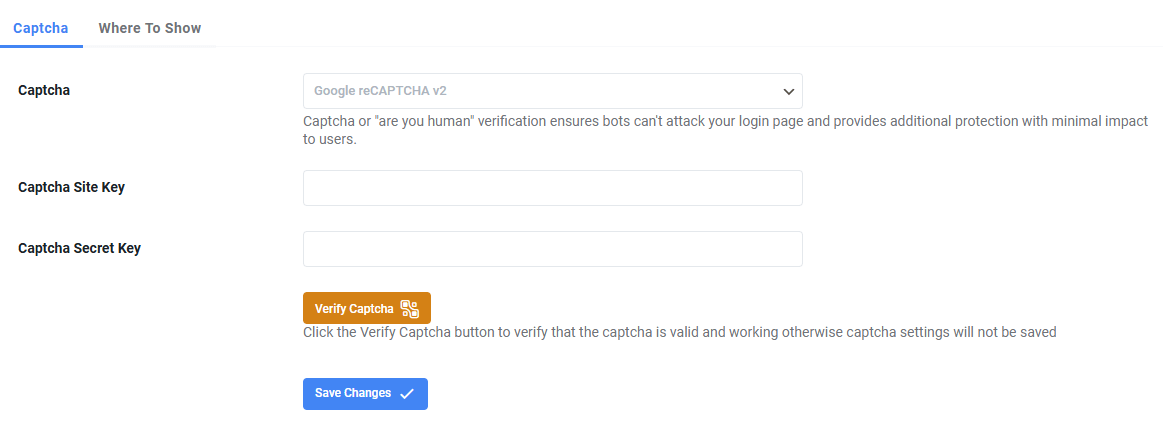
3. From the plugins configuration settings click on the captcha tab and select “Google reCAPTCHA v2“.
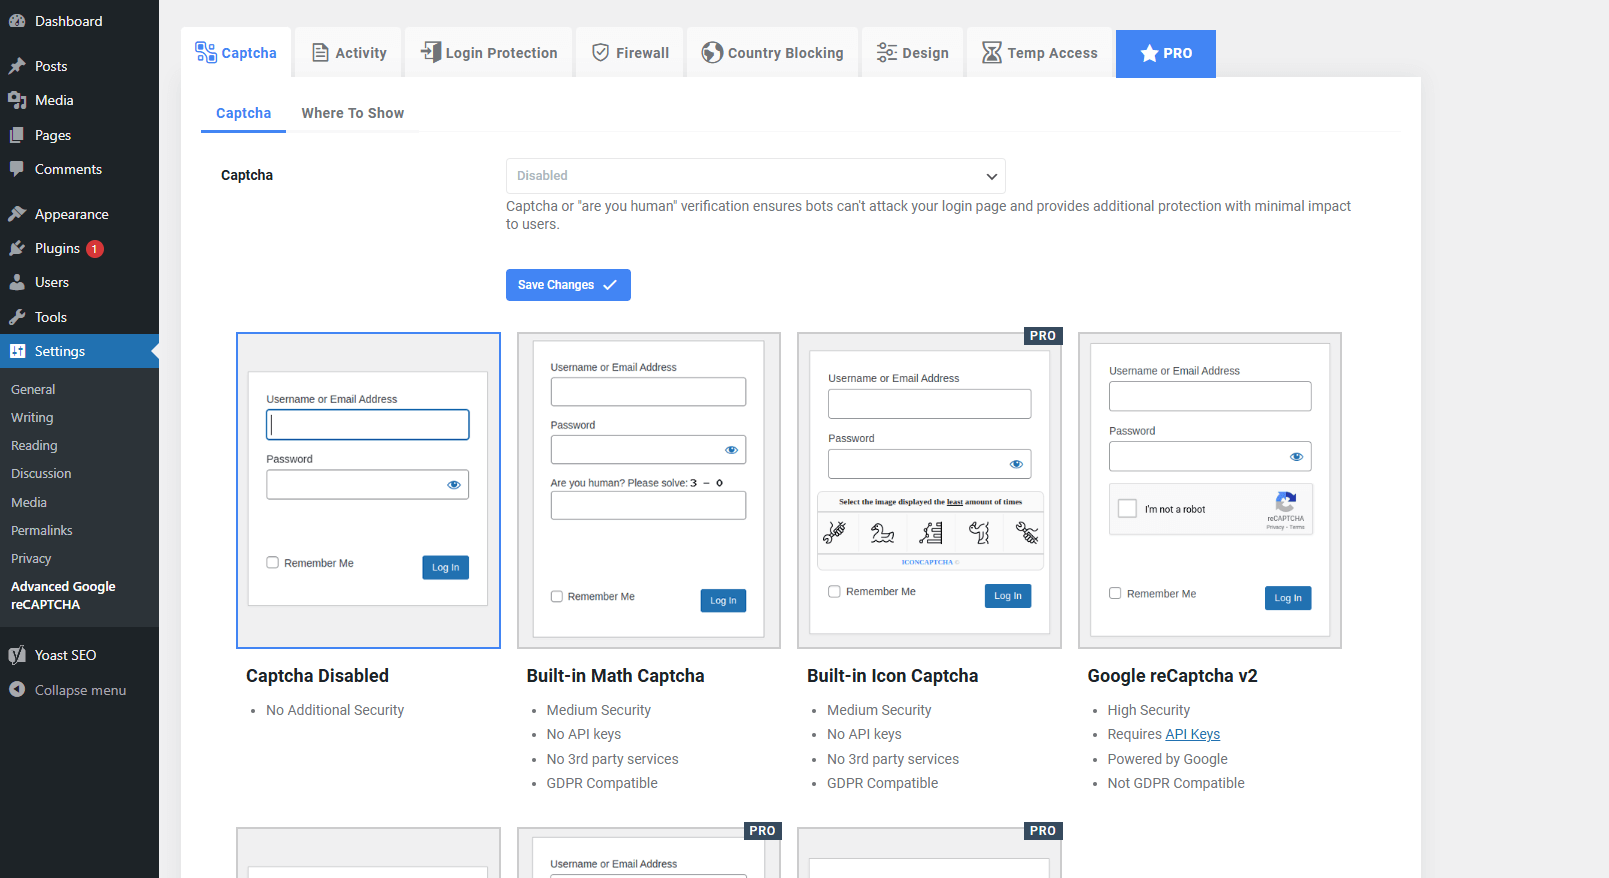
4. Finally to link the plugin with your Google account enter the site and secret key from the earlier set up guide. Verify the link with the “Verify CAPTCHA” button and if successfully connected click “Save Changes”. Your login page should now be secured with CAPTCHA.
Additional security measures
Alongside reCAPTCHA, you should enable HTTPS on your WordPress site to encrypt data transmitted between your visitors and your server. For more guidance on securing your WordPress installation, check our WordPress frequently asked questions.

Ready to get started?
Launch your website with our reliable cPanel hosting with unlimited bandwidth and expert support.
Get cPanel Hosting