Nameservers direct traffic to your domain by storing DNS records that point to your website, email server and other services. You need to change nameservers when moving your domain to new hosting or configuring external services like Cloudflare.
You will update nameserver settings through your client area. This takes effect within 24 hours as the changes propagate across the internet’s DNS system.
Before you begin
- You need access to your client area.
- Your domain must be registered or transferred to your account.
- We recommend noting your current nameservers before making changes.
Default nameservers for shared hosting
All shared hosting plans use these nameservers by default. This includes standard, premium and reseller packages. These values ensure your DNS records connect correctly to your hosting package.
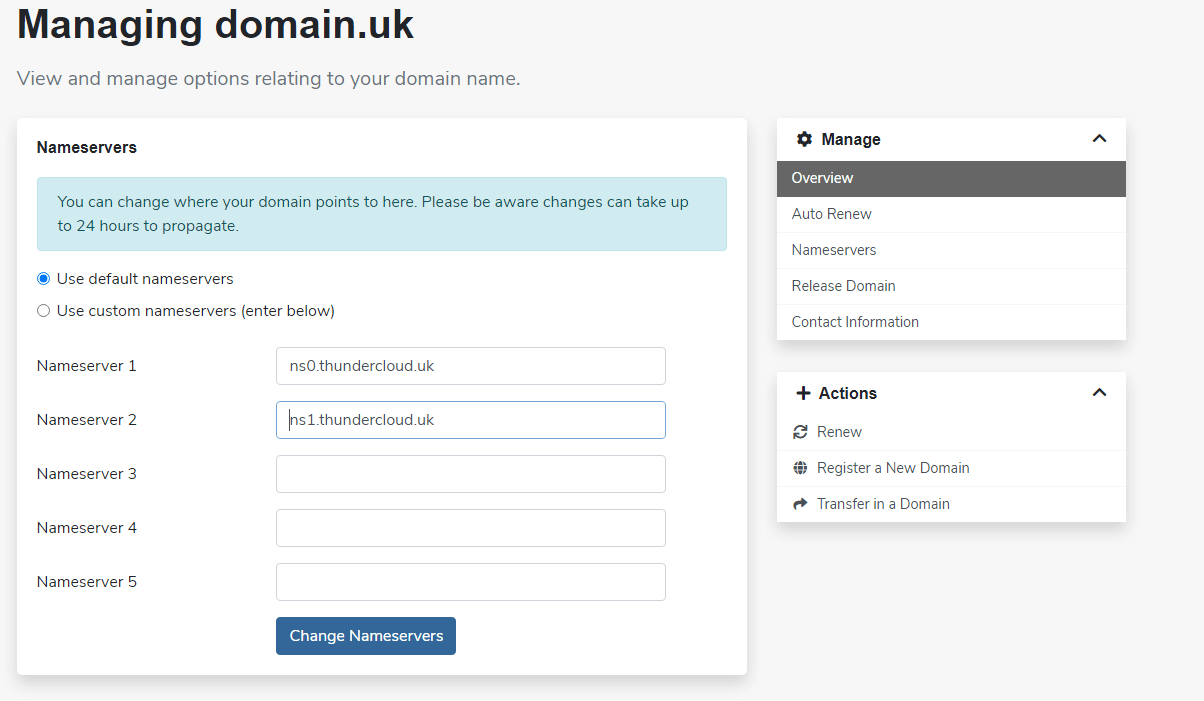
ns0.thundercloud.uk
ns1.thundercloud.uk
You can create custom nameservers based on your own domain names if you want to white-label your service. VPS hosting customers receive private nameservers during the build process because the VPS acts as its own DNS host.
Change nameservers through your client area
You will access your domain settings and update the nameserver configuration. Incorrect nameservers are one of the most common causes of websites appearing broken, so verify the values before saving.
- Log in to your client area.
Access your account atunlimitedwebhosting.co.uk/client/loginusing your email address and password. - Open the domains section.
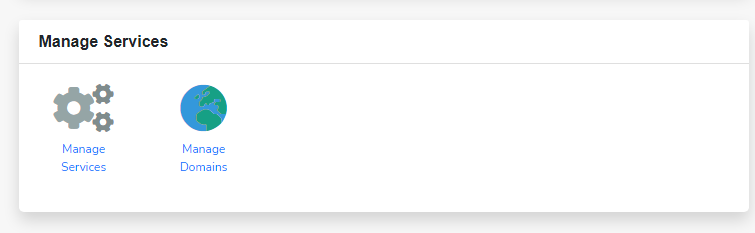
In the Manage Services area, click Manage Domains.
- Select your domain.
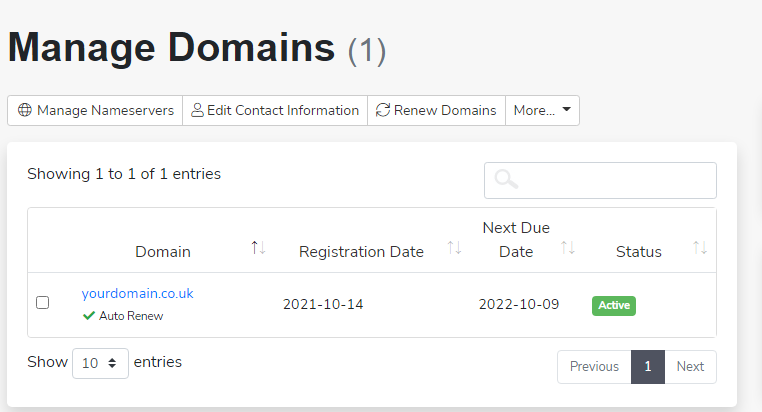
Click the domain name you want to modify from the list of registered domains.
- Access nameserver settings.
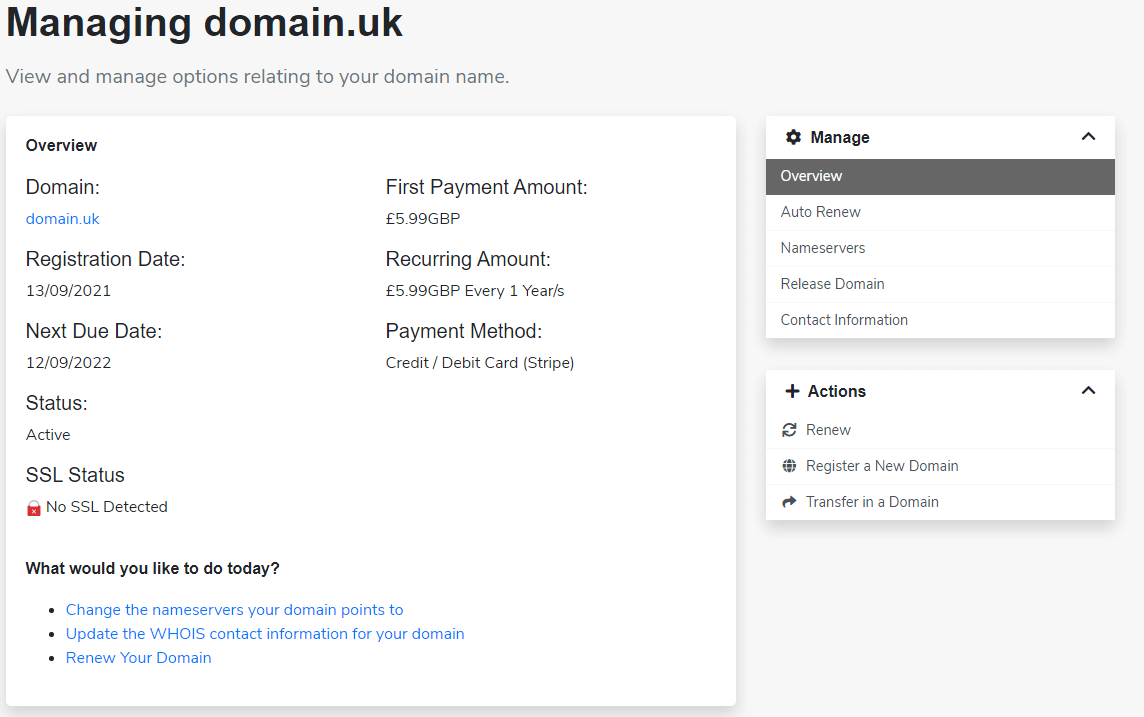
In the Manager sidebar on the right, click Nameservers.
- Update the nameserver values.
Enter the new nameserver addresses in the provided fields. Most configurations require at least two nameservers for redundancy. - Save your changes.
Click Change Nameservers to apply the new configuration.
Your nameserver changes will propagate across the DNS system within 24 hours. During this period, some visitors may see your old site while others see the new one as DNS servers update their cached records.
Wrapping up
Your domain now points to the new nameservers. DNS propagation completes within 24 hours, after which all traffic routes through the updated configuration. You can verify the change by checking your domain’s DNS records using online lookup tools.
Review our guide on managing DNS zones to configure specific records like A, AAAA and MX entries. Our web hosting plans include DNS management tools for complete control over your domain configuration.

Need a domain name?
Search and register your perfect domain name hundreds of extensions available.
Search Domains
Keep your site secure
Protect your visitors with SSL certificates – from budget DV to premium EV certificates.
Get SSL Certificate