Custom email accounts that match your domain name establish credibility and strengthen your brand identity. Creating an email address like contact@yourdomain.co.uk appears more professional than using a generic provider.
You will create email accounts through your hosting control panel using either cPanel or Plesk. Both platforms provide straightforward tools for setting up addresses with secure passwords and configurable storage quotas.
Before you begin
- You need a registered domain name pointed to your hosting account.
- Access to your cPanel or Plesk control panel is required.
Create accounts using the quick create tool
The quick create tool in your client area provides the fastest method for setting up email accounts. This feature works for cPanel hosting and cPanel reseller main accounts.
- Log in to your client area.
Access the Unlimited Web Hosting client area using your account credentials. - Open your hosting service.
Locate your hosting service on the main panel and click View Details. This displays your service management page.
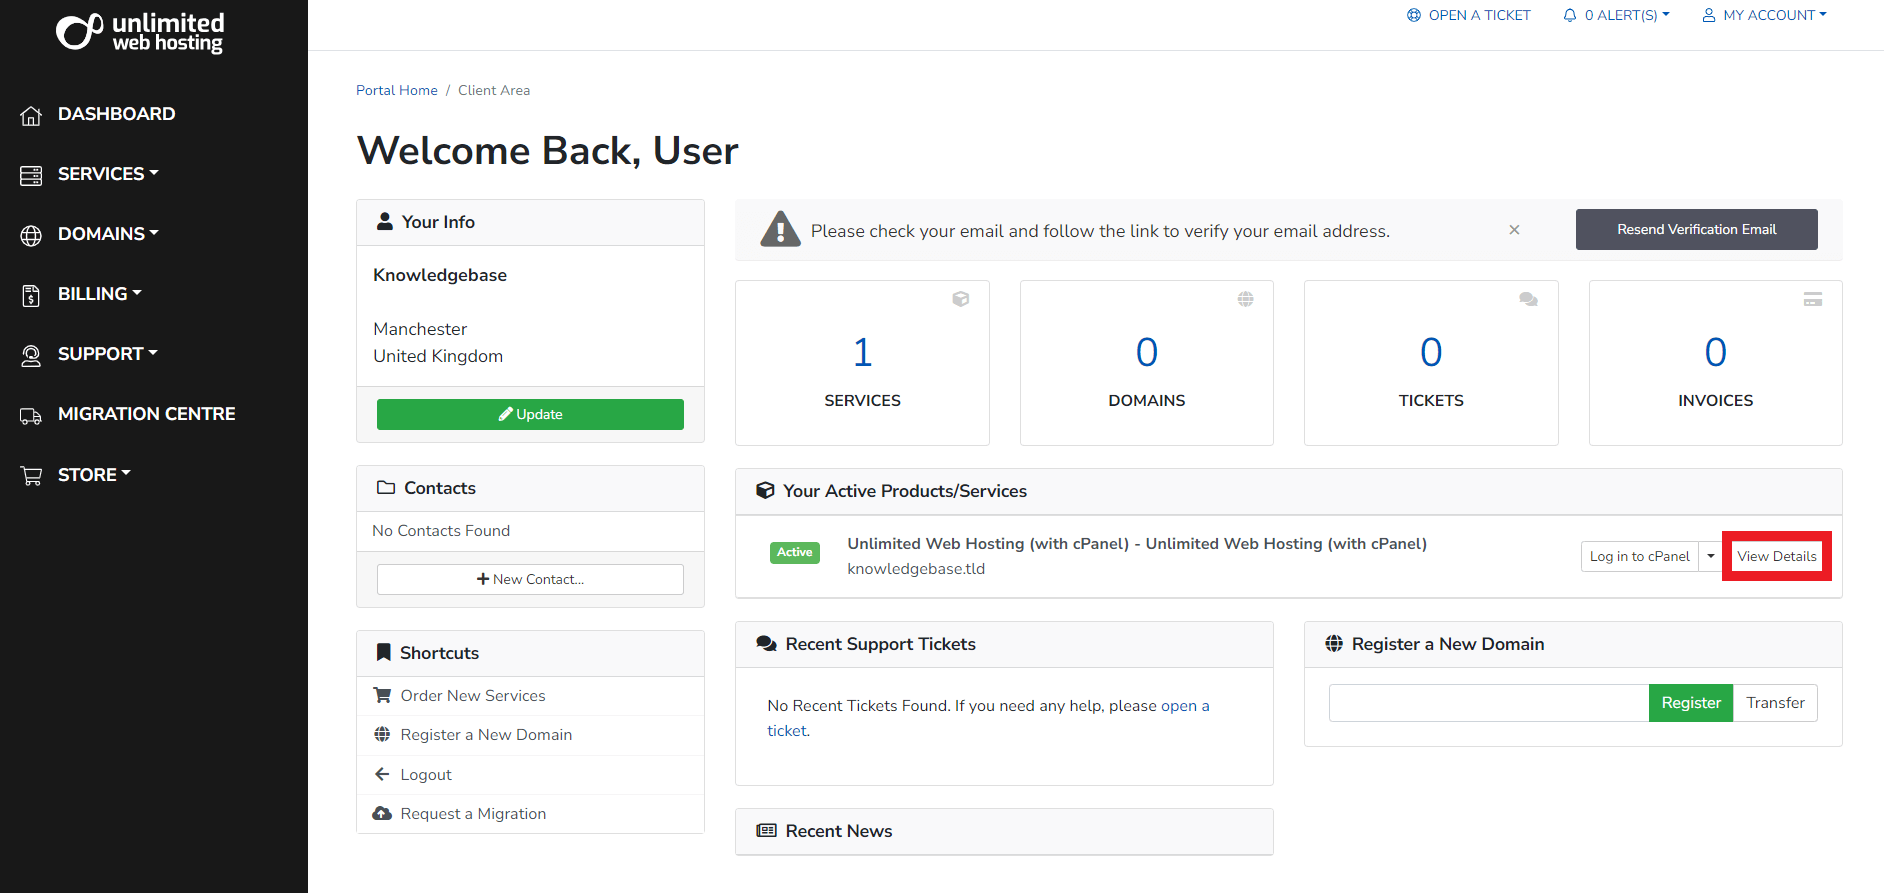
- Create the email account.
Enter your desired email address and password in the quick create tool fields, then click Create. Your new email account is ready to use immediately.

Create an email account in cPanel
The cPanel email accounts interface provides additional configuration options including custom mailbox quotas. You access this through your hosting control panel.
- Log in to cPanel.
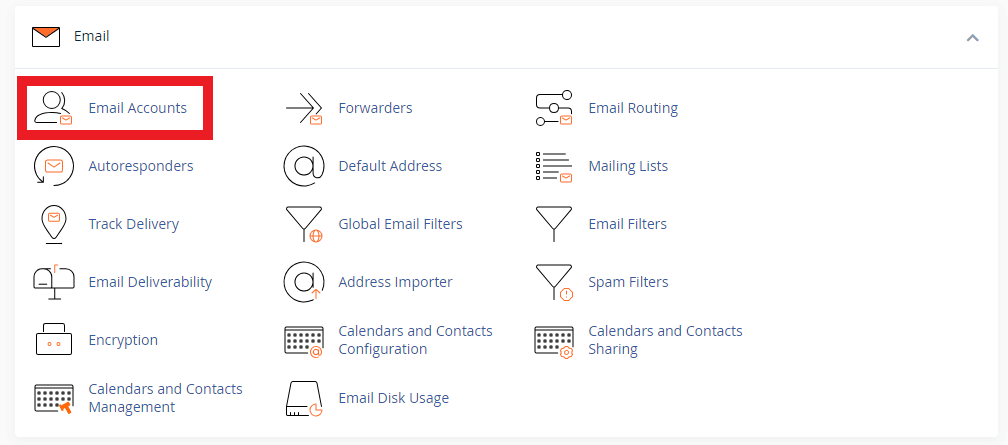
Access your cPanel control panel using your username and password. Your login URL follows the formatyourdomain.co.uk/cpanel. - Open Email Accounts.
Locate the Email section on your cPanel dashboard and click Email Accounts. This displays all existing email addresses for your domain.
- Start creating an account.
Click the Create button at the top of the Email Accounts page. This opens the account creation form.

- Configure account details.
Enter your desired email address in the Username field. Click Generate next to the password field to create a secure password automatically. We recommend using the password generator because it produces strong, unique passwords that protect your account.
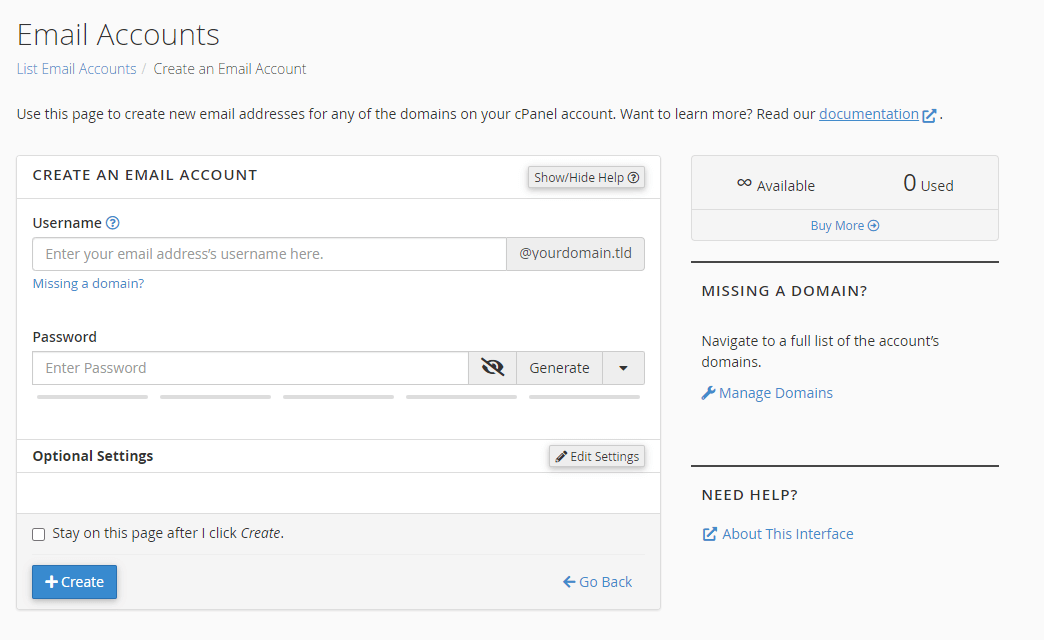
- Adjust storage quota (optional).
Click Edit Settings to modify the mailbox quota. The default quota works for most users, but you can increase it if you expect to store large volumes of email. - Finalise the account.
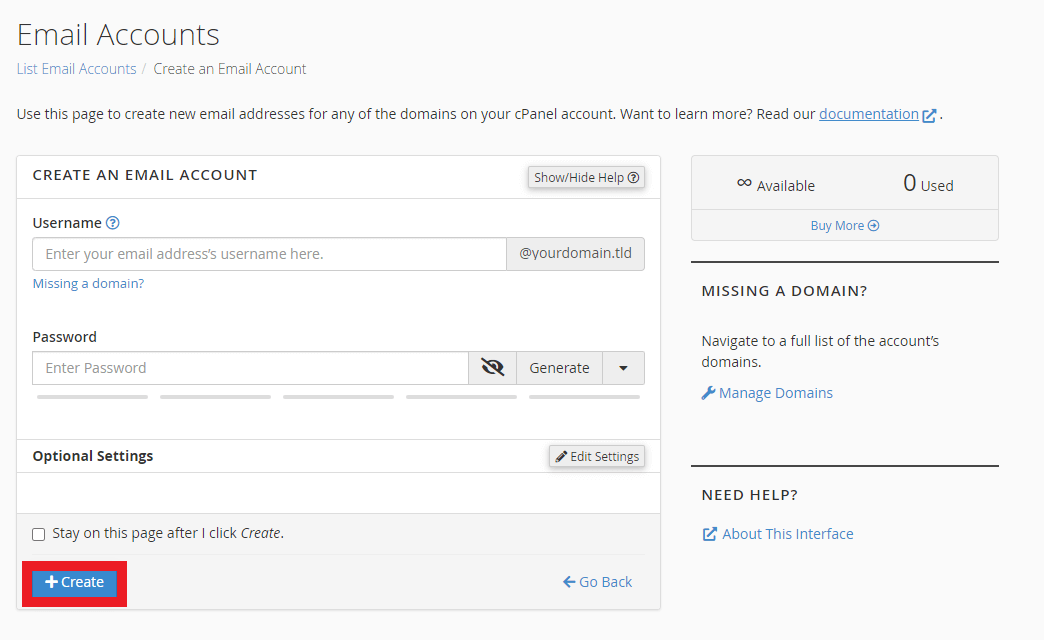
Click Create at the bottom of the form. Your email account is now active and ready to receive messages.
Create email accounts in Plesk
Plesk organises email management under the Mail section of your control panel. You create accounts through a similar process to cPanel with slightly different navigation.
- Log in to Plesk.
Access your Plesk control panel using your login credentials. - Expand the Mail section.
Locate the Mail section in your Plesk dashboard and click Show More. This reveals additional email management options. - Open email addresses.
Click Show Email Addresses to display all existing email accounts for your domain. - Start creating an account.
Click Create an Email Address to open the account setup form. - Configure and save.
Enter your desired email address in the provided field. Click Generate next to the password field to create a secure password automatically. Click OK to create the account. Your new email address is now active.
Wrapping up
You have created professional email accounts that match your domain name. Your new addresses are ready to send and receive messages immediately through webmail or email clients.
Consider setting up email forwarding if you want messages sent to multiple addresses.

Ready to get started?
Launch your website with our reliable cPanel hosting with unlimited bandwidth and expert support.
Get cPanel Hosting