Out of office replies let your contacts know when you are unavailable to respond to emails. Setting up an autoresponder in Roundcube prevents confusion and manages expectations while you are away from your inbox.
You will configure an autoresponder through cPanel, customise your message and set optional start and end dates. Once active, Roundcube sends automatic replies to incoming emails without requiring any action from you.
Before you begin
- You need access to your cPanel control panel.
- The email account must already exist in cPanel.
Access Roundcube through cPanel
You need to open Roundcube webmail before you can configure autoresponders. cPanel provides direct access to Roundcube for each email account.
- Log in to cPanel.
Access your cPanel control panel using the credentials provided in your welcome email. - Open the Email section.
Scroll down to the Email section on the cPanel homepage.
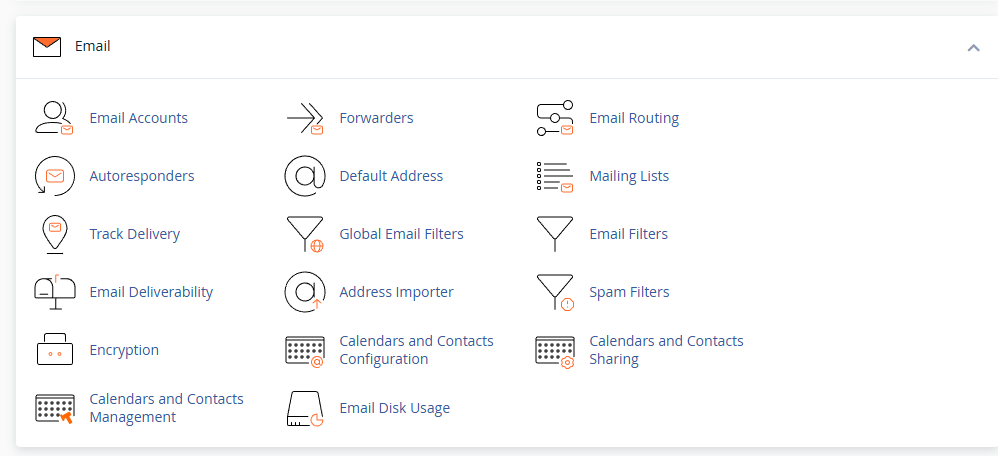
- Click Email Accounts.
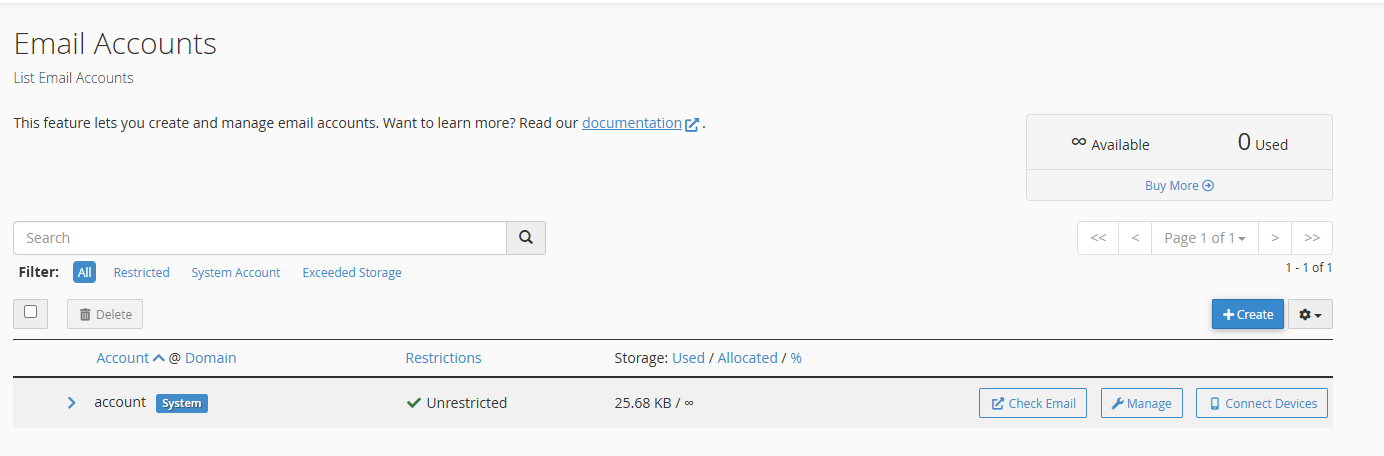
This opens a list of all email accounts configured on your hosting account. - Select Check Email.
Find the email account you want to configure and click Check Email next to it. This opens Roundcube webmail in a new tab.
Roundcube opens with your inbox displayed. You can now configure autoresponder settings.
Configure your autoresponder
The autoresponder settings control when automatic replies are sent and what message recipients receive. You can customise the message content and schedule specific dates for the autoresponder to run.
- Click Autoresponders.
In the Roundcube interface, click the Autoresponders option. This takes you to the autoresponder management page.

- Click Add Autoresponder.
This opens the autoresponder configuration form where you set up your out of office message. - Set the interval.
The Interval field controls how often the same person receives your automatic reply. Setting this to 24 hours prevents the same contact receiving multiple replies if they email you several times in one day. - Configure the sender details.
The Email field shows the address sending the reply. The From field displays your name in the recipient’s inbox. Leave these as the defaults unless you want replies sent from a different address. - Write your subject line.
Enter a clear subject in the Subject field such as “Out of office” or “Away from email”. This tells recipients immediately that your reply is automatic. - Compose your message.
In the Body field, write the main content of your automatic reply. Include when you will return and who to contact for urgent matters if appropriate. - Set start and stop dates.
Use the Start and Stop fields to schedule when your autoresponder runs. This activates and deactivates the reply automatically on the dates you specify.
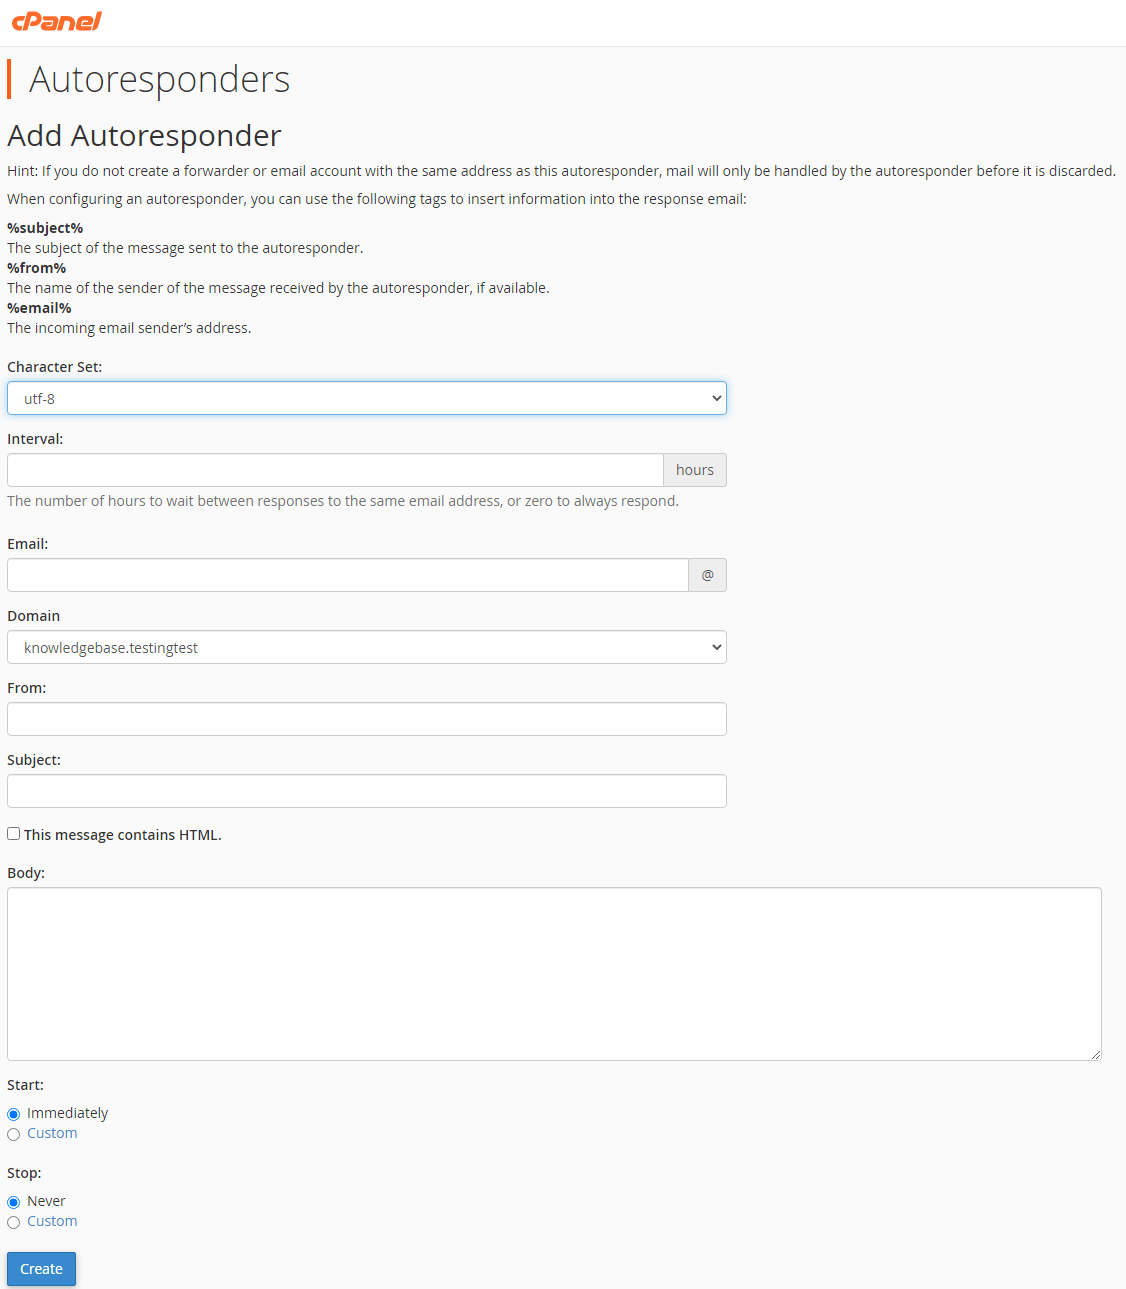
- Click Create.
This saves your autoresponder settings and activates the automatic replies. Roundcube now sends your configured message to anyone who emails this account.
Your out of office reply is now active. You can return to the autoresponder page at any time to edit the message or disable the autoresponder.
Wrapping up
Your Roundcube autoresponder now sends automatic out of office replies to incoming emails. You configured the message content, set an appropriate interval and scheduled optional start and end dates. Recipients receive your message without any manual action from you.
Check your autoresponder settings if you need to update the message or change the schedule. If you use Plesk instead of cPanel, learn how to manage email settings in Plesk.

Ready to get started?
Launch your website with our reliable cPanel hosting with unlimited bandwidth and expert support.
Get cPanel Hosting