Email sent without SSL encryption travels across the internet in plain text. Anyone intercepting the connection can read your messages, passwords and attachments. SSL certificates encrypt these connections and prevent unauthorised access to your email data.
You will install a free Let’s Encrypt SSL certificate for your domain’s mail service through Plesk. Once complete, your email client connects using encrypted ports and your messages remain private during transmission.
Before you begin
- You need access to your Plesk control panel. If you are unsure how to access Plesk, read our guide on accessing your control panel.
- Your domain must be active and pointing to your hosting account.
Install the SSL certificate
Plesk includes Let’s Encrypt integration that generates and installs SSL certificates automatically. You will enable SSL protection for your mail service through the certificate management interface.
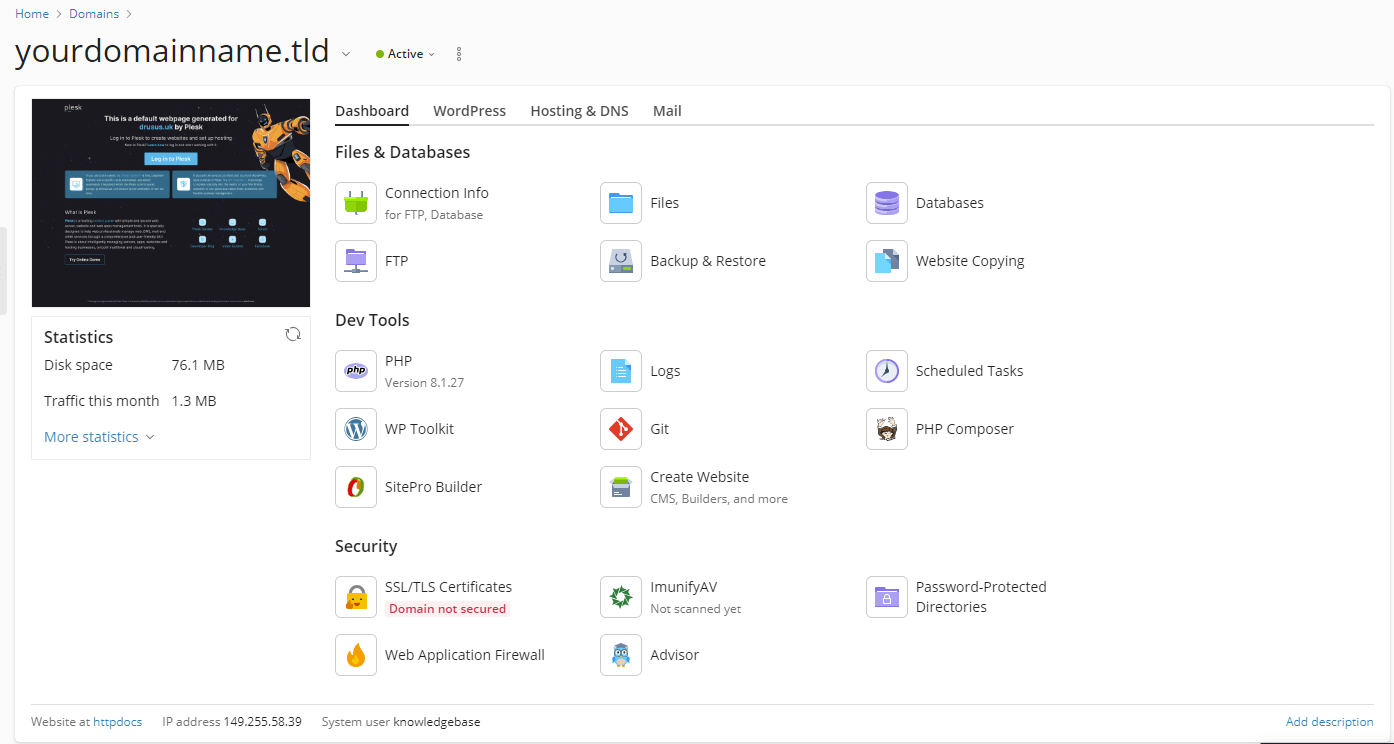
- Open the SSL/TLS Certificates page.
Log in to Plesk and locate your domain in the main dashboard. Under the Security section, click SSL/TLS Certificates.
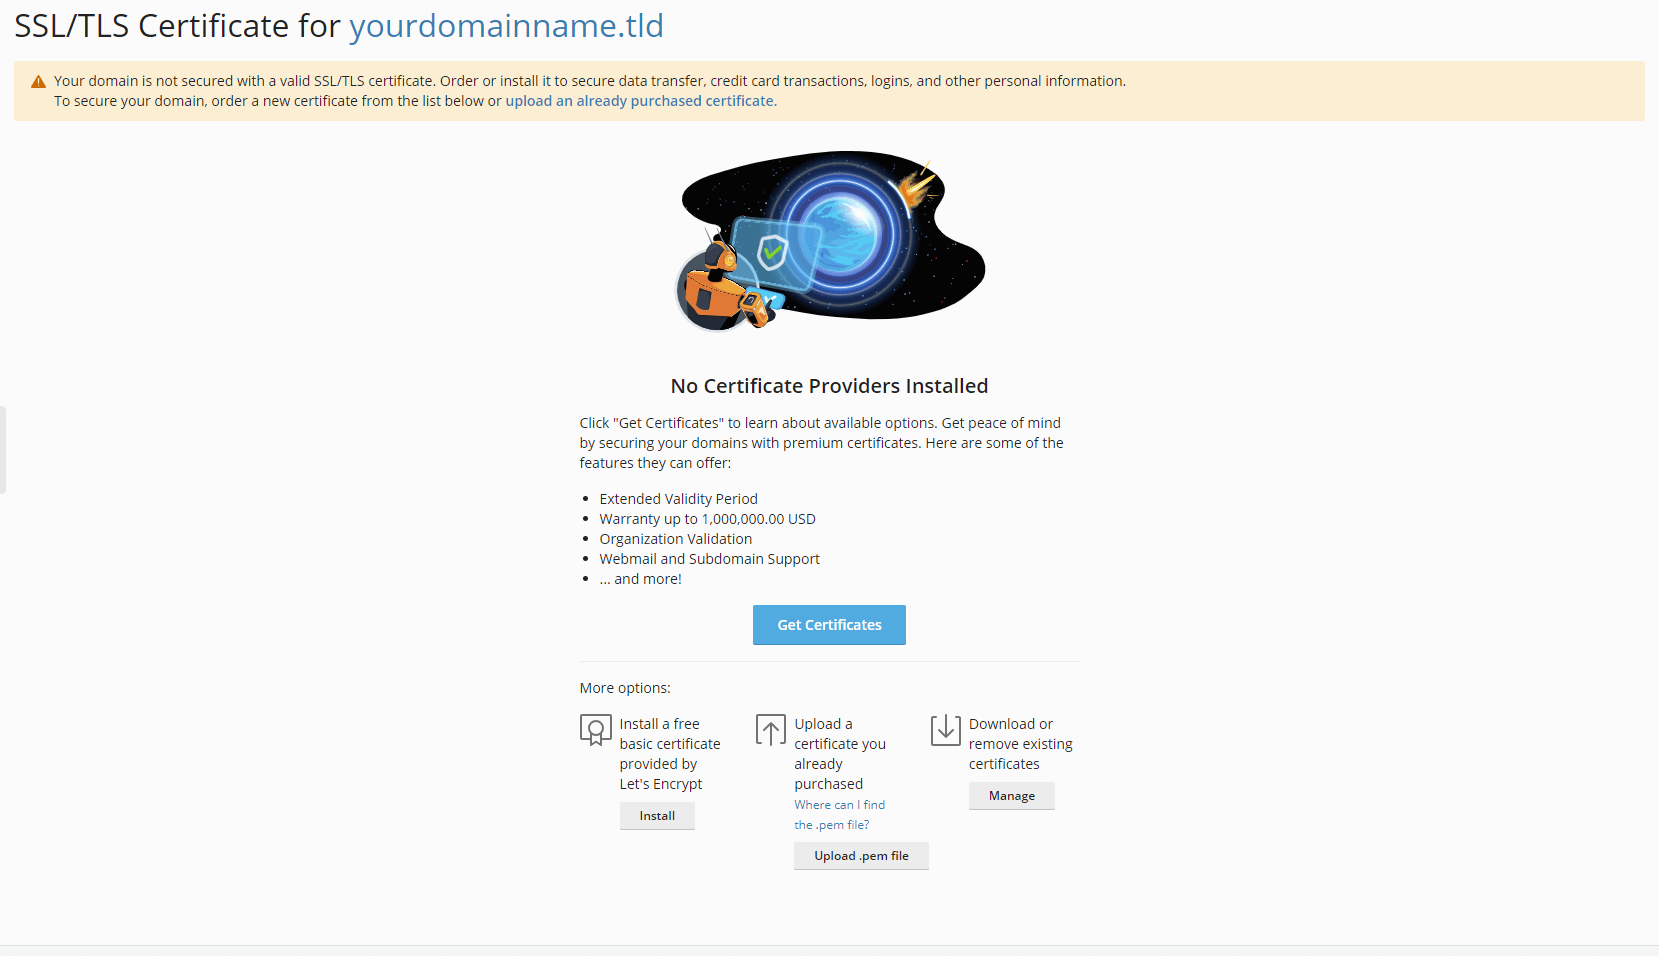
- Start the Let’s Encrypt installation.
On the SSL/TLS Certificate page, click More Options and select Install a free basic certificate provided by Let’s Encrypt. Click Install to continue.
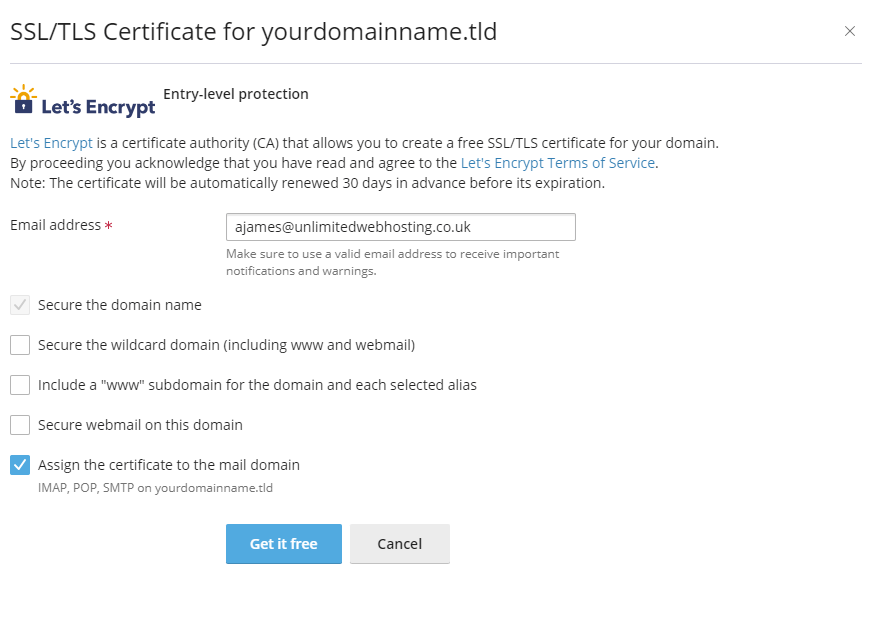
- Enable mail protection.
On the certificate configuration page, locate the checkbox labelled Assign the certificate to the mail domain and tick it. This applies the SSL certificate to your email service. Click Get it free to generate and install the certificate.
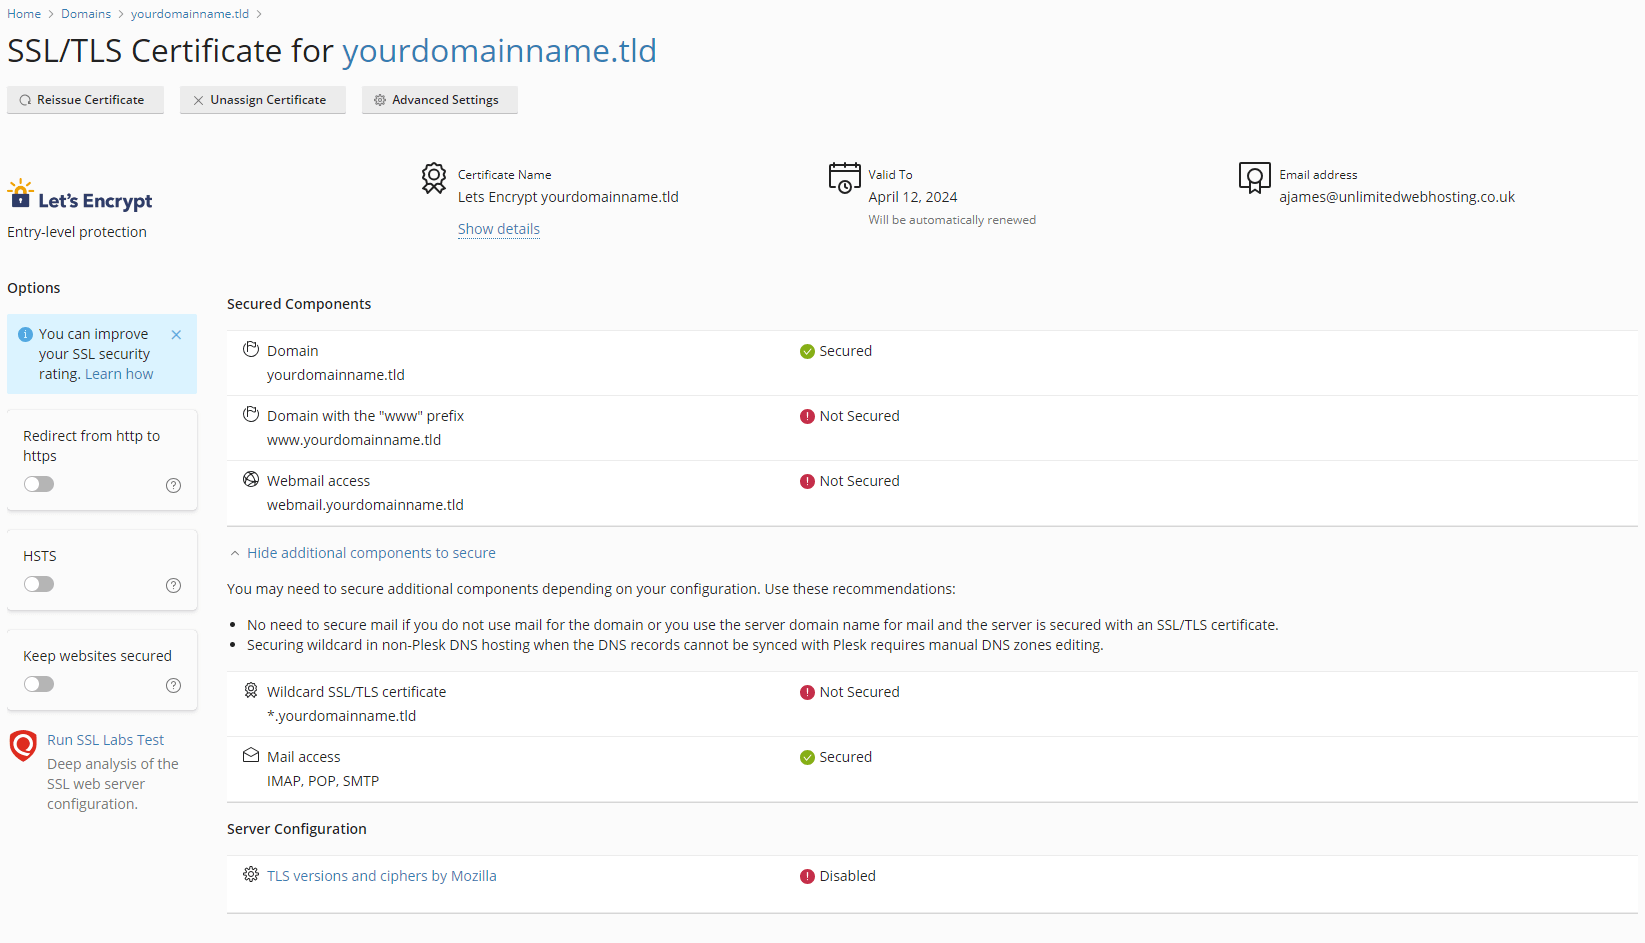
- Confirm mail security status.
After installation completes, click Show Additional Components to Secure. The page expands to display protected services. Verify that Mail Access shows as Secured with a green tick mark.
Your mail service now uses SSL encryption. Email clients connecting to your domain can establish secure connections using encrypted ports.
Wrapping up
Your domain email now transmits over encrypted connections. You installed a Let’s Encrypt SSL certificate through Plesk and enabled mail protection. Email clients connecting to your domain use secure ports that prevent interception of your messages and credentials.
Configure your email client to use the correct secure ports for IMAP, POP and SMTP connections. Our guide on setting up Outlook covers the recommended port configuration. We recommend testing your email connection after enabling SSL to confirm encrypted access works correctly.

Ready to get started?
Launch your website with our reliable cPanel hosting with unlimited bandwidth and expert support.
Get cPanel Hosting