OPcache conflicts can prevent WHMCS from functioning correctly. As a reseller on shared hosting, you cannot disable PHP extensions at server level because this would affect other accounts. You can disable OPcache for your specific WHMCS installation by adding a directive to your .htaccess file.
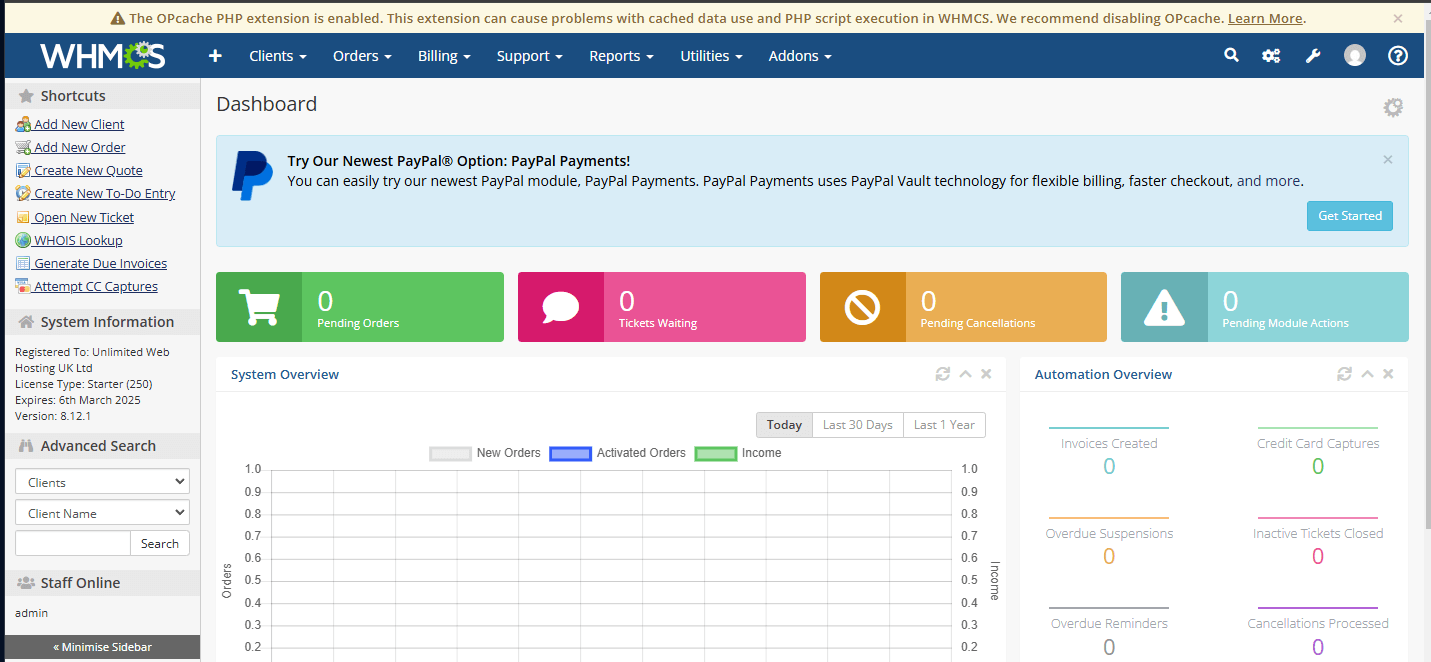
You will locate your WHMCS installation directory, edit the .htaccess file to disable OPcache and verify the change through WHMCS. This resolves OPcache conflicts without requiring server-level changes.
Before you begin
- You need access to cPanel for the account hosting WHMCS.
- If using cPanel File Manager, enable Show Hidden Files (dotfiles) in settings to view .htaccess files.
- We recommend creating a backup of your .htaccess file before editing.
Disable OPcache in .htaccess
You will add a PHP directive to your WHMCS .htaccess file. This tells the server to disable OPcache for files in that directory, preventing conflicts with WHMCS operations.
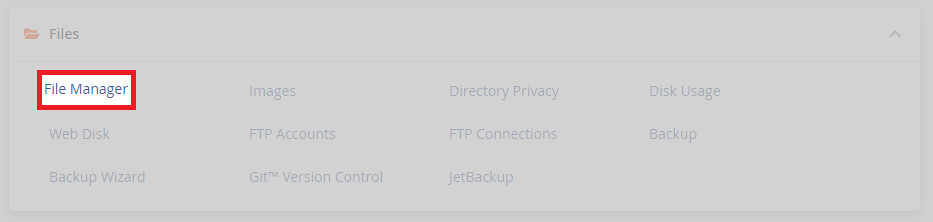
- Access cPanel File Manager.
Log in to cPanel and click File Manager under the Files section. This opens the file browser for your hosting account.
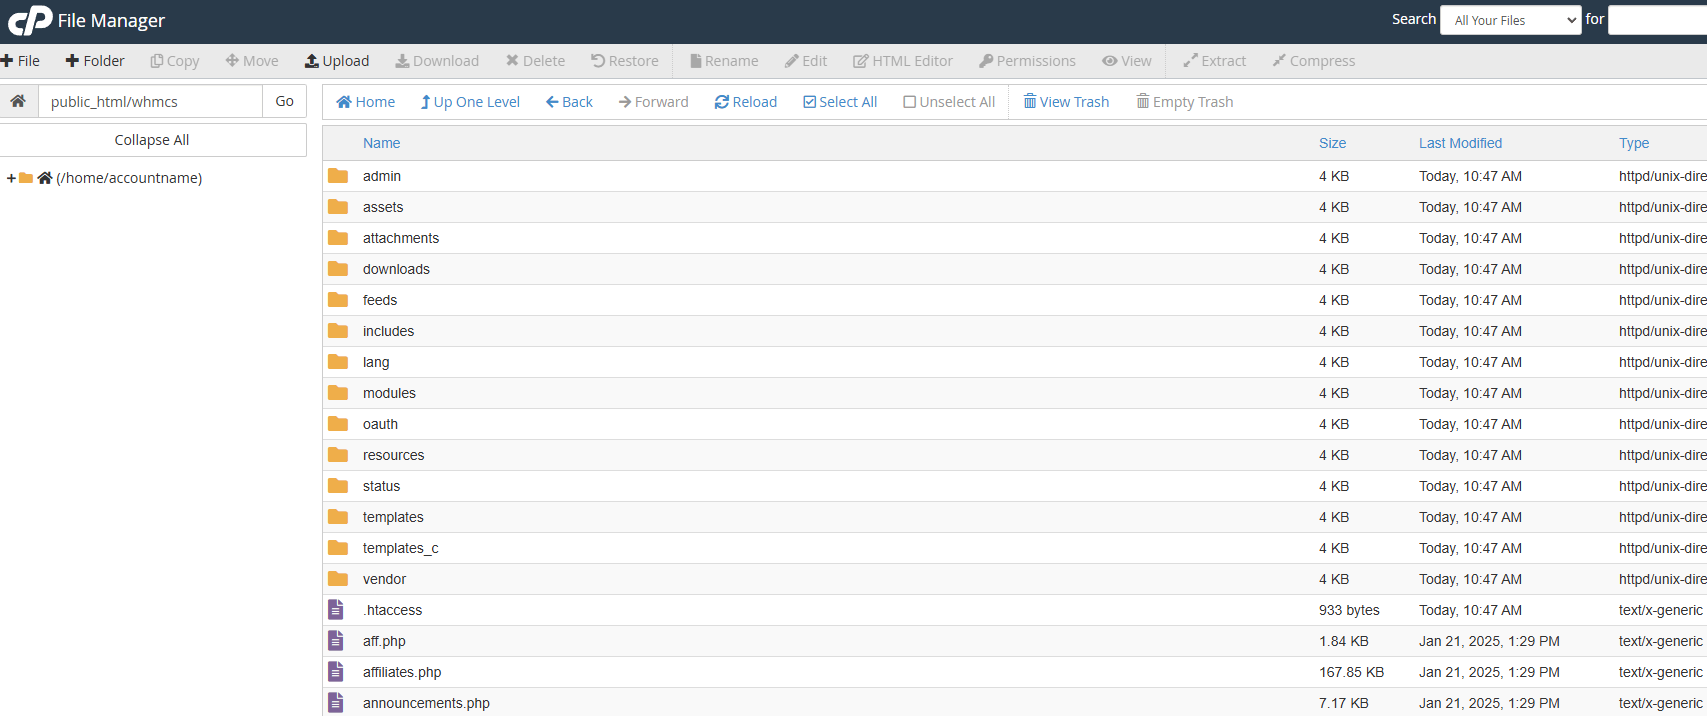
- Navigate to your WHMCS directory.
If you installed WHMCS with Softaculous, it is typically located inpublic_html/whmcs/. Your installation path may differ depending on where you placed WHMCS during setup.
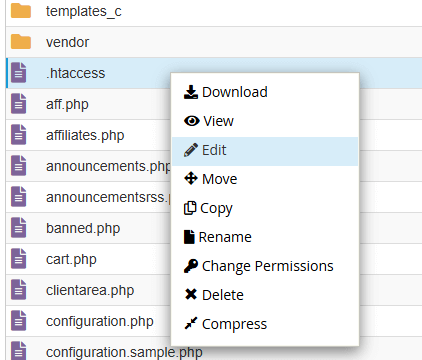
- Open or create the .htaccess file.
Right-click the .htaccess file in your WHMCS directory and select Edit. If no .htaccess file exists, click File in the toolbar, then New File, name it.htaccessand open it for editing.
- Add the OPcache directive.
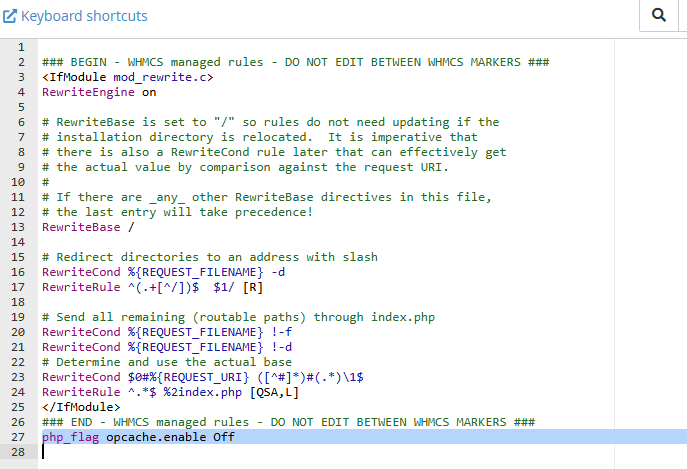
Add the following line to the end of the file. This disables OPcache for all PHP files in the WHMCS directory.
php_flag opcache.enable Off- Save the file.
Click Save Changes in the editor toolbar, then close the editor. Your .htaccess file now disables OPcache for WHMCS.
Verify OPcache is disabled
You can confirm OPcache is disabled by checking PHP configuration through WHMCS. This verifies the .htaccess directive is working correctly.
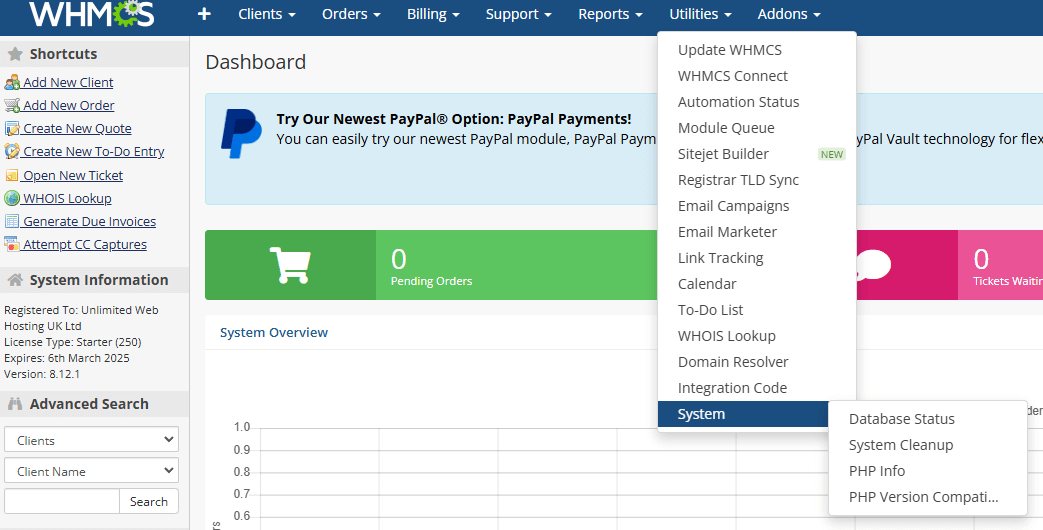
- Access PHP Info in WHMCS.
Log in to your WHMCS admin panel. Navigate to Utilities in the top menu, then select System and click PHP Info. This displays your current PHP configuration.
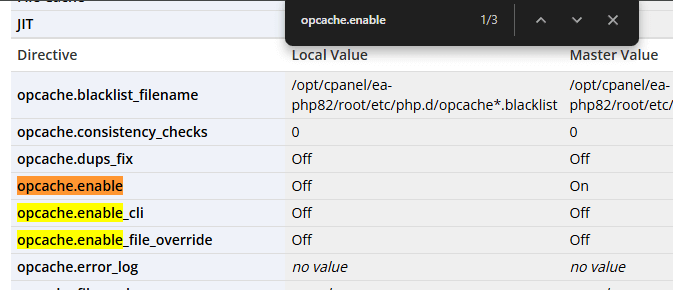
- Search for opcache.enable.
Use your browser’s search function (Ctrl+F or Cmd+F) to findopcache.enableon the PHP Info page. Confirm the value shows Off in both the Local Value and Master Value columns.
Troubleshooting
OPcache still shows as enabled
If OPcache remains enabled after editing .htaccess, you may have edited the wrong file or the directive is not being processed correctly.
- Verify you edited the .htaccess file in your WHMCS installation directory, not the root public_html directory.
- Check the .htaccess file contains no syntax errors. The directive should appear on its own line with no extra spaces.
- If you recently changed your PHP version, the directive may need reapplying. Edit .htaccess again and save to refresh the configuration.
- Create a phpinfo file in your WHMCS directory to verify PHP settings are being read correctly.
Wrapping up
Your WHMCS installation now runs with OPcache disabled. You edited the .htaccess file to add a PHP directive, preventing OPcache conflicts without affecting other accounts on the server. WHMCS should no longer display OPcache warnings.
Monitor WHMCS over the next few days to confirm all functions work correctly. Check that invoices generate, emails send and automated tasks complete without errors. Our reseller hosting includes full cPanel access for managing your WHMCS installation.

Need multiple accounts?
Create isolated individual accounts for your clients and manage them all from one dashboard.
Get Reseller Hosting
Need more control?
Upgrade to VPS hosting for scalable resources and root access to your server.
Get VPS Hosting