If you need to connect to your MySQL database remotely, using an SSH tunnel is the safest and most reliable way to do it. This method encrypts your connection, keeping your data secure and avoiding compliance issues.
This guide requires that you have installed PuTTY and set up SSH key access on your VPS.
Why Remote MySQL Connections Are Disabled
To protect our network, remote MySQL connections are disabled by default because port 3306, the standard MySQL connection port, is closed. On shared hosting, we cannot open this port due to strict security policies. If you have a VPS, we can open it upon request, but doing so comes with serious security risks.
Leaving port 3306 open makes your database vulnerable to brute-force attacks, SQL injection, and denial-of-service (DoS) attacks. It can also lead to PCI-DSS compliance issues, which could be a problem if you handle payments through providers like Visa, Mastercard, or American Express. PCI-DSS requires encryption of data in transit, which is not inherently provided by MySQL alone. In short, an open MySQL port can be a major security hole.
How an SSH Tunnel Works
An SSH tunnel lets you securely connect to your database without opening port 3306 to the internet. Instead, you first establish an SSH connection to your server using a key pair (recommended) or password. This connection creates a secure, encrypted tunnel between your local machine and the remote database.
Once the tunnel is active, you can connect to MySQL as if it were running locally, using something like localhost:3307. Behind the scenes, all traffic is securely routed through SSH, keeping it encrypted and protected from outside threats.
You connect to MySQL as if it were running locally (e.g., localhost:3307), whilst SSH handles the secure routing behind the scenes. If you experience connection issues, you may need to disable strict host key checking for automated scripts or dynamic environments.
Create an SSH Tunnel using PuTTY
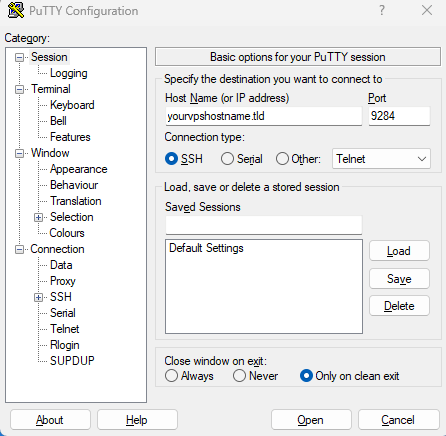
1. First off open a PuTTY window and enter either the IP or hostname of your VPS followed by port 9284 or 22.
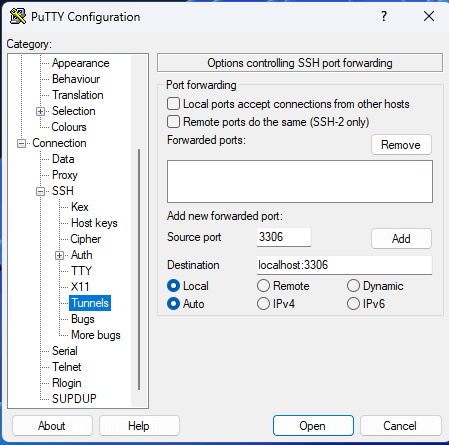
2. Moving forward in the category section click on the SSH dropdown using the + icon and then click “Tunnels”. From here in the source port section put in the Remote SQL port 3306 and add the destination as localhost:3306.
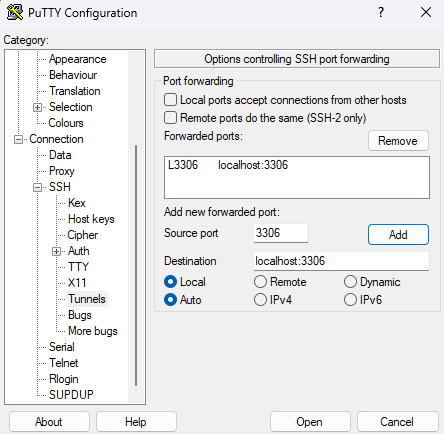
3. Afterwards click “Add” this will add that configuration to the forwarded ports list.
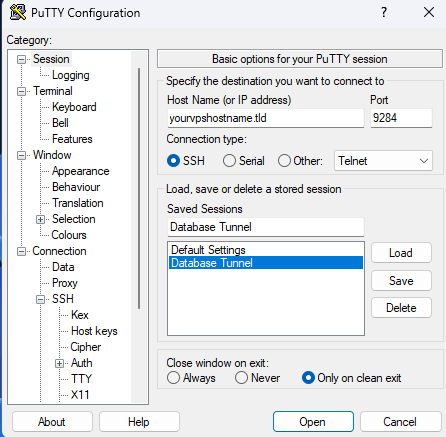
4. Finally, using the category menu click back on “Session” from here you can choose to save this configuration to use it at a later date or open the connection with the “Open” button.
Connect to MySQL through the tunnel
With the SSH tunnel established, connect to MySQL using your preferred database client:
- Host:
localhostor127.0.0.1 - Port:
3307(or whichever local port you configured) - Username: Your MySQL username
- Password: Your MySQL password
- Database: Your database name
Popular MySQL clients include:
- MySQL Workbench
- phpMyAdmin (if installed locally)
- DBeaver
- DataGrip
- Command-line MySQL client
Once connected, you can perform standard database operations. If you need to import SQL files into MySQL, you can do so through the tunnel connection.
Alternative database connections
If you’re working on a VPS with and have PostgreSQL instead of MySQL, the good news is you can use the same SSH tunnelling approach to connect to PostgreSQL securely. The setup is very similar you’re just connecting to a different database system on the other end.

Need more power?
Get scalable resources with our VPS hosting with root access and optional software.
Get VPS Hosting
Starting something new?
Perfect for websites and small businesses unlimited bandwidth with cPanel hosting.
Get cPanel Hosting