Adding domains to your hosting account allows you to run multiple websites from a single package. This works well for smaller sites with minimal resource requirements, such as portfolios or personal projects.
You will configure the domain through your control panel, which creates the necessary file structure and settings. The process differs slightly between cPanel and Plesk, so follow the section that matches your hosting environment.
Before you begin
- Your domain must be registered and pointing to your hosting nameservers.
- We recommend using a reseller hosting package for multiple sites. Reseller accounts isolate each website through CageFS, which prevents malware spreading between sites if one becomes infected.
- If you need to test before DNS propagation completes, edit your hosts file instead of using a temporary domain.
Add a domain in cPanel
cPanel groups domain management under a single interface. You will create the domain configuration, which generates the directory structure and server settings automatically.
- Log in to cPanel.
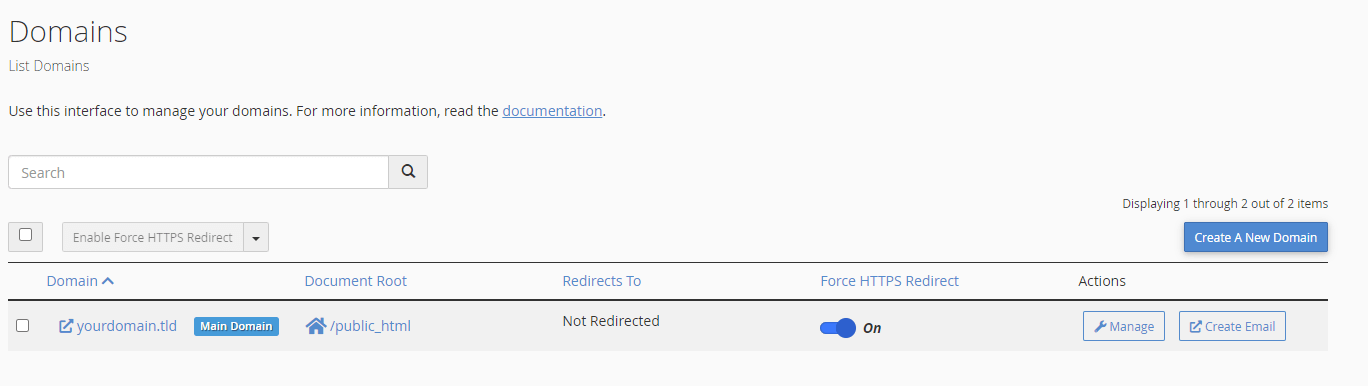
Access your control panel at the URL provided in your welcome email. - Open the Domains tool.
Scroll to the Domains section and click Domains. This displays all domains currently configured on your account.

- Start creating a domain.
Click Create A New Domain. New accounts show only your primary domain with a “main domain” label.
- Configure the domain.
Enter your domain name in the Domain field. cPanel automatically suggests a document root directory based on the domain name. You can accept this default or specify a custom path.
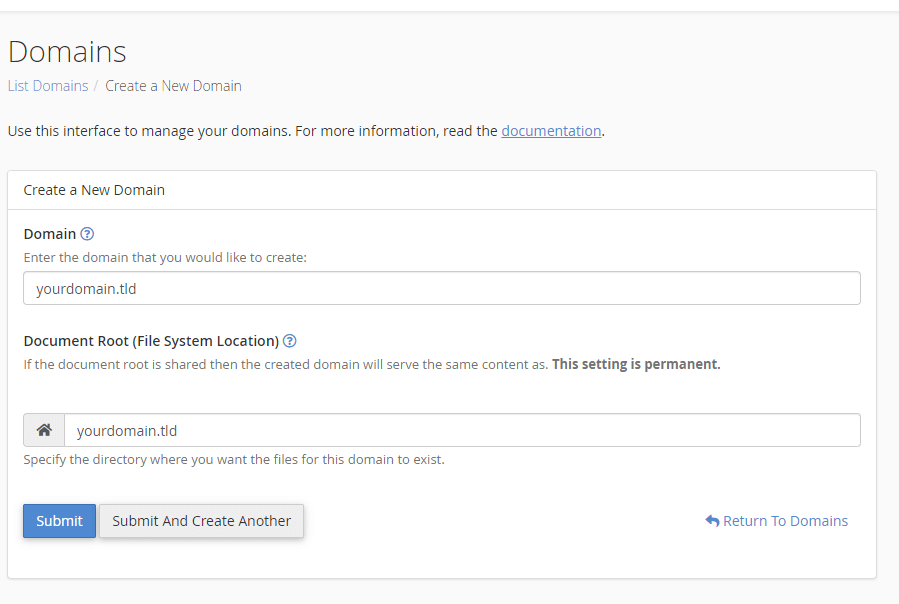
- Save the domain.
Click Submit. cPanel creates the directory structure and configures the web server. Your domain now appears in the domains list and is ready to host content.
Add a domain in Plesk
Plesk manages domains through the Websites & Domains section. You will specify the domain name and choose which services to activate, such as email and DNS hosting.
- Log in to Plesk.
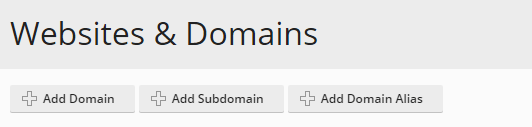
Access your control panel using the credentials from your welcome email. - Open the domain creation tool.
Navigate to Websites & Domains and click Add Domain. This opens the domain configuration interface.
- Enter the domain name.
Type your domain in the Registered domain name field. Plesk validates the format as you type. - Verify the webspace.
Check that the Webspace field shows your account name or subscription. If it displays a different value, use the search function to locate your account. - Configure services.
Plesk enables mail and DNS services by default. Disable these if you manage email or DNS elsewhere. Otherwise, leave the defaults active.
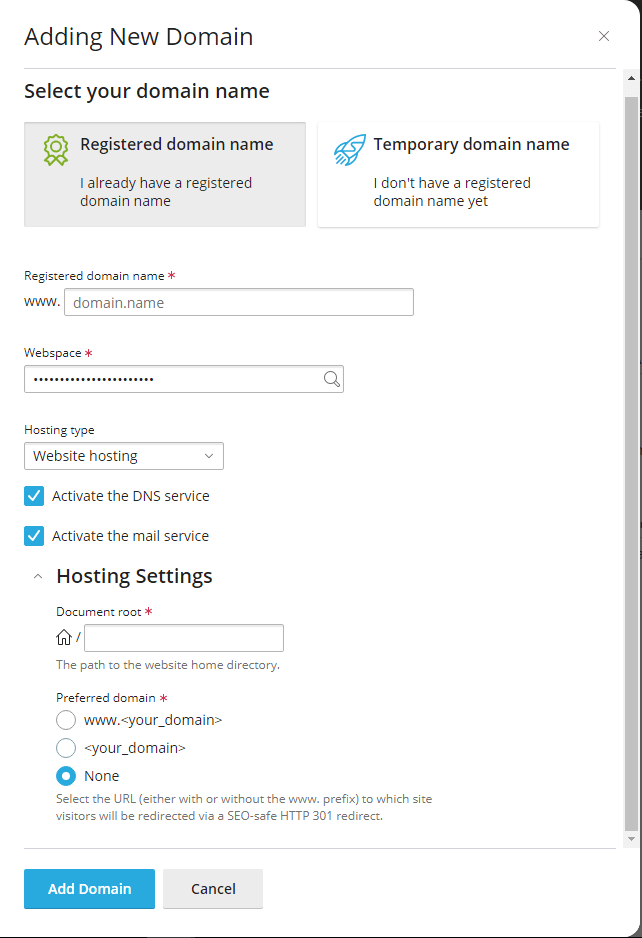
- Complete the setup.
Review the remaining settings and click Add Domain. Plesk creates the domain configuration and makes it available for hosting.
Wrapping up
Your additional domain is now configured and ready to host content. You created the domain through your control panel, which set up the necessary directories and server configuration. Upload your website files to the document root to make the site live.
Remember that websites sharing a cPanel account also share the same file system. If you plan to host multiple production sites, consider our reseller hosting packages, which provide better isolation and management features. For guidance on securing WordPress sites, see our article on removing malware from WordPress.

Ready to get started?
Launch your website with our reliable cPanel hosting with unlimited bandwidth and expert support.
Get cPanel Hosting