A temporary domain lets you test websites and development projects without registering a permanent domain name. You can preview sites before they go live, set up staging environments or test configuration changes without affecting your production site.
You will create a temporary domain using a free subdomain service. This method requires no technical configuration and works immediately after setup.
Before you begin
- You need your server’s IP address from cPanel.
- If previewing an addon domain, create it in cPanel first.
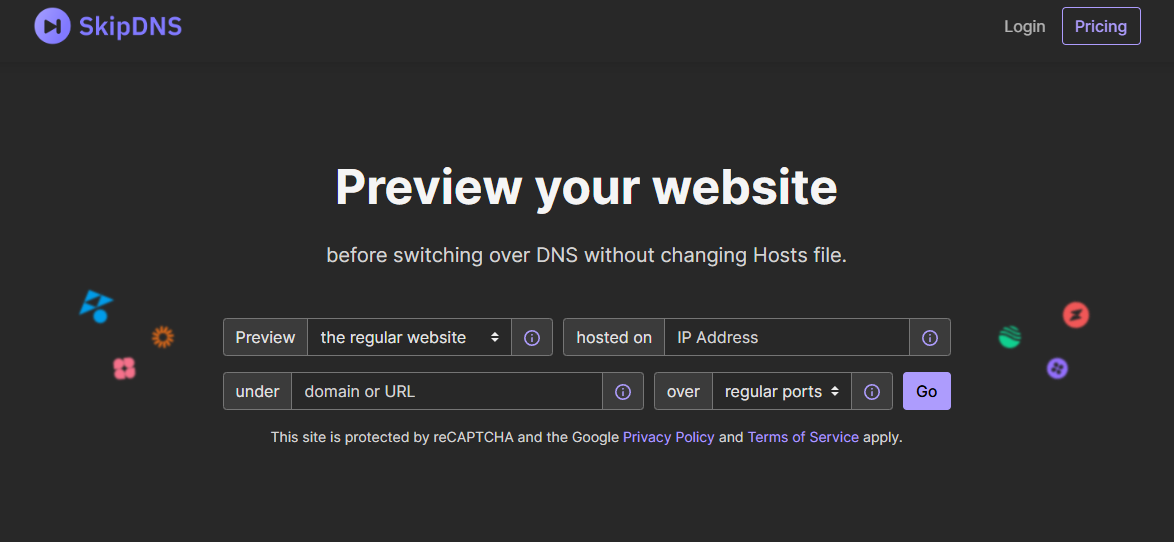
Create a temporary domain with SkipDNS
SkipDNS provides free temporary subdomains that point to your server’s IP address. This creates an instant preview URL without changing DNS records or waiting for propagation.
- Open the SkipDNS website.
Visit skipdns.link in your browser.
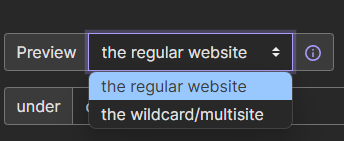
- Select your site type.
Use the Preview dropdown menu to choose between Regular for standard WordPress installations or Multi-site for WordPress multisite networks.
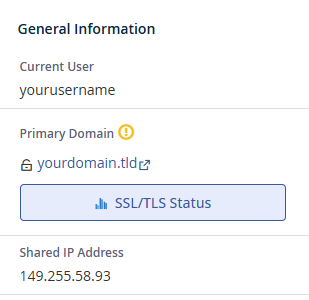
- Find your server IP address.
Log in to cPanel and locate the General Information section on the right sidebar. Copy the IP address shown under Shared IP Address.
- Enter your server IP.
Paste the IP address into the IP field on the SkipDNS page. - Configure the domain fields.
In the Under field, enter the addon domain you created in cPanel. In the Domain field, enter the subdomain you want to use for testing. This creates a URL likedev.yourdomain.skipdns.link.
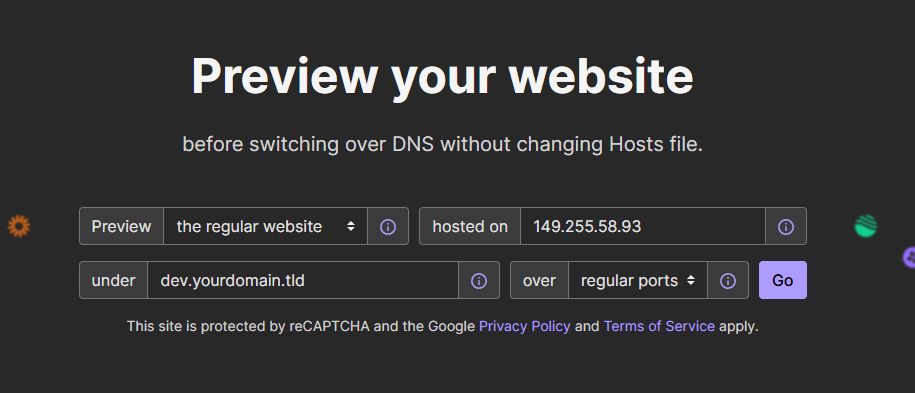
- Generate the temporary domain.
Adjust the Over field if you need to specify a custom port. Click Go to create your temporary domain. SkipDNS displays your preview URL immediately.
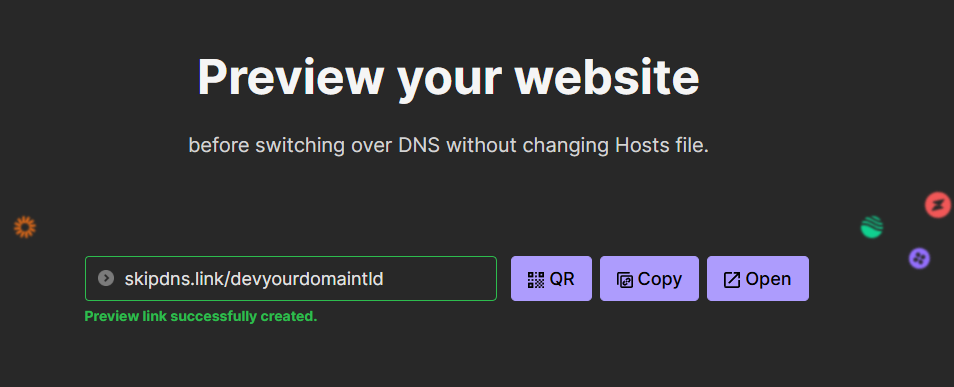
Your temporary domain now points to your server. You can access your site immediately using the SkipDNS URL without waiting for DNS propagation.
Alternative methods
Free subdomain services like SkipDNS work well for quick previews. For longer-term development projects, consider registering a dedicated development domain. This gives you full control over subdomains and DNS records.
You can also edit your hosts file to create temporary domains that only work on your local machine. This method requires no external services but only affects the computer where you edit the hosts file.
Wrapping up
You created a temporary domain using SkipDNS that points to your server’s IP address. This lets you preview websites, test configurations and develop projects without registering a permanent domain or modifying DNS records.
Test your temporary domain by visiting the URL SkipDNS generated. Check that your site loads correctly and all resources display as expected. Our web hosting plans include cPanel access and support for addon domains and staging environments.
If you run into any trouble, get in touch and our team will be happy to help.

Ready to get started?
Launch your website with our reliable cPanel hosting with unlimited bandwidth and expert support.
Get cPanel Hosting