Migrating a cPanel account to your reseller hosting preserves your site files, databases and email accounts in a single transfer. A full cPanel backup packages everything into one file that you restore on the target server, avoiding manual file transfers and reducing the risk of missing content.
You will generate a backup on your current host, upload it to your reseller account and restore it. Once the transfer completes, you can test the site before updating DNS records.
Before you begin
- You need access to cPanel on both your current host and your reseller account.
- If you are migrating to us from cPanel for the first time, you can use our migration tool to move the first 25 accounts or 50GB (whichever comes first).
- We recommend creating a full cPanel backup before starting this process.
Generate a full cPanel backup
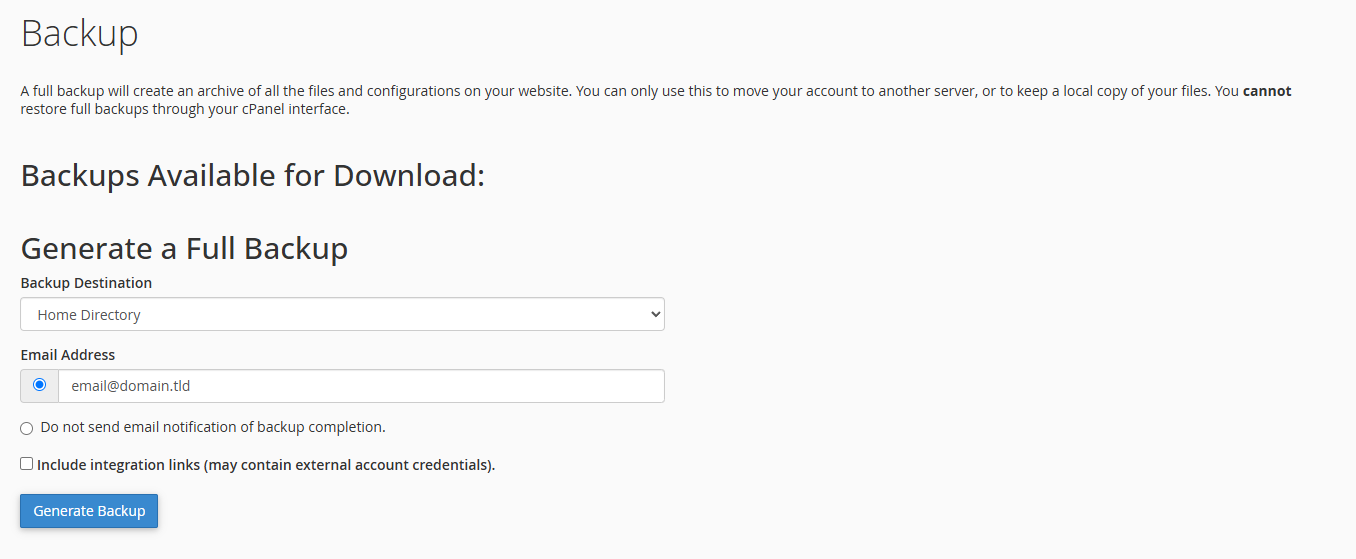
A full cPanel backup creates a compressed archive containing all account data. This file includes your website files, databases, email accounts and configuration settings.
- Log in to cPanel on your current host.
Access your cPanel account using the credentials provided by your hosting provider. - Open the Backup tool.
Scroll to the Files section and click Backup. - Generate a full backup.
Under Full Backup, click Download a Full Account Backup. Select Home Directory as the destination and click Generate Backup. This creates a .tar.gz file in your account’s home directory.
- Download the backup file.
Once the backup completes, download the .tar.gz file to your local computer. This file contains everything needed to restore your account.
Upload the backup to your reseller account
You need to transfer the backup file to your reseller hosting account before restoring it. FTP handles large files more reliably than the cPanel File Manager.
- Connect to your reseller account via FTP.
Use an FTP client to connect to your reseller hosting account. If you need help setting this up, see our guide on using cPanel File Manager. - Upload the backup file.
Navigate to the home directory of your reseller account and upload the .tar.gz backup file. This may take some time depending on the file size and your connection speed.
Restore the backup
Restoring a full cPanel backup requires root access to the server. You will need to contact our support team to complete this step.
- Contact our support team.
Get in touch with our support team and provide the following information: “I’ve uploaded a full cPanel backup to the home directory of my hosting account. Could you please restore it for me?” - Wait for confirmation.
Our team will restore the backup and confirm when the process completes. This typically takes a few hours depending on the backup size.
Test your migrated site
Before updating DNS records, verify that your site transferred correctly. Testing prevents visitors from seeing errors or missing content after the migration.
- Create a temporary domain.
If you have not migrated DNS yet, create a temporary domain to access your site on the new server. - Check site functionality.
Browse your site and test key features. Verify that pages load correctly, forms submit and images display. Check that your database connections work by logging in to any admin areas. - Test email accounts.
Send and receive test emails to confirm that email accounts transferred correctly.
Update DNS records
Once you confirm everything works correctly, point your domain’s DNS records to your reseller hosting account. This makes your site live on the new server.
- Update your nameservers.
Log in to your domain registrar and update your nameservers to point to your reseller hosting account. Your hosting provider will supply the correct nameserver addresses. - Wait for DNS propagation.
DNS changes can take up to 48 hours to propagate globally. During this time, some visitors may see the old site while others see the new one.
Wrapping up
Your cPanel account is now migrated to your reseller hosting. You generated a full backup, uploaded it to the new server and restored all account data. After testing the site and updating DNS records, your migration is complete.
Monitor your site over the next few days to confirm everything functions correctly. If you need to migrate multiple accounts, repeat this process for each one. Our reseller hosting includes the tools and support you need to manage client accounts efficiently.
If you run into any trouble, get in touch and our team will be happy to help.

Ready to get started?
Launch your website with our reliable cPanel hosting with unlimited bandwidth and expert support.
Get cPanel Hosting