An SSL certificate encrypts data between your website and its visitors. Installing one protects sensitive information like passwords and payment details whilst displaying the padlock icon in browsers. This confirms to visitors that your site is authentic and secure.
You will install your SSL certificate through either cPanel or Plesk, depending on your hosting environment. The process involves uploading certificate files, configuring private keys and assigning the certificate to your domain. Once complete, your site loads over HTTPS and browsers display security indicators.
Before you begin
- You need a valid SSL certificate issued by a certificate authority.
- You must have generated a Certificate Signing Request (CSR) for your domain.
- Your certificate files will arrive via email or in your client area, depending on validation type.
- You need access to your cPanel or Plesk control panel.
Install an SSL certificate in cPanel using automatic detection
cPanel can automatically detect and configure certificate components when you upload a CRT file. This method works when your certificate authority provides all required files in the correct format.
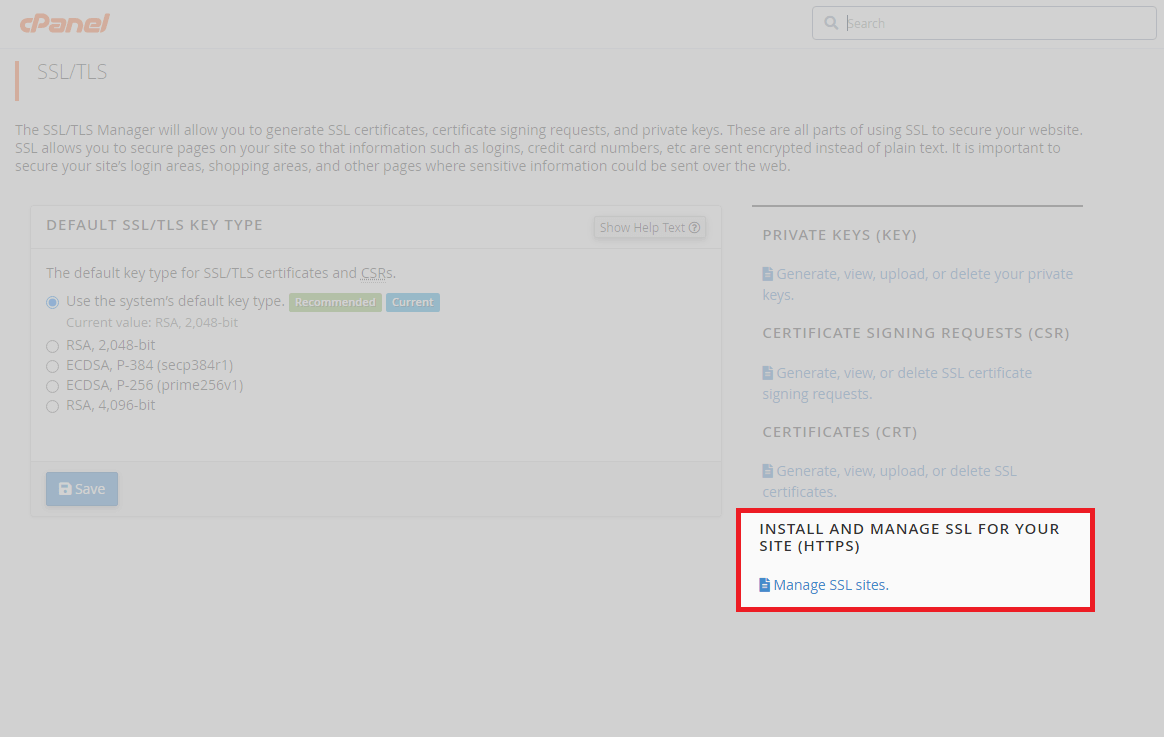
- Access the SSL/TLS area.
Log into your cPanel control panel and locate the Security section. Click SSL/TLS to open the certificate management area.

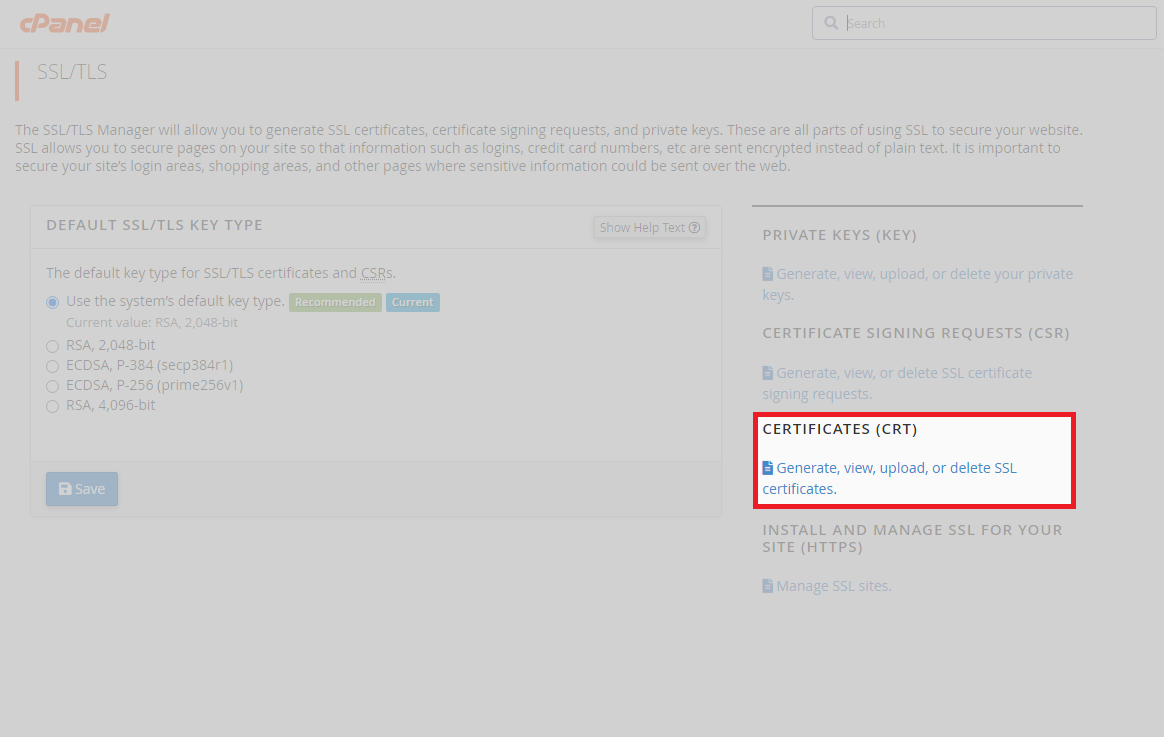
- Open the certificate management page.
Click Generate, view, upload, or delete SSL certificates. This takes you to the area where you upload and manage certificates.
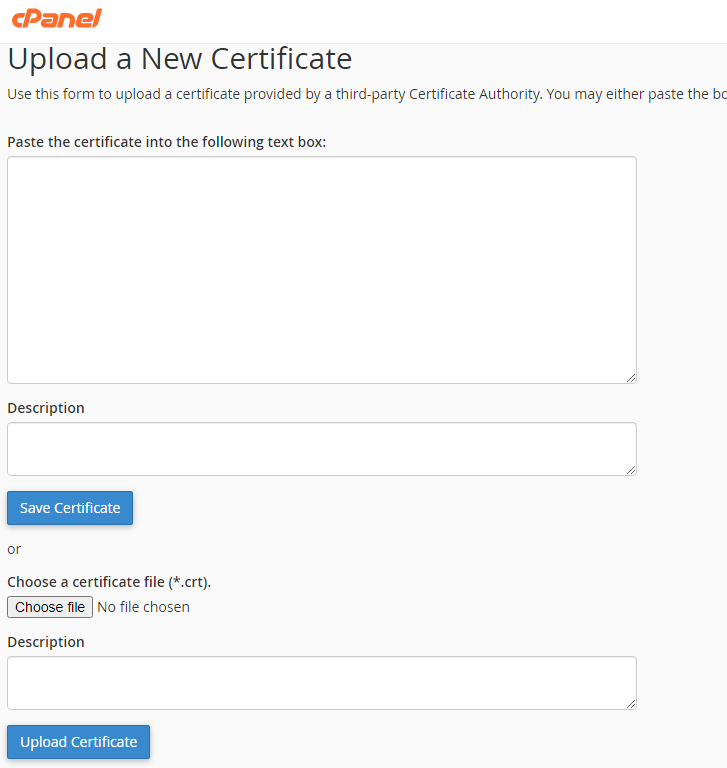
- Upload your certificate.
If you received certificate text, paste it into the box provided and click Save Certificate. If you received a .crt file, click Browse under Choose a certificate file, select your file and click Upload Certificate.
- Install the certificate.
Refresh the page after uploading. Your certificate appears under Certificates on this server at the top of the page. Click Install next to the correct certificate to complete installation.

Your certificate is now active. If automatic detection fails or you need more control over the installation, use the manual method below.
Install an SSL certificate in cPanel using a private key
Manual installation gives you full control over certificate components. You will retrieve your private key, then manually configure the certificate, private key and CA bundle.
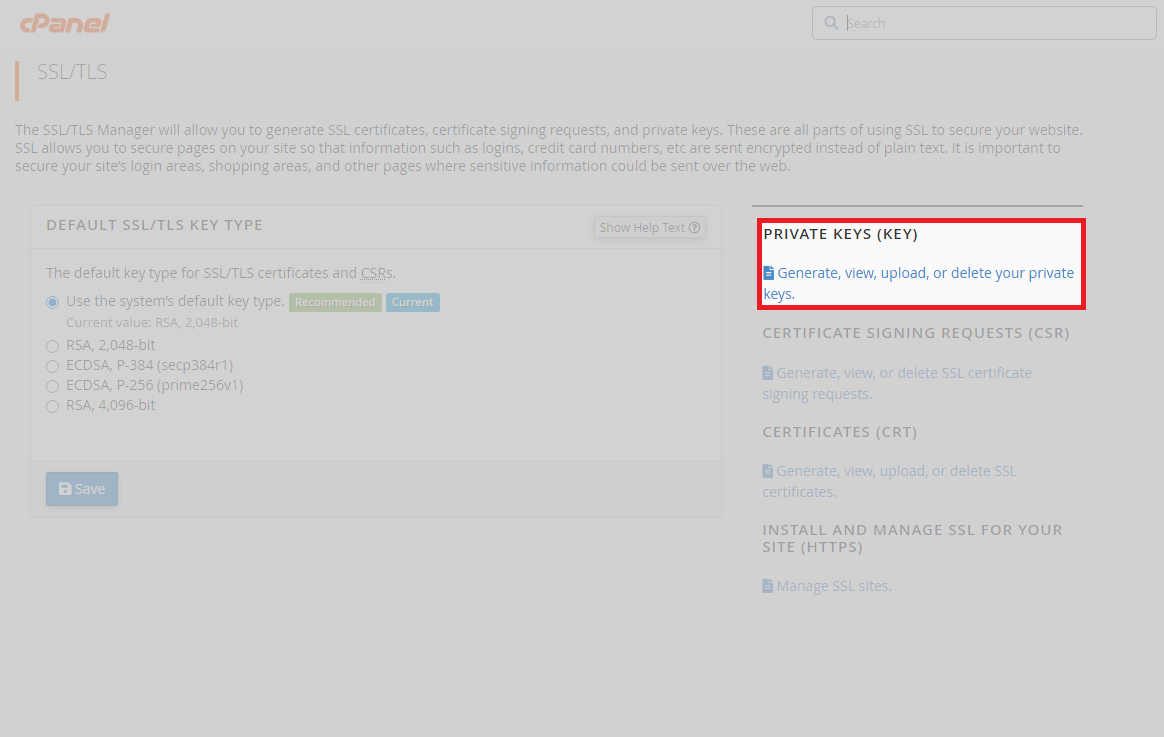
- Access private keys.
From the SSL/TLS area, click Private Keys (KEY). This displays all private keys associated with your account.
- Select your private key.
Find the private key matching your domain and click Edit. This opens the key details page.
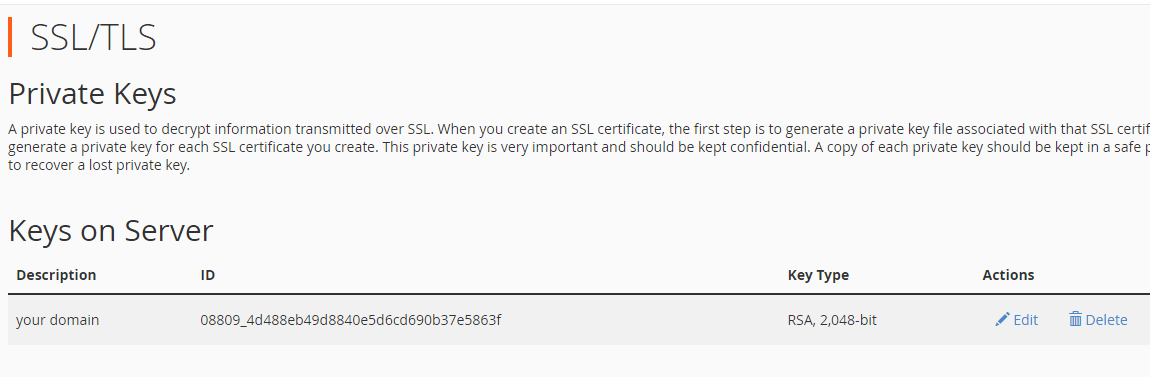
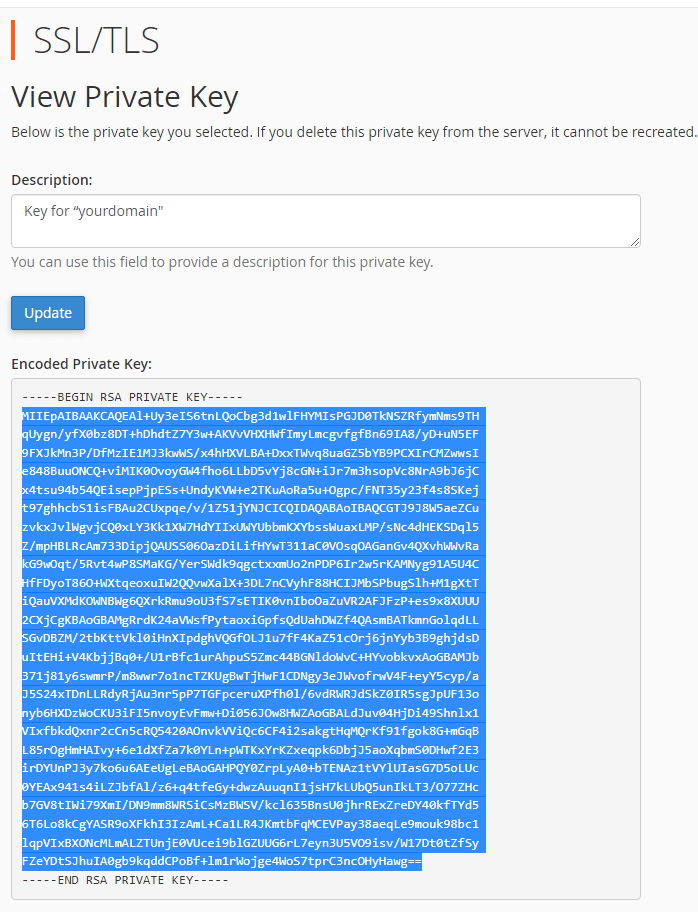
- Copy the private key.
Copy the entire encoded private key text from the page. Scroll to the bottom and click Go Back to SSL Manager to return to the main SSL area.
- Open SSL site management.
Back in the SSL/TLS Manager, click Manage SSL sites. This opens the interface for assigning certificates to domains.
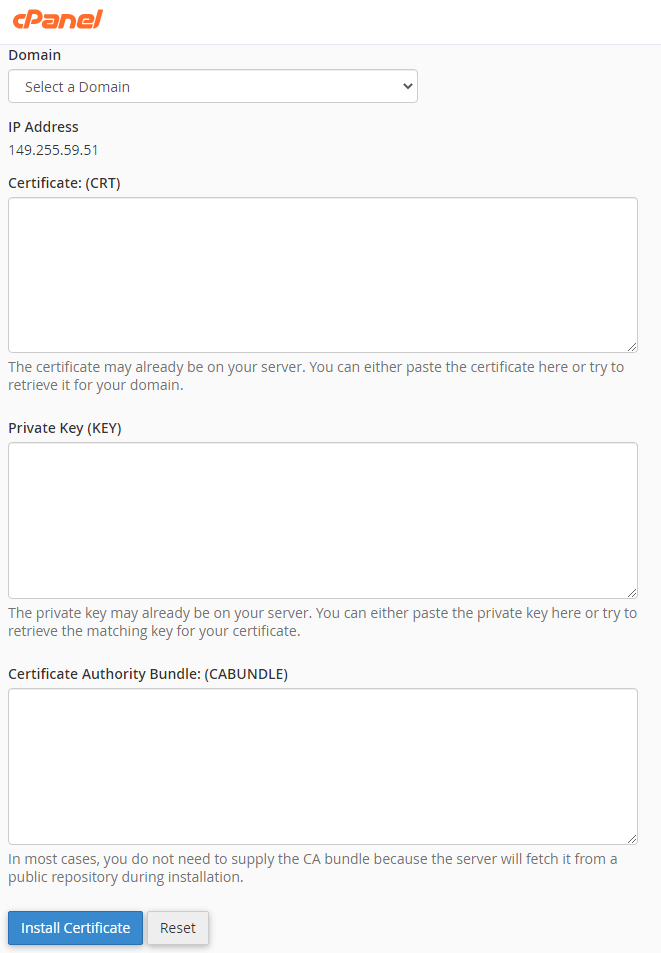
- Configure certificate components.
Select your domain from the dropdown list. Paste the private key you copied earlier into the Private Key (KEY) field. Add your certificate by pasting text or uploading the .crt file into the Certificate (CRT) field. Add your CA bundle using the same method in the Certificate Authority Bundle (CABUNDLE) field. Click Install Certificate when all fields are complete.
Your certificate is now installed and active on your domain. Visitors accessing your site will see the padlock icon indicating a secure connection.
Install an SSL certificate in Plesk
Plesk handles SSL installation through its certificate manager. You will upload your certificate files and assign the certificate to your domain through hosting settings.
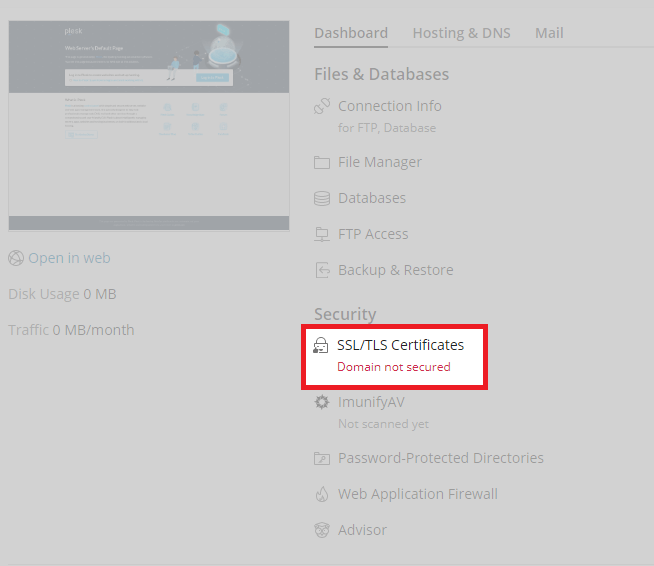
- Access SSL/TLS certificates.
Log into your Plesk control panel. Find the domain you want to secure and click SSL/TLS Certificates.
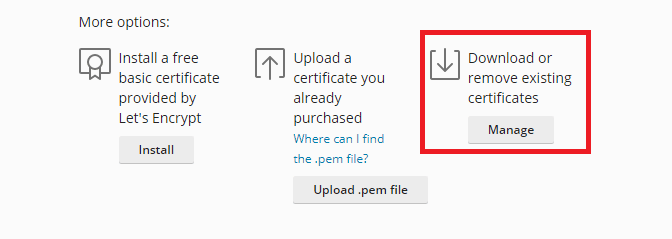
- Open certificate management.
Click Manage under Download or remove existing certificates. This opens the certificate management interface.
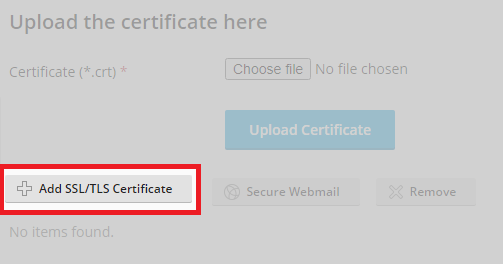
- Add your certificate.
Click Add SSL/TLS Certificate to open the upload form. Plesk automatically assigns the private key if you generated your CSR through Plesk.
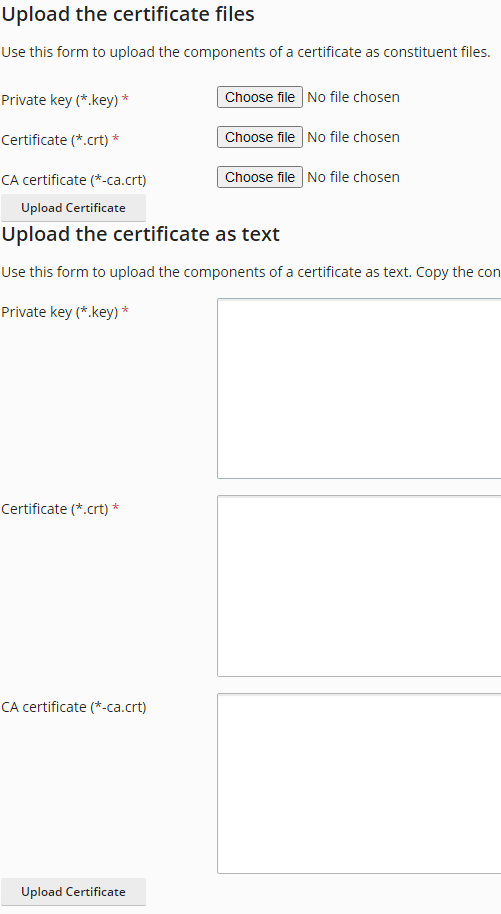
- Upload certificate files.
Paste your certificate text into the provided fields or upload the certificate files directly. Add your certificate in the Certificate field and your CA bundle in the CA Certificate field. Click Upload Certificate when complete.
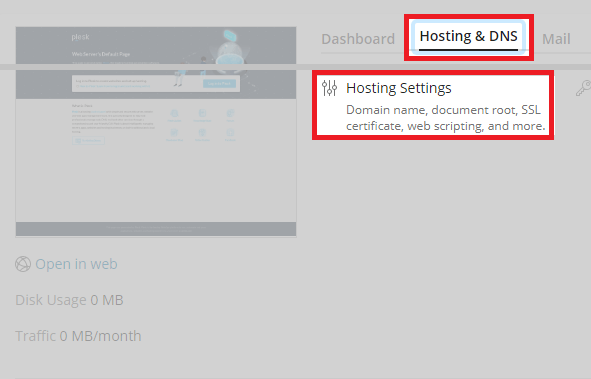
- Access hosting settings.
Return to your domain’s main area. Click Hosting & DNS followed by Hosting Settings. This opens the configuration page where you assign certificates.
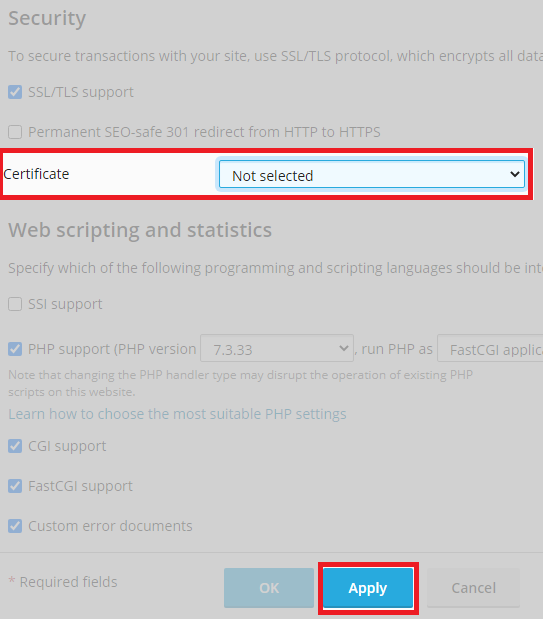
- Assign the certificate.
Find the Certificate dropdown in the hosting settings. Select your newly installed certificate from the list and click Apply to activate it.
Your certificate is now active on your domain. Plesk handles the configuration automatically once you assign the certificate.
Further reading on SSL certificates
SSL certificates come in three validation levels, each offering different levels of authentication and trust indicators. Domain Validated (DV) certificates provide basic encryption and display a padlock in the browser address bar. These verify only that you control the domain and are suitable for most websites.
Organisation Validated (OV) certificates require verification of your organisation’s identity before issuance. Certificate authorities check business registration documents and contact details. OV certificates typically include higher warranty coverage if the certificate authority makes an error during validation.
Extended Validation (EV) certificates require the most rigorous authentication process. Financial institutions and large organisations commonly use EV certificates. Browsers previously displayed a green address bar for EV certificates, but major browsers discontinued this feature as SSL adoption became standard practice. The validation process remains more thorough than DV or OV certificates.
Certificate authorities issue SSL certificates after validating your identity and domain ownership. The validation method determines how quickly you receive your certificate and what information appears in the certificate details. Understanding these differences helps you choose the appropriate certificate type for your website’s security requirements.
Wrapping up
Your SSL certificate is now installed and protecting your website. You uploaded certificate files through your control panel, configured private keys and assigned the certificate to your domain. Visitors see the padlock icon in their browser, confirming their connection is encrypted.
Test your installation by visiting your site using https:// in the address bar. Check that all pages load correctly and no mixed content warnings appear. Our guide on forcing HTTPS on WordPress explains how to redirect all traffic to secure connections.
Our web hosting plans include free SSL certificates that renew automatically. If you run into any trouble, get in touch and our team will be happy to help.

Ready to get started?
Launch your website with our reliable cPanel hosting with unlimited bandwidth and expert support.
Get cPanel Hosting