Outdated plugins are one of the most common entry points for attackers, as older versions frequently contain known vulnerabilities. Enabling automatic updates means your plugins receive security patches and new releases without requiring you to log in and update them manually each time.
You can turn on auto-updates for all your plugins at once or select individual plugins to update automatically. This article covers approaches.
Before you begin
- You need access to your WordPress admin area at
https://yourdomain.co.uk/wp-admin - Auto-updates are available for plugins installed from the official WordPress plugin repository. Plugins installed from third-party sources may not support this feature and will need to be updated manually.
- We recommend creating a backup of your site before enabling auto-updates. A plugin update can occasionally introduce compatibility issues, and a recent backup lets you restore quickly if needed.
Enable auto-updates for all plugins
Using the bulk actions menu, you can switch on auto-updates for every plugin in a single action. This is the fastest way to keep your entire plugin library current without revisiting each one individually.
- Log in to your WordPress admin area.
Navigate tohttps://yourdomain.co.uk/wp-admin, replacingyourdomain.co.ukwith your actual domain name. - Go to the Installed Plugins page.
In the left sidebar, hover over Plugins and click Installed Plugins. - Select all plugins.
Tick the checkbox at the top of the plugin list, next to the Plugin column heading. This selects every plugin on the current page. - Choose the bulk action.
Open the Bulk actions dropdown above the list and select Enable Auto-updates. - Apply the change.
Click Apply. WordPress updates the auto-update status for each selected plugin. You will see an Auto-updates enabled confirmation appear in the Automatic Updates column next to each plugin.
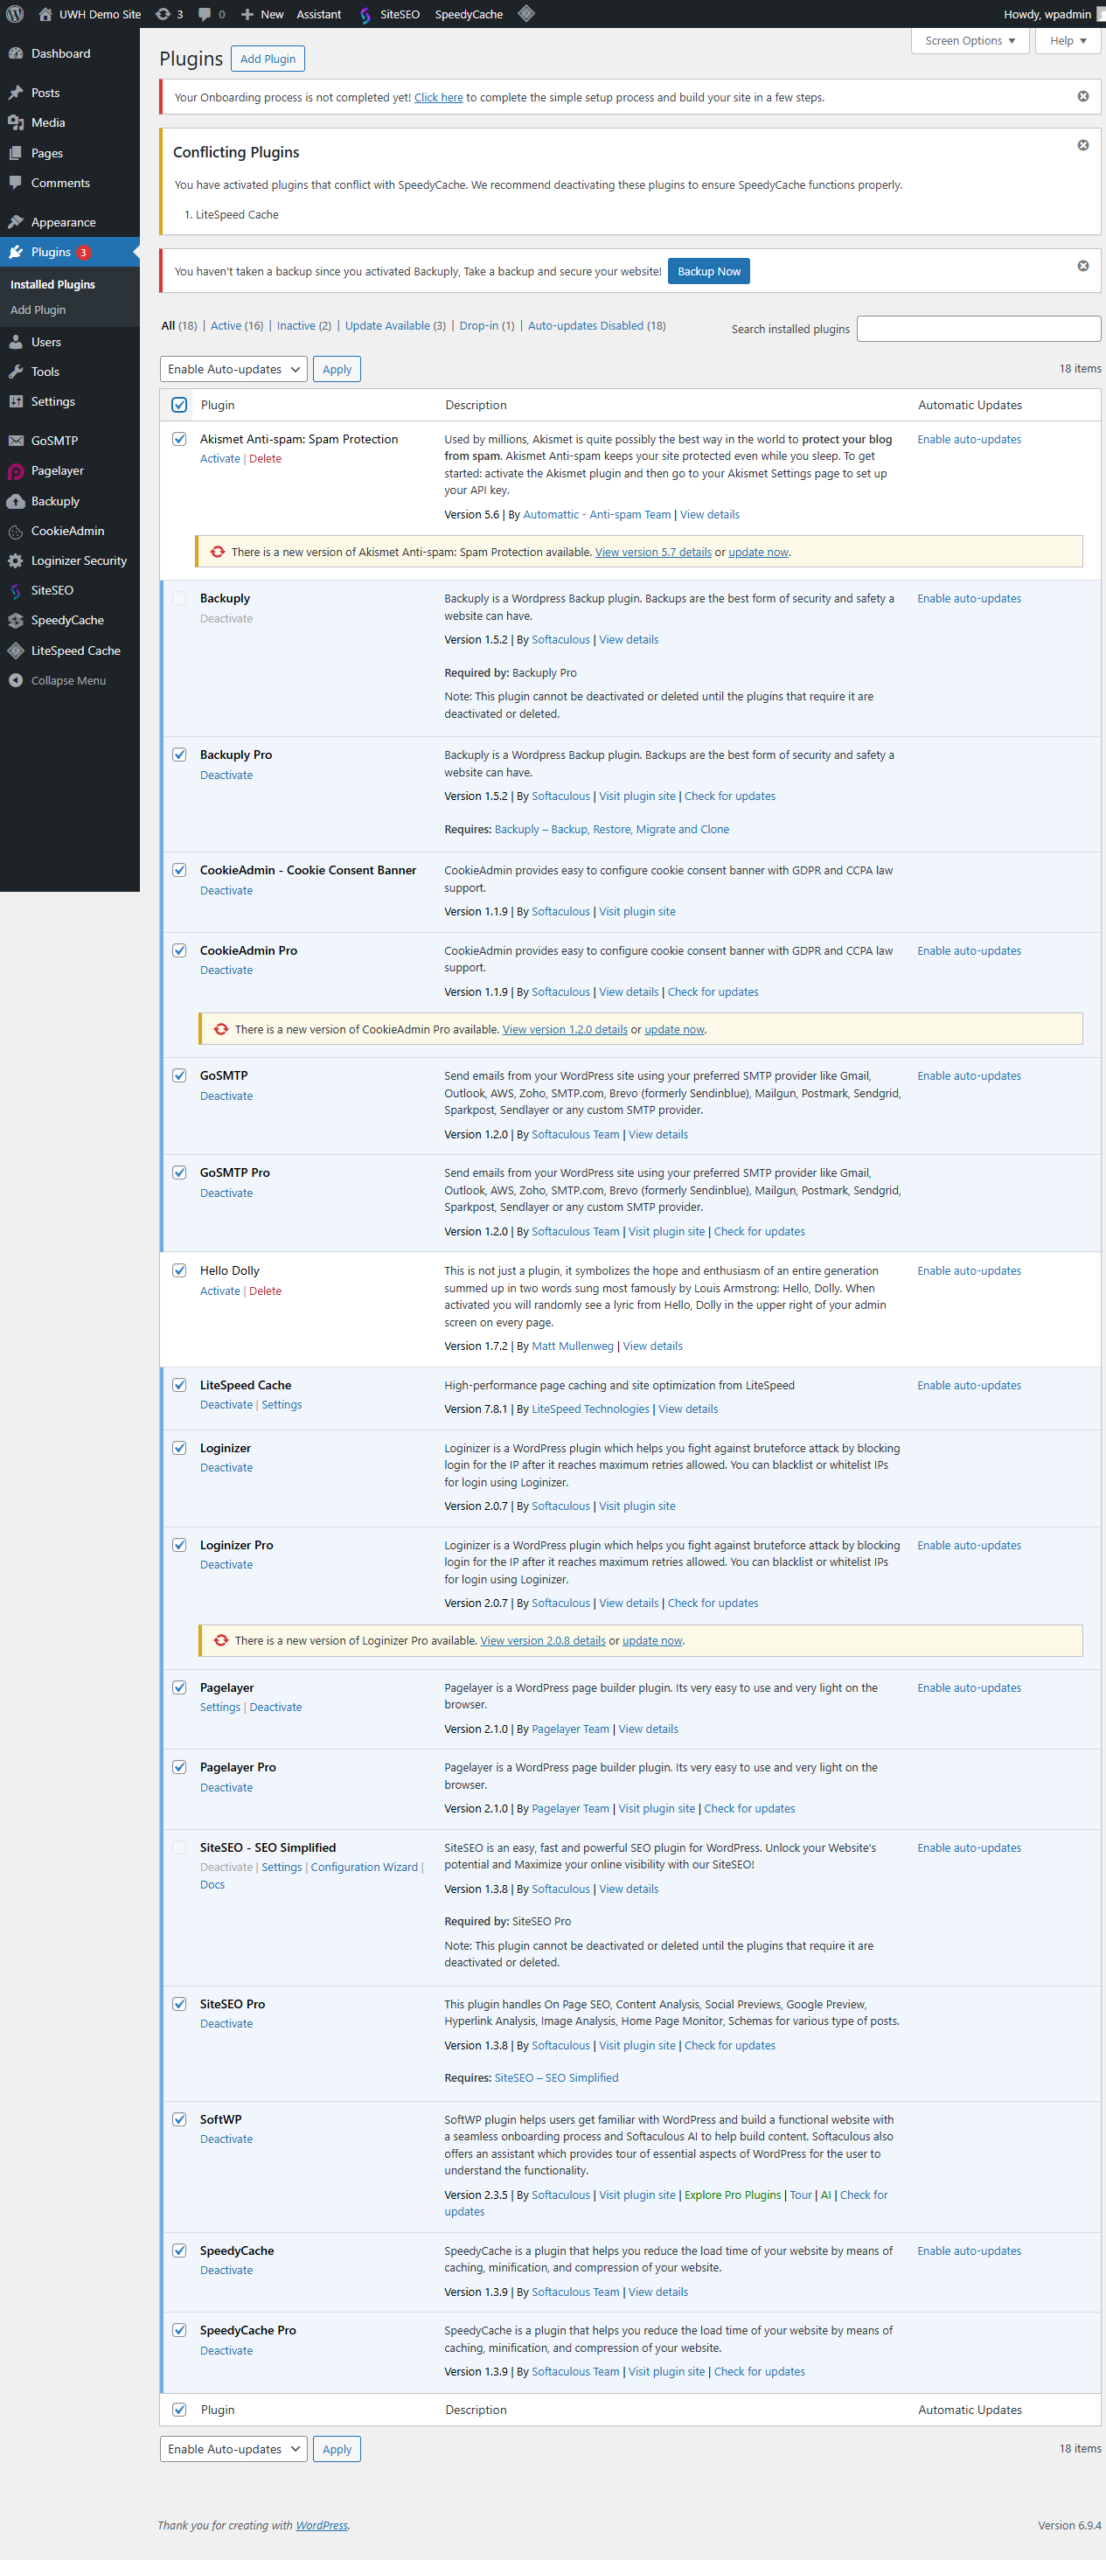
Auto-updates are now active for all selected plugins. WordPress will update them automatically whenever a new version is released.
Enable auto-updates for specific plugins
If you prefer more control, you can enable auto-updates on a plugin-by-plugin basis. This is useful when you want to keep certain plugins on a fixed version while allowing others to update freely.
- Go to the Installed Plugins page.
In the left sidebar, hover over Plugins and click Installed Plugins. - Locate the plugin you want to update automatically.
Find the plugin in the list. In the Automatic Updates column on the right, you will see an Enable auto-updates link. - Enable auto-updates for that plugin.
Click Enable auto-updates. The link changes to Disable auto-updates, confirming the setting is active. - Repeat for any other plugins.
Work through the list and click Enable auto-updates for each plugin you want to include.
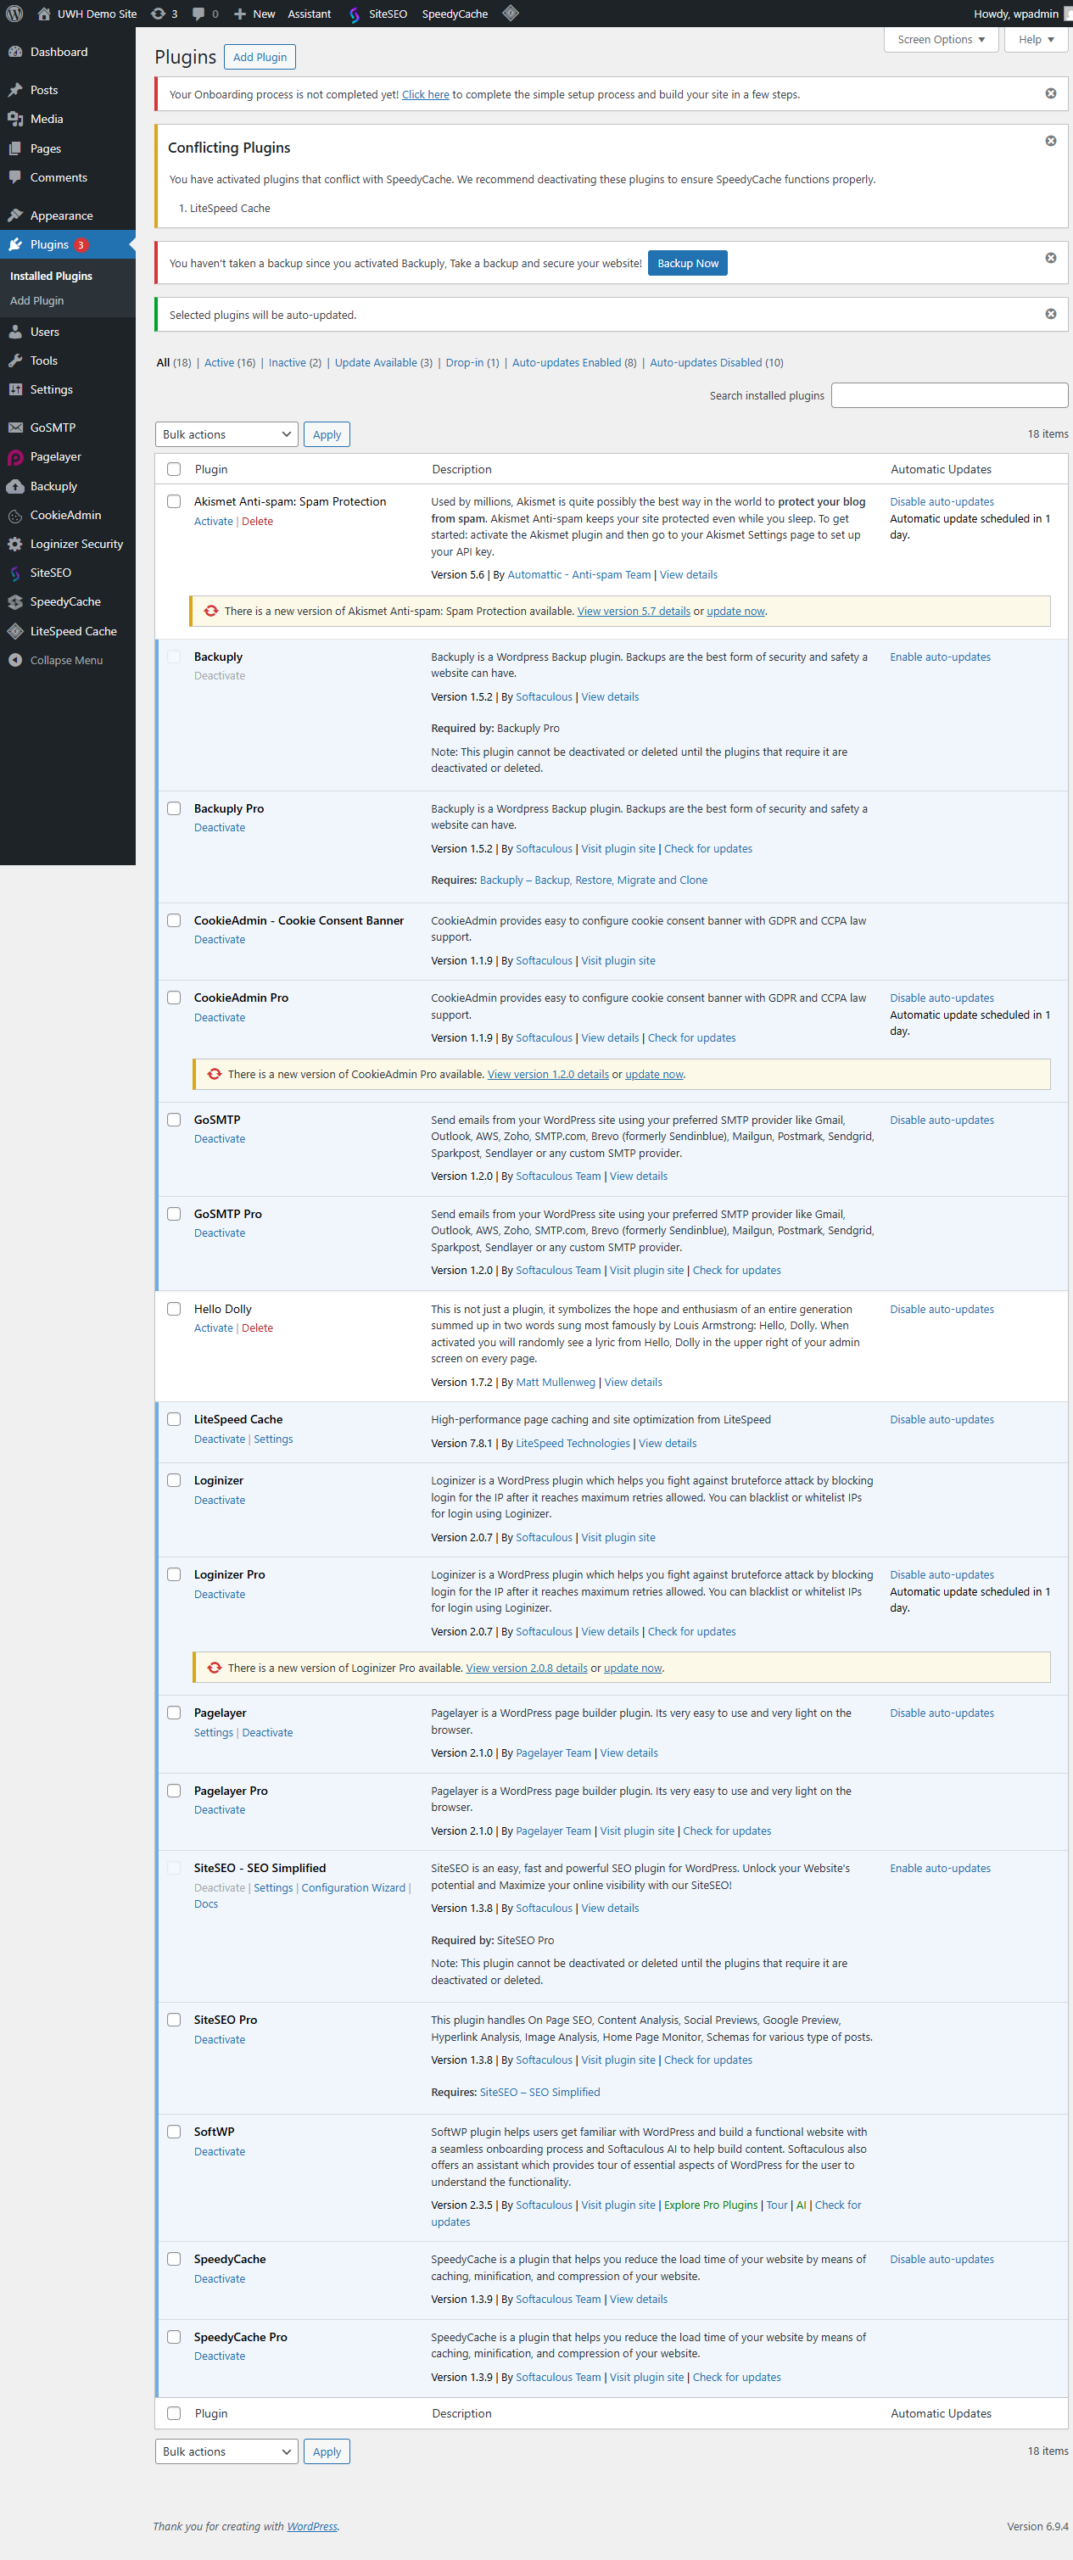
Only the plugins you selected will update automatically. Any plugin without auto-updates enabled will remain on its current version until you update it manually.
Troubleshooting
The Automatic Updates column is not visible
The Automatic Updates column was introduced in WordPress 5.5. If you do not see it, your WordPress installation may be running an older version.
- Go to Dashboard > Updates and check whether a WordPress core update is available.
- If the column is present but hidden, click Screen Options at the top right of the Installed Plugins page and tick Automatic Updates.
A plugin does not show an auto-update option
Plugins installed from outside the official WordPress repository may not support the built-in auto-update mechanism. This includes some premium and third-party plugins that manage their own update delivery.
- Check the plugin developer’s documentation for their recommended update process.
- For plugins that cannot auto-update, set a reminder to check for updates manually on a regular schedule.
A plugin update broke part of my site
Occasionally, a new plugin version introduces a conflict with your theme or another plugin. If your site stops working correctly after an automatic update, restoring a backup is the fastest way to recover.
- Restore your most recent backup using your hosting control panel or backup plugin.
- Once restored, disable auto-updates for the affected plugin and wait for a patched release before updating again.
- See our guide on disabling plugins using WP Toolkit if you need to deactivate a plugin without access to the admin area.
Wrapping up
You have enabled automatic updates for your WordPress plugins, either across your entire plugin library or for selected plugins individually. Your chosen plugins will now update in the background whenever a new version is released, reducing the window of exposure from known vulnerabilities.
Keep an eye on your site after updates run to confirm nothing has changed unexpectedly. Pairing auto-updates with a regular backup schedule gives you a reliable safety net. See our guides on backing up WordPress and removing malware from WordPress for related tasks. You may also find our article on how plugins compromise security useful background reading.
Did this guide solve your problem?
Still stuck?
Our UK support team answers tickets and live chat every day. Send us the guide you were following and where it stopped working.
Keep learning
Find a guide
Related guides

Running a WordPress site?
Get fast, secure and reliable WordPress Hosting with optimised for performance with AccelerateWP.
Get WordPress Hosting
Need multiple accounts?
Create fully isolated individual accounts for your clients and manage them all from one dashboard.
Get Reseller Hosting