Your hosting account password protects access to your client area, billing information and server management tools. Changing it regularly reduces the risk of unauthorised access, particularly if you suspect your credentials have been compromised or shared with former team members.
You will update passwords for your client area, cPanel hosting account and reseller WHM interface. You can also enable two-factor authentication to add an extra layer of security beyond your password alone.
Before you begin
- You need access to your client area to change passwords.
- We recommend using a password manager to generate and store strong passwords.
- If you lose access to your two-factor authentication device, contact support for recovery assistance.
Change your client area password
Your client area password controls access to billing, service management and account settings. You can update it at any time and use the built-in password generator to create a strong replacement.
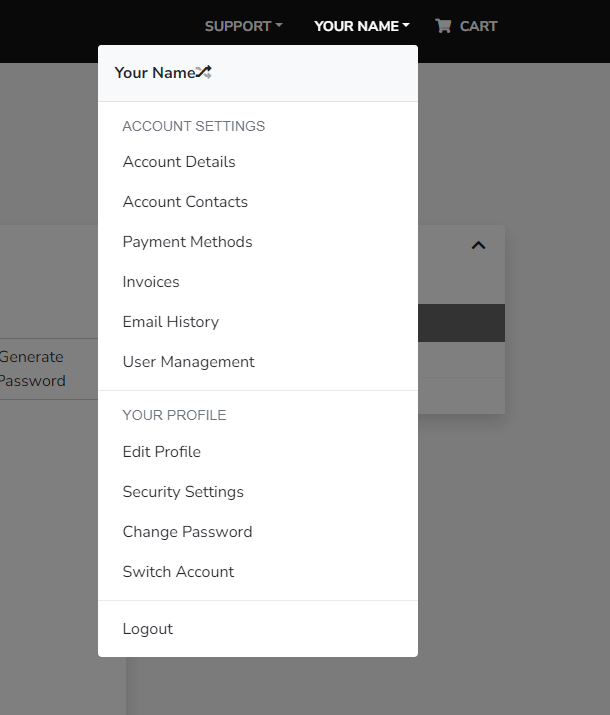
- Open your account menu.
Log in to your client area and click your name in the top right corner. Select Change Password from the dropdown menu.
- Enter your current password.
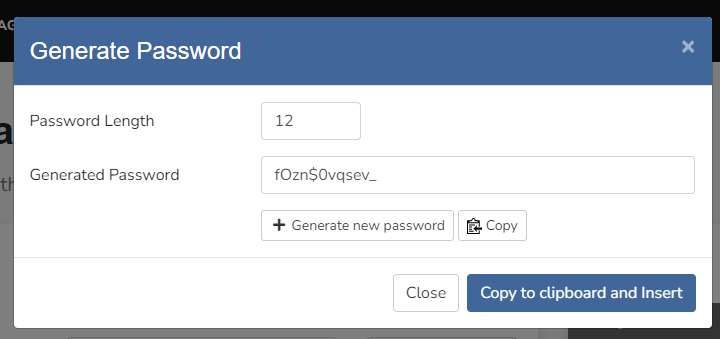
Type your existing password in the Existing Password field. This confirms you have permission to make the change. - Set your new password.
Either type a password you have created or click Generate Password to create a strong random password automatically. The generator produces a 16-character password containing uppercase letters, lowercase letters, numbers and symbols.
- Save your changes.
Click Save Changes at the bottom of the page. Your new password takes effect immediately and you will need it for your next login.
Enable two-factor authentication
Two-factor authentication requires a one-time code from your smartphone in addition to your password. This prevents unauthorised access even if someone obtains your password through phishing or data breaches.
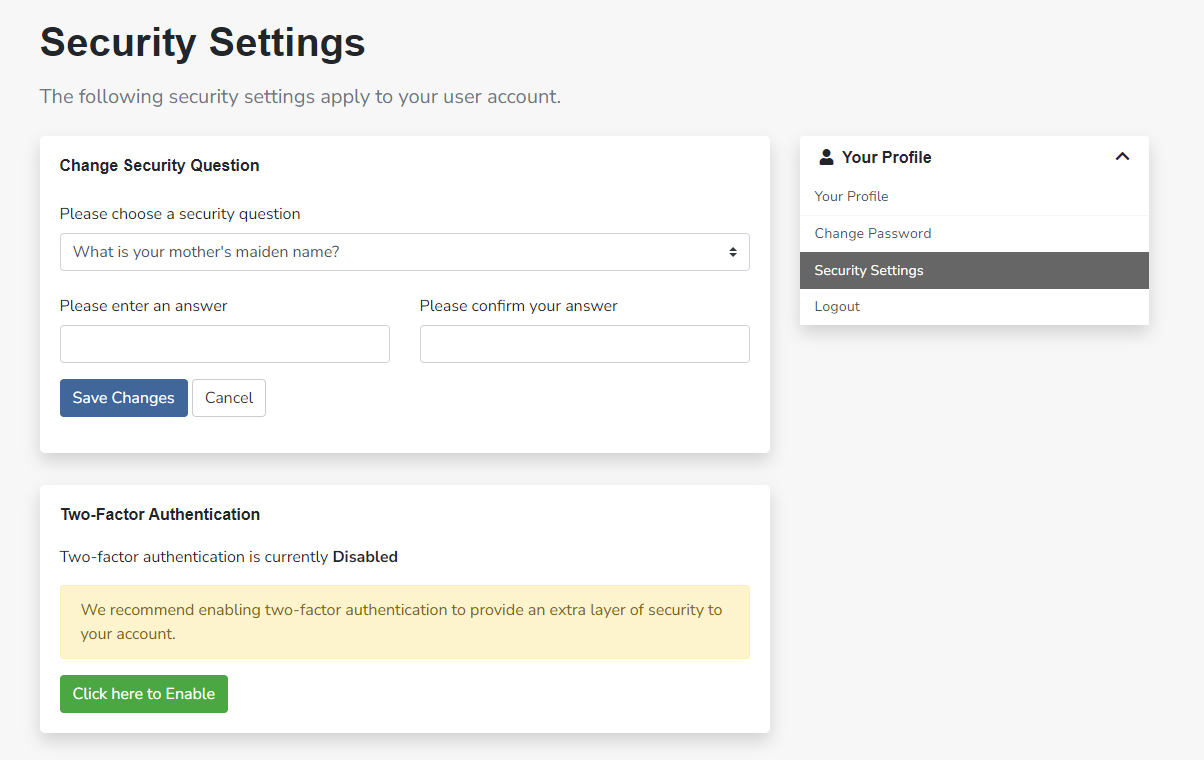
- Open security settings.
Click your name in the top right corner and select Security Settings from the dropdown menu. - Enable two-factor authentication.
Find the Two Factor Authentication section and click the green button labelled Click here to enable.
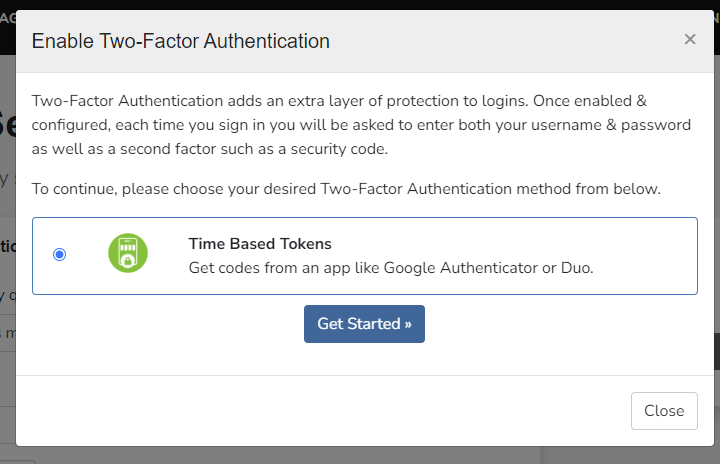
- Complete the setup process.
Follow the instructions in the popup window. You will scan a QR code with an authenticator app on your smartphone and enter a verification code to confirm the setup worked correctly.
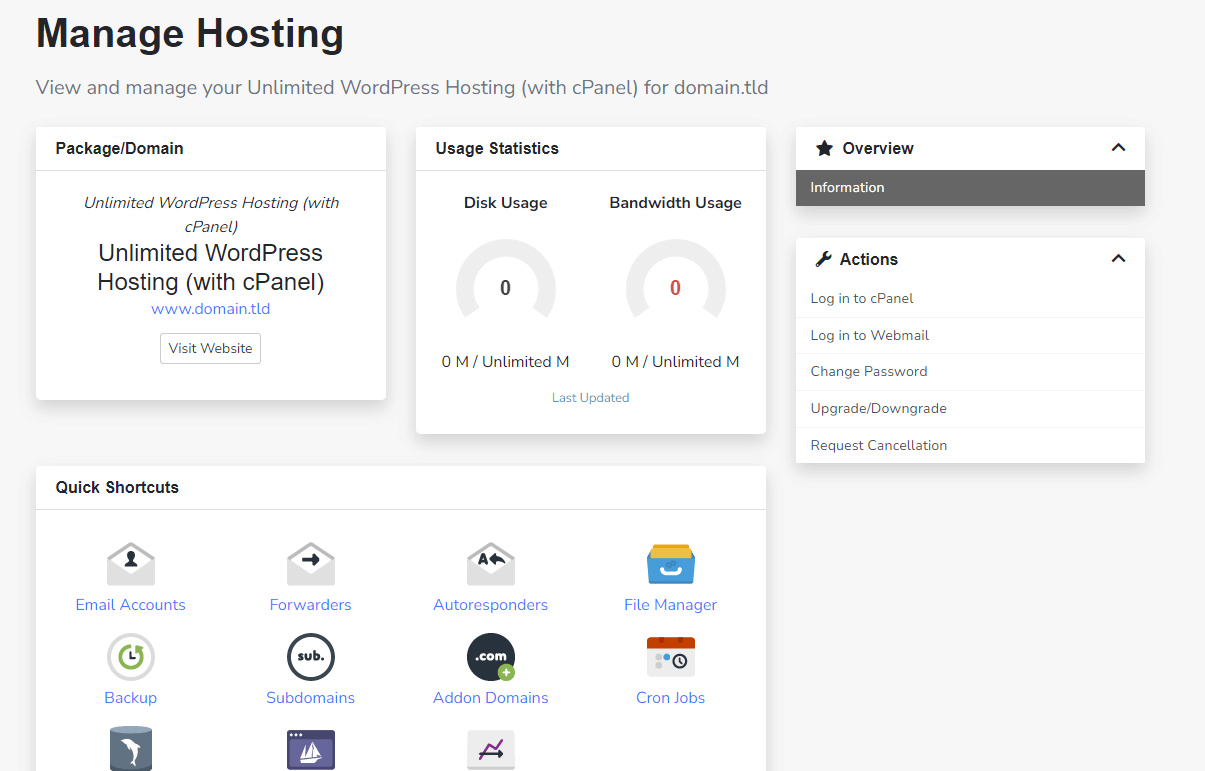
Change your cPanel account password
Your cPanel password is separate from your client area password. It controls access to your hosting control panel where you manage files, databases and email accounts.
- Open your services list.
From the client area overview page, find the Manage Services section and click Manage Services. - Select your hosting service.
Click on the service you want to update. This opens the service management page for that specific hosting account. - Open the password change form.
Under the Actions section, click Change Password.
- Set your new cPanel password.
Either type your own password or click Generate Password to create one automatically. Store the password in a secure location before clicking Save Changes.
If you need to reset your WordPress admin password instead, that is separate from your hosting account credentials. Our guide on resetting your WordPress password covers the process.
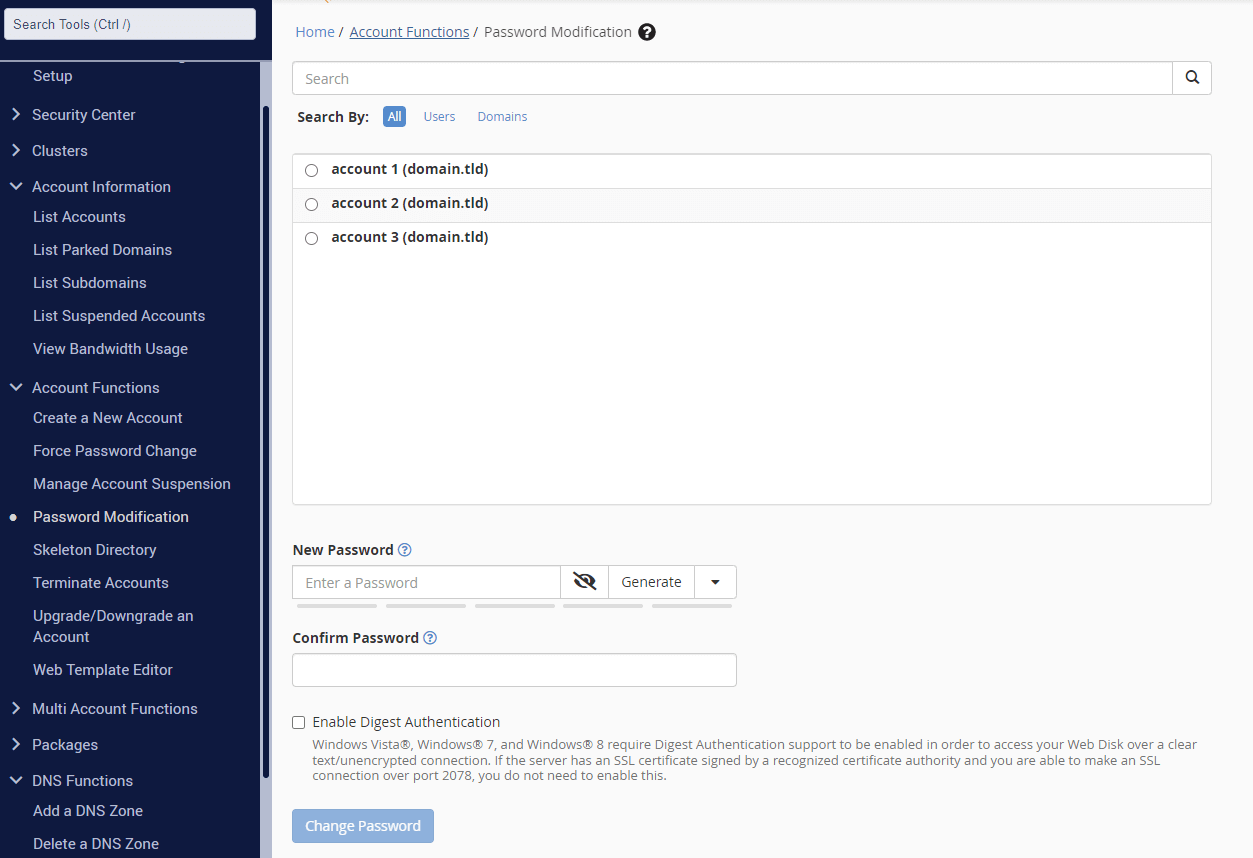
Change client passwords from WHM
Reseller hosting customers can update passwords for their client accounts directly from WHM without logging into each individual cPanel account.
- Open password modification.
Log in to WHM and find Password Modification under Account Functions in the left navigation bar. - Select an account and update the password.
Choose the client account you want to update from the dropdown menu. Enter a new password or use the generator, then click Change Password to save your changes.
Wrapping up
You have updated your hosting account passwords and can now enable two-factor authentication for additional security. Your client area, cPanel and WHM accounts are protected with fresh credentials that reduce the risk of unauthorised access.
Review your other account details while you are updating security settings. You can update your contact details and manage payment methods from the same client area. Our cPanel hosting includes secure account management tools for all service types.
If you run into any trouble, get in touch and our team will be happy to help.

Ready to get started?
Launch your website with our reliable cPanel hosting with unlimited bandwidth and expert support.
Get cPanel Hosting