Transferring emails between hosting providers requires exporting your existing mail and importing it into your new account. Outlook handles this process through PST files, which preserve your folder structure and message history.
You will export mail from your current provider, create matching email accounts on your new hosting and import the PST file into Outlook connected to your new account. This preserves all messages, folders and attachments.
Before you begin
- Create email accounts in cPanel that match your existing setup. Our guide on creating email accounts covers this process.
- Configure your existing email account in Outlook if you have not already done so.
- We recommend checking email size limits before transferring large mailboxes.
Export mail from your current account
Outlook exports mail to a PST file that contains all your messages and folder structure. This file acts as a portable backup you can import into any Outlook-connected account.
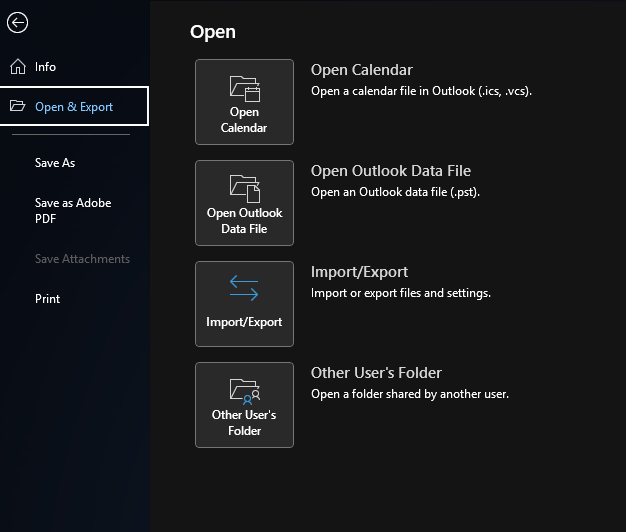
- Open the export wizard.
In Outlook, click File, then select Open & Export followed by Import/Export. This launches the wizard that handles both export and import operations.
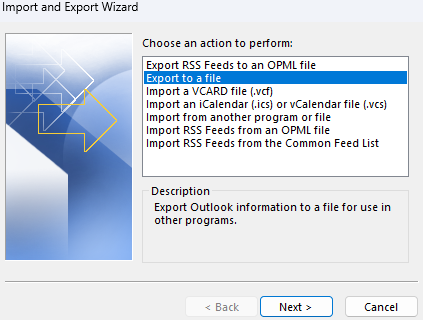
- Select the export option.
Choose Export to a file from the wizard dialogue box and click Next. This tells Outlook you want to create a backup file rather than import data.
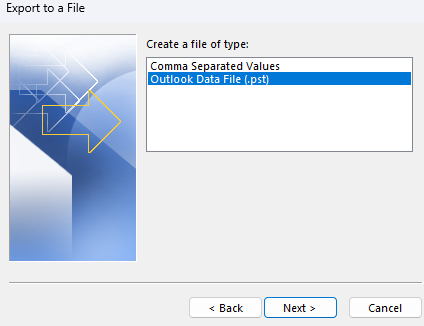
- Choose the file format.
Select Outlook Data File (.pst) and click Next. PST files maintain compatibility across Outlook versions and preserve all message properties.
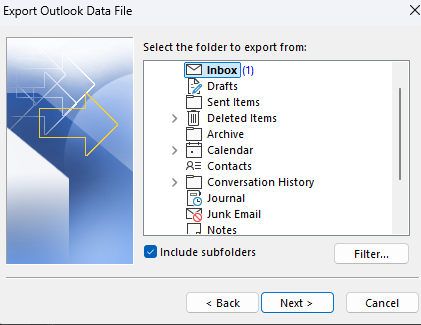
- Select folders to export.
Choose which folders to include in the export. Tick Include subfolders if you want to preserve your complete folder structure. Click Next to continue.
- Configure export options.
Choose where to save the PST file and select how Outlook should handle duplicate items. The Replace duplicates with items exported option overwrites existing messages with the exported versions.
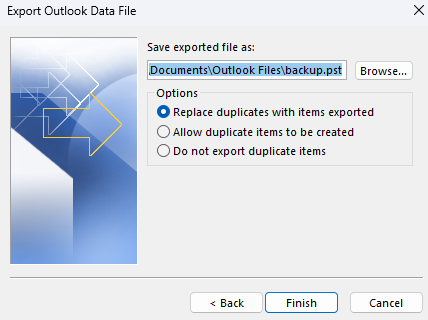
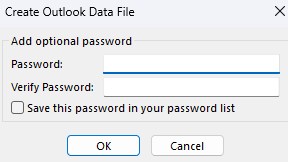
- Set a password.
Enter a password to protect your PST file or leave the fields blank to create an unprotected file. Password protection prevents unauthorised access to your exported mail. Click OK to start the export.
Outlook creates the PST file in your chosen location. Large mailboxes take longer to export. You can now configure Outlook to connect to your new email account.
Import mail into your new account
After setting up Outlook with your new email account, you will import the PST file to transfer all messages and folders. This process mirrors the export steps but loads data instead of saving it.
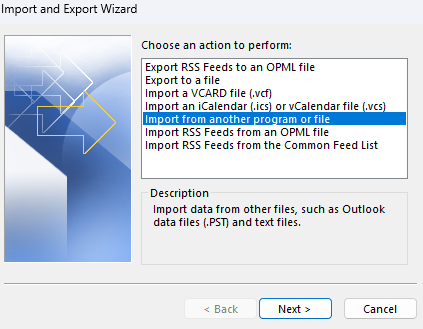
- Open the import wizard.
Click File, select Open & Export and choose Import/Export. The same wizard handles both export and import operations.
- Select the import option.
Choose Import from another program or file and click Next. This tells Outlook to load data from an external source.
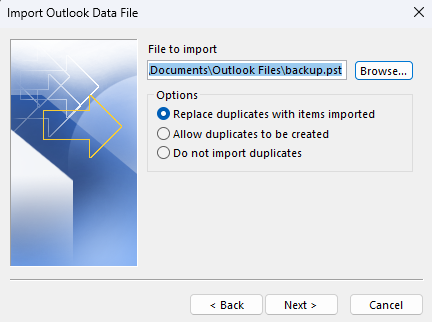
- Choose the file format.
Select Outlook Data File (.pst) and click Next. This matches the format you used during export.

- Select your PST file.
Click Browse to locate the PST file you exported earlier. Choose how Outlook should handle duplicates and click Next to start the import.
Outlook imports all messages and folders into your new account. You can verify the transfer by checking your folder structure matches the original account.
Wrapping up
Your emails are now transferred to your new hosting account. You exported mail from your previous provider as a PST file, configured matching email accounts in cPanel and imported the PST file into Outlook connected to your new account.
Log in to webmail to confirm all folders and messages transferred correctly. If you notice missing emails or folder structure issues, repeat the import process and verify you selected all folders during export. You may want to set up out-of-office replies and other email settings on your new hosting. Our web hosting includes email accounts with webmail access and IMAP support.

Ready to get started?
Launch your website with our reliable cPanel hosting with unlimited bandwidth and expert support.
Get cPanel Hosting