The Setup Node.js App tool in cPanel lets you run Node.js applications directly on your shared hosting account. This guide walks you through creating a basic working application so you can confirm Node.js is functioning correctly before building out your own project.
Before you begin
- You need access to your cPanel account. See our guide on accessing your control panel if you have not logged in before.
- Your domain must be pointed to your hosting account and resolving correctly.
- Node.js app support is provided through the CloudLinux Node.js Selector. Application-level configuration, module installation and custom app setup fall outside of shared hosting support. We recommend a VPS for production Node.js applications.
Create a Node.js app in cPanel
The steps below create a minimal Node.js application at a subdirectory of your domain. Once it loads in a browser, you have confirmed that the Node.js service is active on your account and requests are being routed correctly.
- Log in to cPanel.
Access your account through your hosting control panel login page. - Open the Node.js tool.
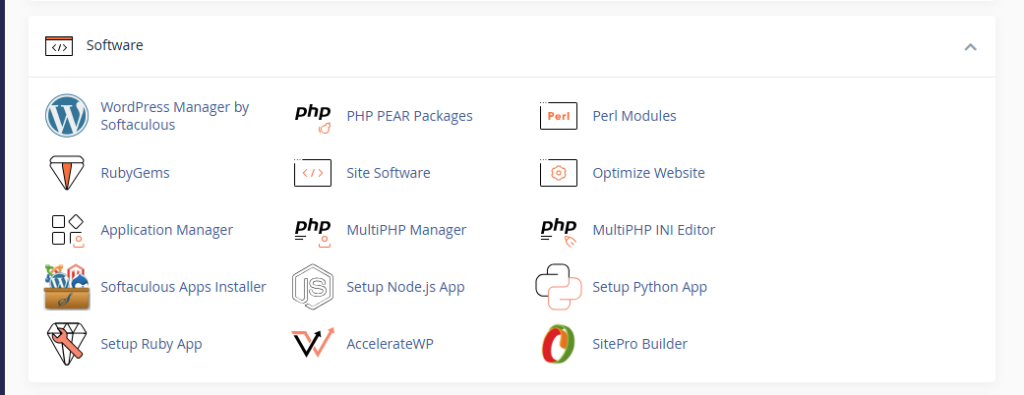
Scroll to the Software section and click Setup Node.js App.
- Create a new application.
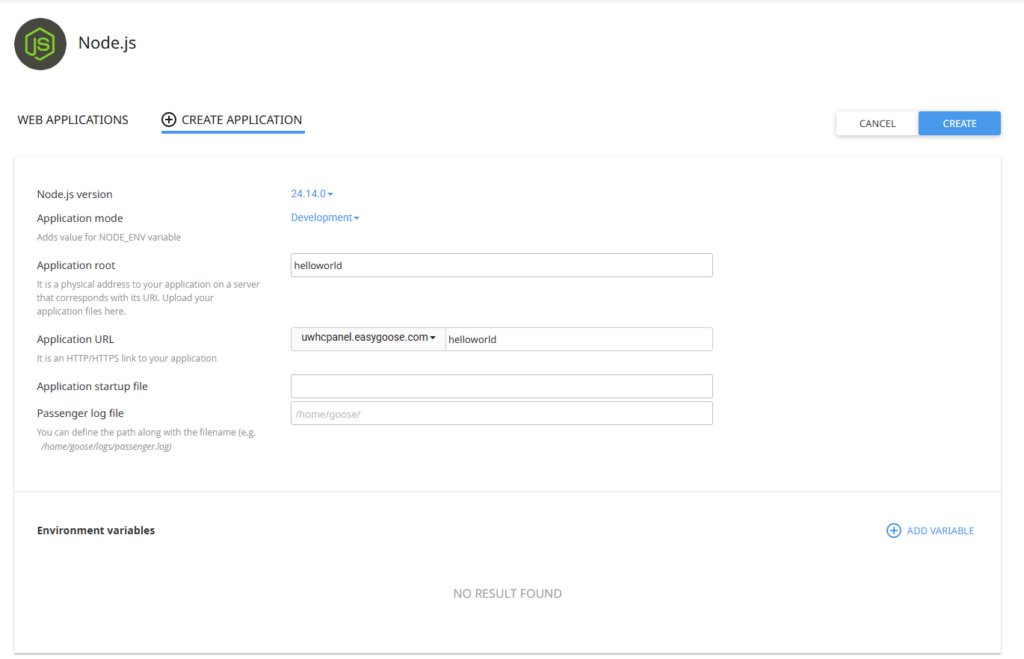
Click Create Application in the top-right corner of the page. - Set the application root.
In the Application root field, enter a folder name for your app. For a test application, enterhelloworld. This is the directory cPanel will create inside your home folder to store your application files. - Set the application URL.
In the Application URL field, enter the path where your app will be accessible. Enterhelloworldto make it available athttps://yourdomain.co.uk/helloworld, replacingyourdomain.co.ukwith your actual domain name.
- Select a Node.js version.
Choose a Node.js version from the Node.js version dropdown. Select the most recent LTS (Long Term Support) version available for the best compatibility with current packages. - Save the application.
Click Create in the top-right corner. cPanel will provision the application directory and configure the Node.js environment. - Test the application in your browser.
Open a new browser tab and go tohttps://yourdomain.co.uk/helloworld. If the page loads, Node.js is running correctly on your account.
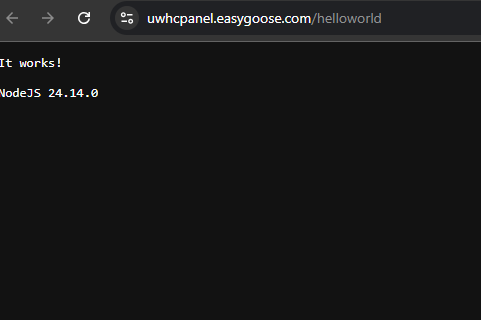
Your Node.js application is now created and accessible at your chosen URL.
Troubleshooting
The page does not load or returns a 404 error
A 404 at your application URL usually means the application was not saved correctly or the URL path does not match what was configured. Check the following:
- Return to Setup Node.js App and confirm the application appears in the list.
- Verify the Application URL value matches the path you are visiting in the browser.
- Check that your domain is resolving to your hosting account. See our guide on why you cannot access your site for DNS troubleshooting steps.
- Review your site’s error codes using our guide on fixing website error codes.
The application was created but the page shows an application error
An application error after creation typically means the Node.js process failed to start. This can happen if the selected Node.js version conflicts with your application code, or if a required startup file is missing.
- Confirm the Application startup file field points to a file that exists in your application root directory.
- Check the application’s log output from within the Setup Node.js App interface for specific error messages.
- For complex application setups, a VPS gives you full control over the Node.js environment, including process managers like PM2 and custom port configuration.
Wrapping up
You have created a Node.js application in cPanel using the Setup Node.js App tool and confirmed it is accessible in a browser. This verifies that the Node.js service is active on your hosting account.
From here, you can replace the default application files with your own project code and install dependencies via the cPanel terminal. For DNS-related issues during setup, see our guide on checking DNS propagation. If you need SSH access to manage your application files, our guide on connecting and using SSH covers the setup process.
For production Node.js applications that need full environment control, take a look at our Node.js hosting plans.

