When WordPress images stop displaying, visitors see blank spaces or broken image icons where your content should be. The cause is rarely obvious at first glance because several unrelated issues produce the same symptom.
This guide walks through the most common reasons WordPress images not displaying occurs and gives you a clear sequence of checks to follow. By the end, you will have identified the cause and restored your images.
Before you begin
- You need access to your WordPress admin area at
yourdomain.co.uk/wp-admin. - You need access to your hosting control panel (cPanel or Plesk) to check file permissions and hotlink settings.
- We recommend creating a full site backup before making changes to your database or file permissions.
- If you use a caching plugin, have access to its settings so you can clear the cache during testing.
Check the image file in the media library
Before investigating server or configuration issues, confirm whether the image file itself is present and accessible. A missing or corrupted file in the media library means no amount of configuration changes will restore the image on the front end.
- Open the media library.
Log in to your WordPress admin area and go to Media > Library in the left sidebar. - Locate the affected image.
Search for the image by name or scroll to find it. If the thumbnail shows a broken icon or grey box, the file is missing or corrupted on the server. - Check the file URL.
Click the image to open its attachment details. Copy the File URL and paste it directly into your browser’s address bar. A 404 error confirms the file is missing from the server. - Re-upload if missing.
If the file is missing, click Add New in the media library and upload a fresh copy. Then update any posts or pages that reference the old URL to point to the new file.
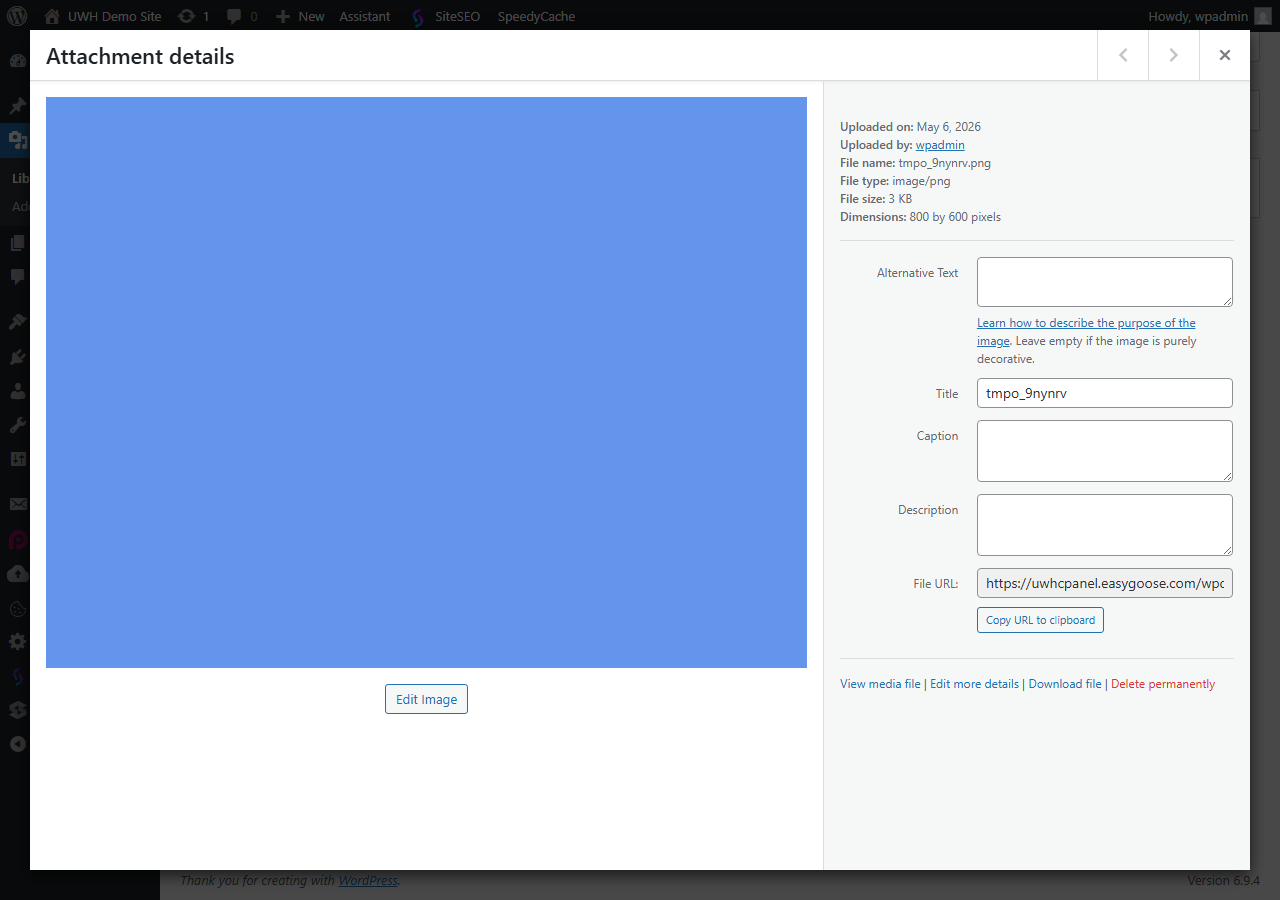
If the file is present and the URL loads correctly in the browser, the problem lies elsewhere. Continue to the next section.
Fix incorrect file permissions
File permissions control which users and processes can read, write or execute files on the server. If the permissions on your uploads folder or image files are too restrictive, the web server cannot read them and the browser receives no image data.
The correct permissions for WordPress are 755 for directories and 644 for files. You can set these via SSH or through your hosting control panel’s file manager.
To correct permissions via SSH, connect to your server and run the following two commands, replacing /home/username/public_html with the actual path to your WordPress installation:
find /home/username/public_html/wp-content/uploads -type d -exec chmod 755 {} \;
find /home/username/public_html/wp-content/uploads -type f -exec chmod 644 {} \;
The first command sets all directories inside uploads to 755. The second sets all files to 644. After running commands, reload the affected page to confirm images now display.
If you prefer not to use SSH, you can set permissions through cPanel’s File Manager. Navigate to public_html/wp-content/uploads, right-click a folder or file, select Change Permissions and enter the correct value.
Resolve mixed content (HTTP vs HTTPS)
Modern browsers block resources loaded over HTTP when the page itself is served over HTTPS. If your site was migrated to HTTPS after images were uploaded, those image URLs in the database may still reference http://, causing them to be blocked silently.
You can confirm this is the cause by opening your browser’s developer tools (press F12 in most browsers), clicking the Console tab and looking for mixed content warnings. They typically read: Mixed Content: The page was loaded over HTTPS, but requested an insecure resource.
- Install a search-and-replace plugin.
From your WordPress admin area, go to Plugins > Add New and search for Better Search Replace. Install and activate it. - Run a database search and replace.
Go to Tools > Better Search Replace. In the Search for field, enterhttp://yourdomain.co.ukreplacing the domain with your own. In the Replace with field, enterhttps://yourdomain.co.uk. - Select all tables and run.
Select all database tables in the list, leave Run as dry run ticked first to preview changes, then untick it and click Run Search/Replace to apply. - Clear your cache.
After the replacement completes, clear your caching plugin’s cache and reload the page. Images served over HTTP should now load correctly.
For a more detailed walkthrough of forcing HTTPS across your WordPress site, see our guide on forcing HTTPS in WordPress.
Clear your WordPress cache
A caching plugin stores static copies of your pages to reduce server load. If an image was recently replaced or re-uploaded, visitors may still see the cached version of the page, which references the old file path. Clearing the cache forces WordPress to rebuild those pages with the current file references.
- Open your caching plugin settings.
The location varies by plugin. For W3 Total Cache, go to Performance > Dashboard. For WP Super Cache, go to Settings > WP Super Cache. For LiteSpeed Cache, go to LiteSpeed Cache > Dashboard. - Purge or clear all cached files.
Look for a button labelled Purge All, Clear Cache or Delete Cache and click it. This removes all stored page copies so they are regenerated on the next visit. - Clear your browser cache.
PressCtrl + Shift + Deleteon Windows orCmd + Shift + Deleteon macOS to open your browser’s clear browsing data panel. Select Cached images and files and clear them. - Reload the page.
Visit the affected page again. If caching was the cause, images should now display correctly.
If images still do not appear after clearing the cache, the problem is not cache-related. Continue to the next check.
Identify and resolve plugin or theme conflicts
A plugin or theme can interfere with how WordPress generates image URLs or outputs HTML. Security plugins, page builders and performance plugins are common sources of this type of conflict. The fastest way to confirm a conflict is to disable all plugins temporarily and switch to a default WordPress theme.
- Deactivate all plugins.
Go to Plugins > Installed Plugins, tick the checkbox at the top to select all, then choose Deactivate from the Bulk actions dropdown and click Apply. You can also use the WP Toolkit to disable plugins without logging in to the admin area. - Switch to a default theme.
Go to Appearance > Themes and activate one of the default WordPress themes such as Twenty Twenty-Four. - Check whether images display.
Reload the affected page. If images now appear, a plugin or your previous theme was the cause. - Reactivate plugins one at a time.
Go back to Plugins > Installed Plugins and reactivate each plugin individually, reloading the page after each one. When images break again, the last plugin you activated is the conflict. - Replace or update the conflicting plugin.
Check whether an update is available for the conflicting plugin. If updating does not resolve the issue, look for an alternative plugin that provides the same functionality.
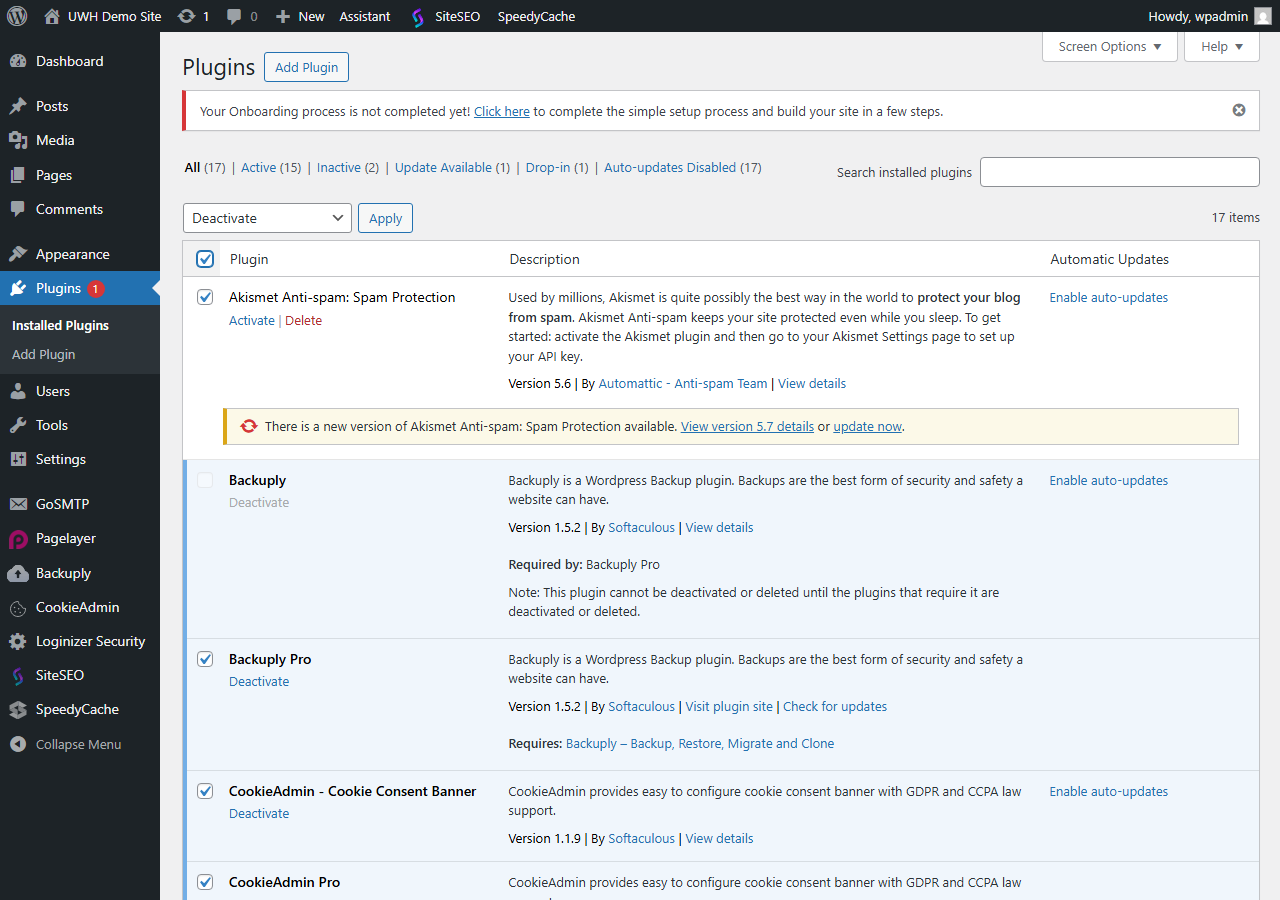
Once you have identified the conflicting plugin, reactivate the rest of your plugins and restore your original theme.
Check hotlink protection settings
Hotlink protection prevents other websites from embedding your images directly by blocking requests where the referring domain does not match your own. If this setting is misconfigured, it can block your own site from loading images, particularly after a domain change or migration.
- Open hotlink protection in cPanel.
Log in to cPanel and go to the Security section. Click Hotlink Protection. - Check the allowed URLs list.
If hotlink protection is enabled, confirm that your domain appears in the URLs to allow access list. Bothhttp://yourdomain.co.ukandhttps://yourdomain.co.ukshould be present. - Disable hotlink protection temporarily.
Click Disable to turn off hotlink protection, then reload the affected page. If images now display, the allowed URLs list was incomplete. Re-enable hotlink protection and add the missing URL variants.
For a full guide on configuring this feature, see our article on setting up hotlink protection in cPanel.
Check lazy loading configuration
Lazy loading defers the loading of images until they scroll into the viewport, which reduces initial page load time. WordPress has included native lazy loading since version 5.5. When a performance plugin adds its own lazy loading on top of the native implementation, or when the configuration is incorrect, images may never load at all.
- Identify whether a plugin controls lazy loading.
Check your active performance or image optimisation plugins (such as Smush, ShortPixel or LiteSpeed Cache) for a lazy loading setting. - Disable the plugin’s lazy loading.
Within the plugin’s settings, locate the lazy loading toggle and turn it off. Save the settings. - Test the affected page.
Reload the page and scroll through it. If images now appear as you scroll, the plugin’s lazy loading was conflicting with the native WordPress implementation. Leave the plugin’s lazy loading disabled and rely on the native behaviour instead.
If disabling lazy loading resolves the issue, check whether an update is available for the plugin before re-enabling the feature.
Troubleshooting
Images display in the admin area but not on the front end
This usually points to a theme conflict or a caching layer that is serving stale pages to visitors. The admin area bypasses most caching and theme output filters, so images appear there even when the front end is broken.
- Clear all caching layers including your plugin cache, server-level cache and CDN cache if applicable.
- Switch to a default WordPress theme and check whether images appear on the front end.
- Check whether a page builder plugin is generating incorrect image markup by viewing the page source (
Ctrl + Uon Windows) and inspecting thesrcattribute of the broken image tag.
Images broke after a site migration
Migrations frequently leave old domain URLs hardcoded in the database. WordPress stores image paths as absolute URLs, so moving from one domain to another without updating the database leaves every image pointing to the old location.
- Use the Better Search Replace plugin (described in the mixed content section above) to replace the old domain with the new one across all database tables.
- Check that the WordPress Address (URL) and Site Address (URL) fields in Settings > General reflect the new domain.
- Confirm that the
wp-content/uploadsfolder was transferred correctly during the migration and that file permissions were preserved. - See our guide on migrating from cPanel for a full migration checklist.
Featured images not showing on posts or archive pages
Featured images are controlled by the active theme. If the theme does not declare support for featured images, WordPress will not display them even if they are set correctly in the post editor.
- Check that your theme’s
functions.phpfile includesadd_theme_support( 'post-thumbnails' );. If it does not, add this line inside the theme’s setup function. - Confirm the featured image is actually set on the post by opening the post in the editor and checking the Featured image panel in the right sidebar.
- If you recently switched themes, regenerate image thumbnails using a plugin such as Regenerate Thumbnails, as the new theme may require different image sizes.
Images not uploading to the media library
If you cannot upload images at all, the problem is typically a full disk, incorrect folder permissions or a PHP upload limit that is too low.
- Check available disk space in cPanel under Files > Disk Usage.
- Confirm the
wp-content/uploadsdirectory has write permissions (755for the directory). - Check the PHP
upload_max_filesizeandpost_max_sizevalues. You can view current PHP settings using a phpinfo file. - Increase the memory limit if uploads fail with a memory error. See our guide on increasing the WordPress memory limit.
Further reading on WordPress image issues
Image problems in WordPress often overlap with broader performance and security topics. Understanding how WordPress handles media, caching and HTTPS gives you a stronger foundation for diagnosing future issues.
If your site was recently compromised, malware can alter file permissions, delete files from the uploads directory or inject code that breaks image output. Our guide on removing malware from WordPress covers how to identify and clean an infected site.
Serving images in modern formats such as AVIF can significantly reduce file sizes without visible quality loss. Smaller files are less likely to time out on slow connections and reduce the chance of partial loads. See our guide on optimising WordPress with AVIF for a practical walkthrough.
If your site uses a CDN to deliver images, a misconfigured or stale CDN cache is a common cause of images not updating after re-uploads. Our guide on migrating your DNS zone to Cloudflare includes notes on cache purging that apply to image delivery.
For a broader look at WordPress performance, including how caching layers interact with media files, the WordPress developer documentation on performance provides authoritative reference material. The web.dev guide to image performance covers browser-level image loading behaviour, which is useful context when diagnosing mixed content and lazy loading issues.
Wrapping up
You have worked through the main causes of WordPress images not displaying, covering missing files, file permissions, mixed content, caching, plugin conflicts, hotlink protection and lazy loading. Each check narrows down the cause so you can apply the right fix rather than guessing.
After restoring your images, review your site’s backup schedule to make sure you have a recent restore point in place. See our guides on backing up WordPress, installing a free SSL certificate and forcing HTTPS in WordPress to keep your site secure and your media loading correctly going forward.
Our WordPress hosting plans include server-level caching, SSL certificates and regular backups, reducing the likelihood of image issues caused by configuration problems.
Plans and tools mentioned in this guide
WordPress Hosting
Tuned for WordPress, with one-click installs.
From £5.99/mo
View WordPress HostingDid this guide solve your problem?
Still stuck?
Our UK support team answers tickets and live chat every day. Send us the guide you were following and where it stopped working.
Keep learning
Find a guide
Related guides

Running a WordPress site?
Get fast, secure and reliable WordPress Hosting with optimised for performance with AccelerateWP.
Get WordPress Hosting
Need multiple accounts?
Create fully isolated individual accounts for your clients and manage them all from one dashboard.
Get Reseller Hosting